
Powerful, safe and easy-to-use disk cloning software for disk clone, partition clone and digital device clone.
Since Microsoft announced the new Windows 11 system, many users have been eager to try it. Still, to upgrade to Windows 11, Microsoft has a minimum configuration requirement, but many users don't even mind installing Windows 11 on an unsupported processor. So how to solve this problem? Let's look at how to install Windows 11 on an unsupported processor.
What Are the Minimum Configuration Requirements for Windows 11?
Processor: Your computer's processor should be 1GHz or faster, with two or more cores on a 64-bit processor or Cinema System (SOC).
RAM: The PC's RAM is 4GB or more.
Storage: 64GB or more storage space is required to install this Windows. There may be software or driver updates after installation that requires more space.
Graphics Card: Should be compatible with DirectX12 or higher, with WDDM2.0 driver.
System firmware: UEFI supports secure boot.
TPM: Trusted Platform Module (TPM) version 2.0.
Monitor: High-definition (720p) monitor, 9-inch or larger, 8-bit per color channel.
What should you do if your CPU does not support it but wants to install win 11? Next, we will cover installing Windows 11 on an unsupported CPU configuration.
Read more: How to Install Windows 11 from USB
How to Install Windows 11 on Unsupported CPU?
Before installing Windows 11 on an unsupported computer, we recommend you back up important data. It is always a good habit to make backups, and the risk of accidental system operation is unpredictable. Here we recommend DMclone, one of the best backup software. Next is the operation process.
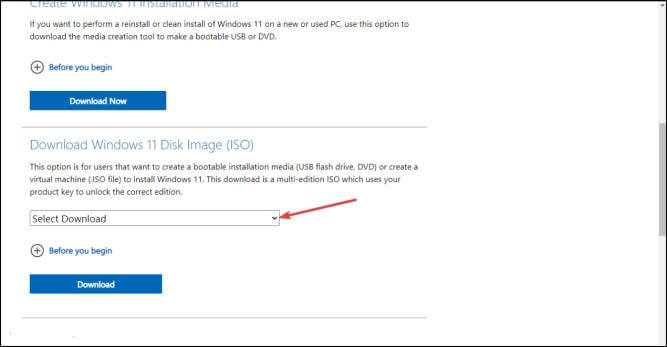
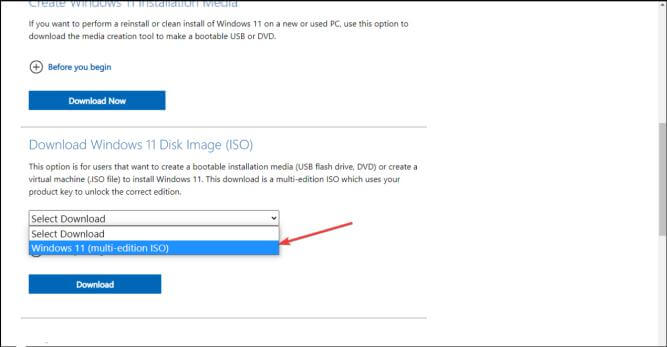
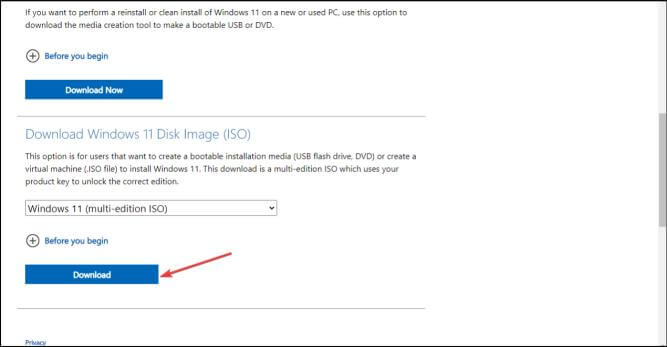
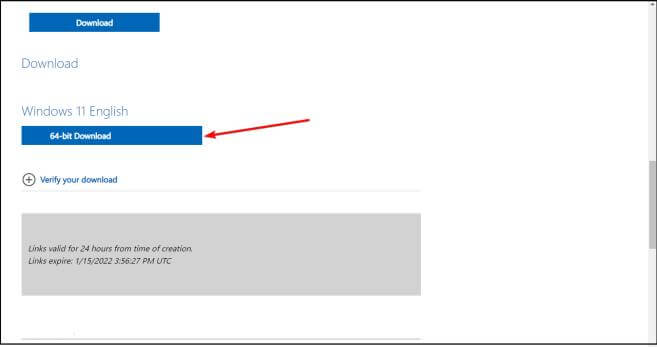
1. Download the Windows 11 ISO
Download the Windows 11 disk image (ISO). First, open the Select Download drop-down menu, select Windows 11, and click the Download button after selecting it. Then click the drop-down menu, select your product language, then confirm. Finally, choose 64-bit download.

The easiest way to update your PC to the latest system is to use the Windows 11 Setup Assistant. In this case, your computer may not be able to use the installation assistant to complete the upgrade because your system does not meet the minimum system requirements.
At this point, the Windows 11 ISO should start downloading (around 5.1GB). We can proceed to the next step at the same time.
Read more: Reinstalling Windows 11 Without Data Loss (Best Solution)
2. Bypass the CPU check by editing the Windows registry
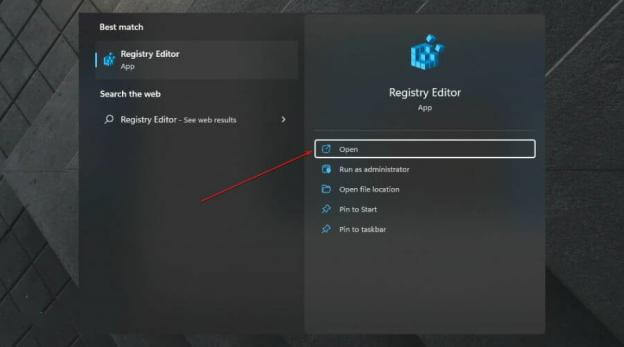
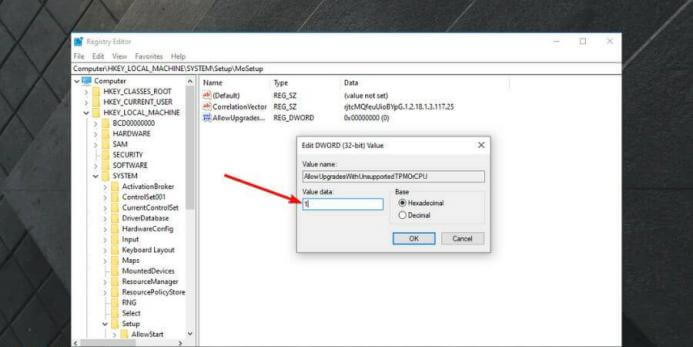
On your Windows desktop, click Start and type Regedit, then click Open to start Registry Editor.
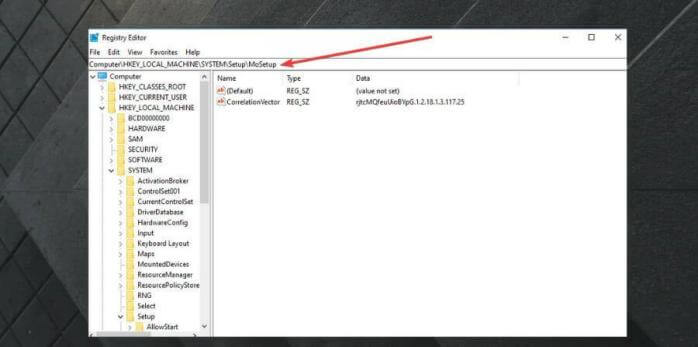
Navigate to the following path: HKEY_LOCAL_MACHINE\SYSTEM\Setup\MoSetup
In the right pane, you can right-click and select New , then DWORD (32-bit) Value.
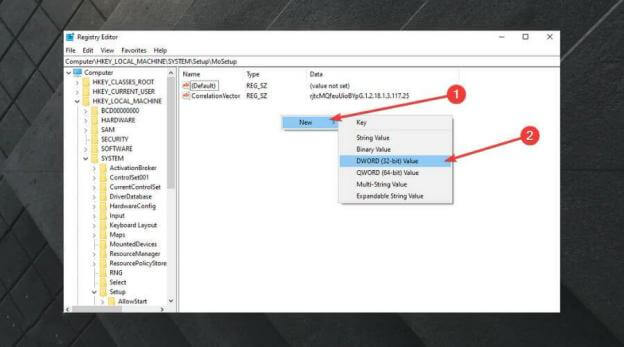
After creating the value, you can rename it to AllowUpgradesWithUnsupportedTPMOrCPU.
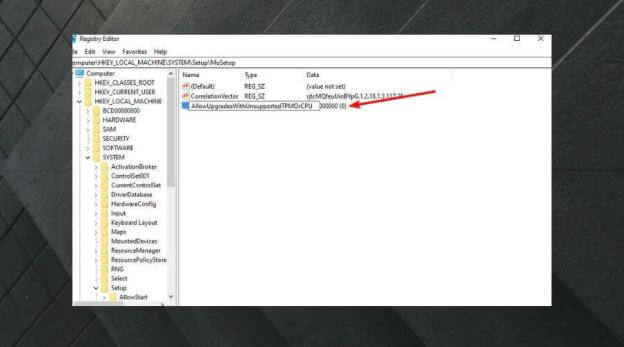
You can now double-click on this new value and enter 1 in the Value data field. Click OK and close Registry Editor.
After completing the setup, wait for the Windows 11 ISO download to complete. After the download completes, install the following steps to complete the installation (at this point, the system will ignore any shortcomings of your CPU, even TPM 2.0 requirements.).
Read more: The PC Can't Run Windows 11, How to Solve and Fix It
3. Open the ISO in Windows Explorer and launch the installer
Once the Windows 11 ISO download is complete, press Windows+E to launch File Explorer.
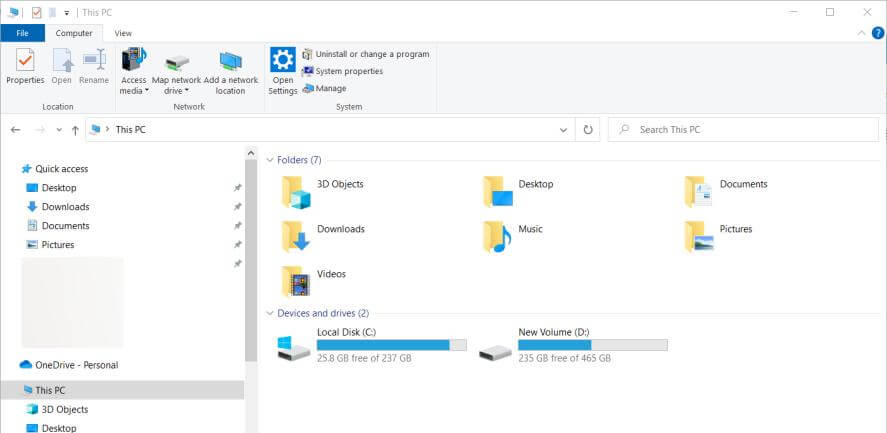
Find the Windows 11 ISO, right-click it and select Mount.

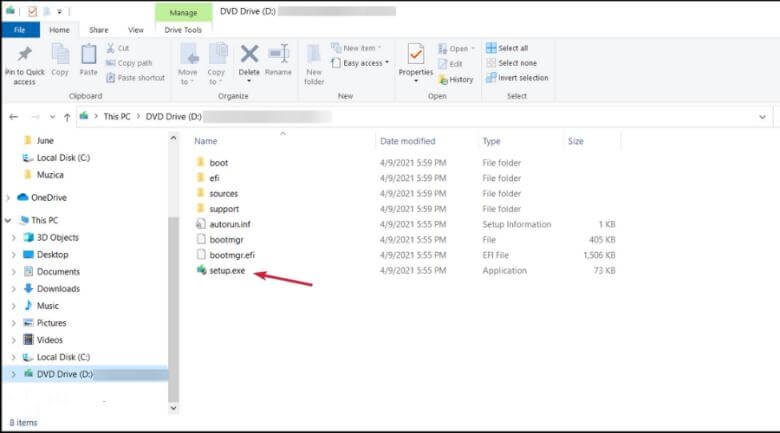
A new virtual drive will appear on your PC. Access it to find and double-click the setup.exe file to start the installation process.
After installation, you should see a warning message instead of a rejection message. This message comes with an option to install Windows 11 without losing data.
Important matter
Here again, back up your important data before starting the whole process. Whether your computer complies with the requirements, backing up necessary data is a must. DMclone is recommended here, and it is one of the best backup/clone software. It helps you to clone HDDs, SSDs, memory cards, USB flash drives, etc., from one location to another easily. You can also use it to help you upgrade your old hard drive to a new one without reinstalling the Windows operating system.

1. Partition clone
This mode can clone a source partition to an existing partition or to unallocated space. Then you will have the same partition on the destination disk with the same data.
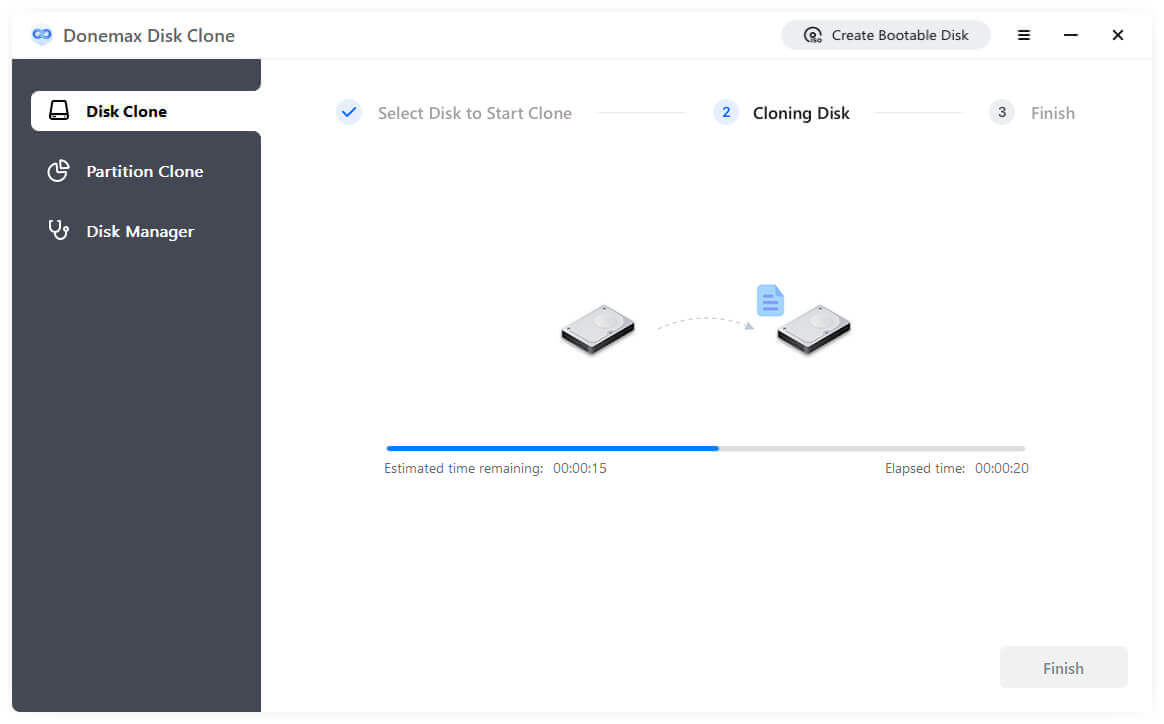
2. Disk Cloning
This mode will help you to fully clone the entire disk to the destination disk and make the same data on both disks.
DMclone
Hot Articles
- How to Install Windows 11 on Unsupported CPU(See What We Do)
- Everything About the EFI System Partition on Windows 11
- Guides on Windows 11 Checker, How to Use it
- What Should I Prepare for the Windows 11 Upgrade
- How to Enable Secure Boot for Windows 11(Complete Guide)
- How to Install Windows 11 from USB
- How to Improve Windows 11 Performance?
- How to Remove Password in Windows 11
- The Difference between Windows 11 and Windows 10| Windows 11 VS Windows 10
- Should You Upgrade to Windows 11? What Benefits of Windows 11?