
Written byCharlesUpdated on Jun 26, 2026
How to Enable Secure Boot for Windows 11(Complete Guide)
Approved byGerhard Chou
PAGE CONTENT:
For users who want to upgrade from Windows 10 to a newer version, Windows 11 now has some mandatory restrictions on the computer configuration. As part of the system requirements and the Trusted Platform Module (TPM), the device needs to have Secure Boot enabled to install Windows 11.

What is Secure Boot?
Secure Boot is a security feature available on most modern hardware with UEFI firmware that provides a safe environment to boot Windows and prevents malware from hijacking the system during Boot. In other words, Secure Boot allows a computer to start using only trusted software from original equipment manufacturers (OEMs). This is one of the reasons why Microsoft requires Secure Boot to be enabled when installing Windows 11.
If you have a Windows 10 system and want to upgrade to Windows 11, this article will guide you through checking and enabling Secure Boot.
How to Check the Status of Safe Boot Started for Windows 11
1. Open Start, search for System Information, and click the top result to open the app.
2. Click System Summary in the left pane.
3. Check the "Safe Boot Status" information:
On—Indicates that the feature is enabled.
Off — Indicates that the feature is disabled or not supported.
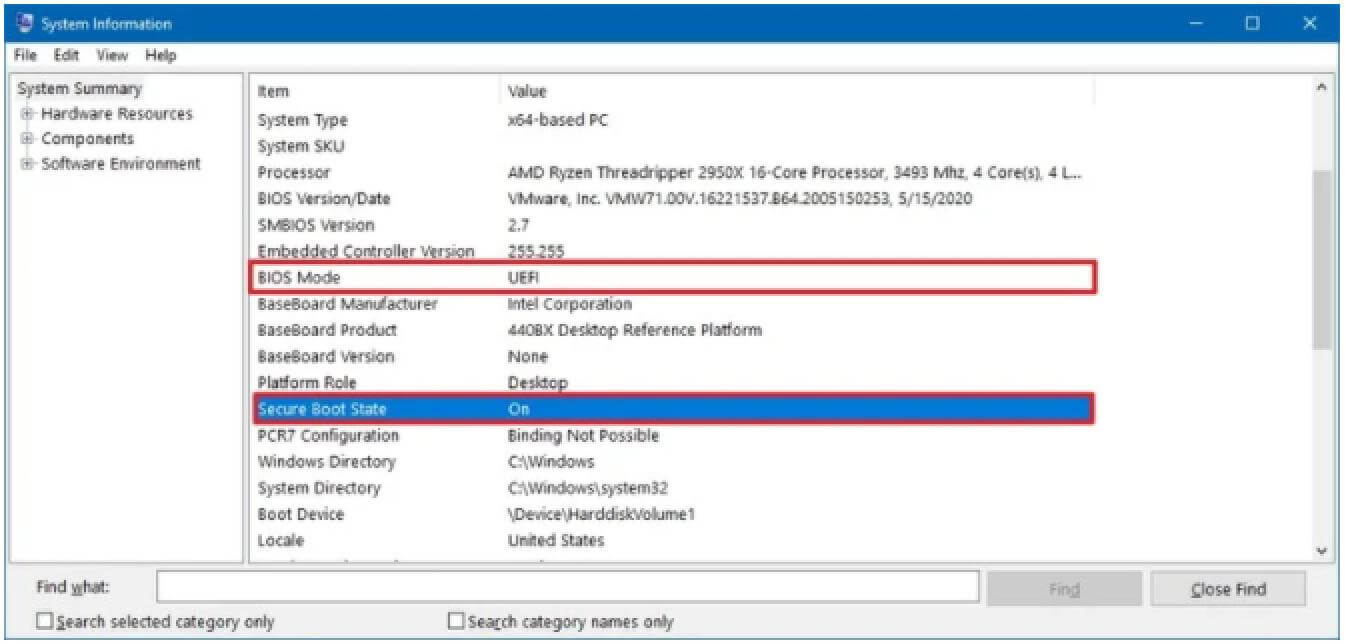
4. Check the "BIOS Mode" information:
UEFI: Indicates that you can enable Secure Boot.
Legacy (BIOS): Indicates that you can enable the feature but requires an extra step.
After completing these steps, if Secure Boot Status is Off and BIOS Mode is UEFI, you can use the steps described below to enable Secure Boot.
If Secure Boot Status is set to Off and BIOS Mode is set to Legacy, you want to create a backup of your computer, use the instructions below to convert the system disk from MBR to GPT, and then proceed with the steps below to enable Secure Boot.
How to Convert MBR to GPT Drive
If you plan to upgrade Windows 10 to Windows 11 on older UEFI-capable hardware, you must first convert the drive from the legacy MBR partition style to GPT to properly switch the system firmware type. On Windows 10, you can use a command-line tool to change the partition type from MBR to GPT without reinstalling Windows.
Check MBR or GPT partition style:
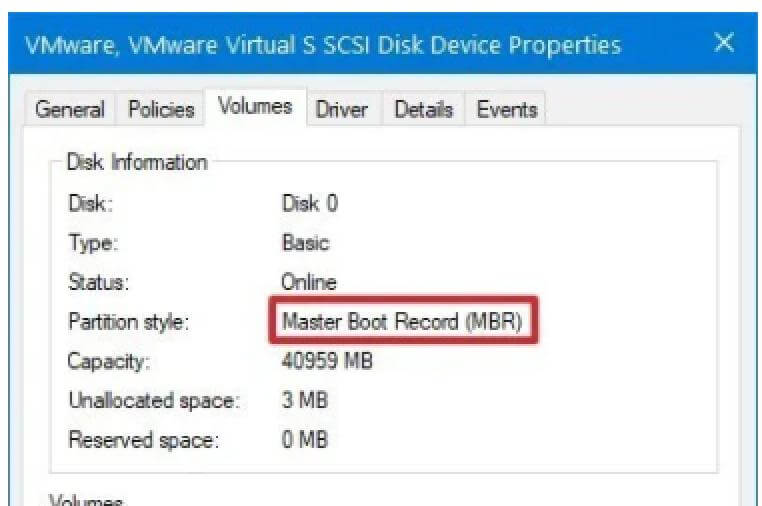
1. Open Start. Search for Disk Management and click the top result to open the experience.
2. Right-click on the drive (the disk location where the Windows 10 system is installed) and select the "Properties" option.
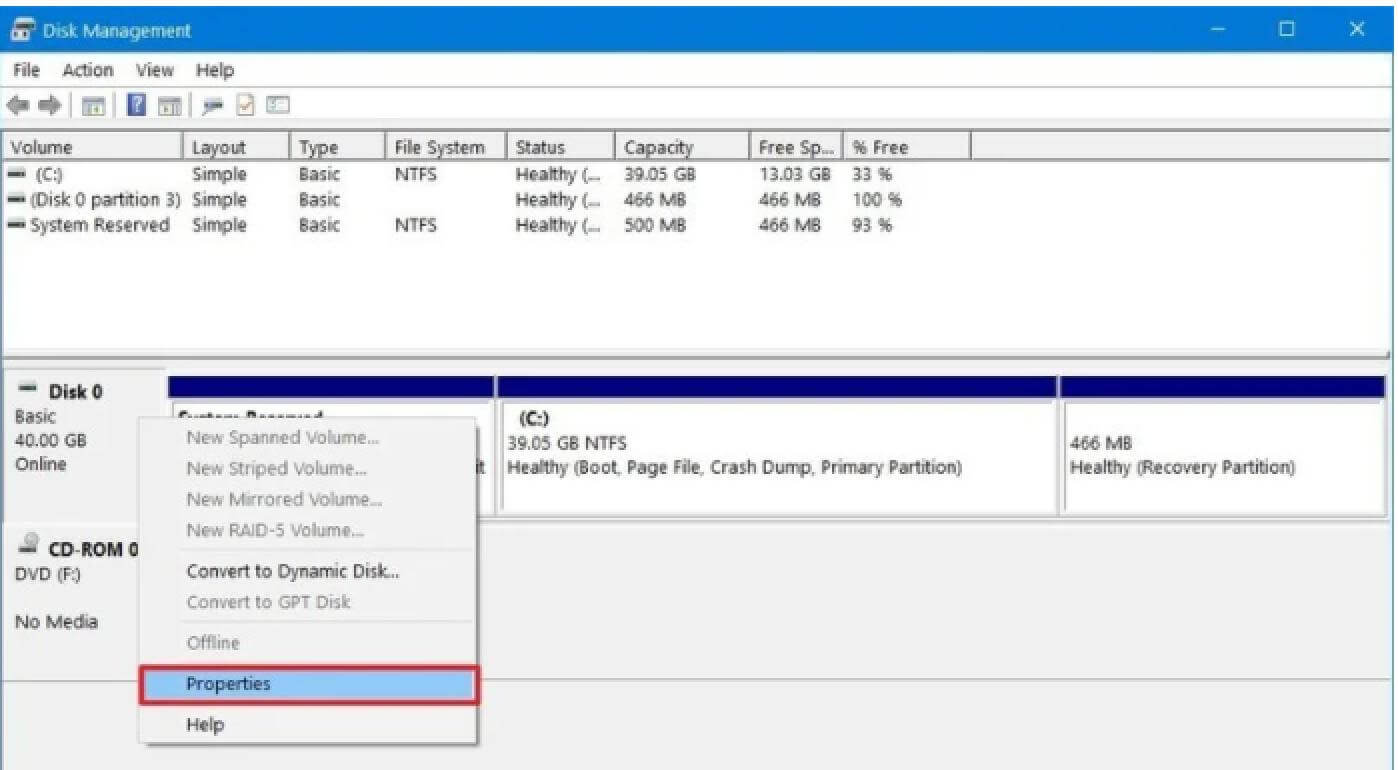
3. Click on the volume tab under the "Partition style" field. If the area is GUID Partition Table (GPT), the drive does not need to be converted, but if you see the Master Boot Record (MBR) label, you can use the conversion tool to switch.
After completing these steps, if the drive needs to be converted, the conversion steps are as follows:
Convert MBR to GPT partition style:
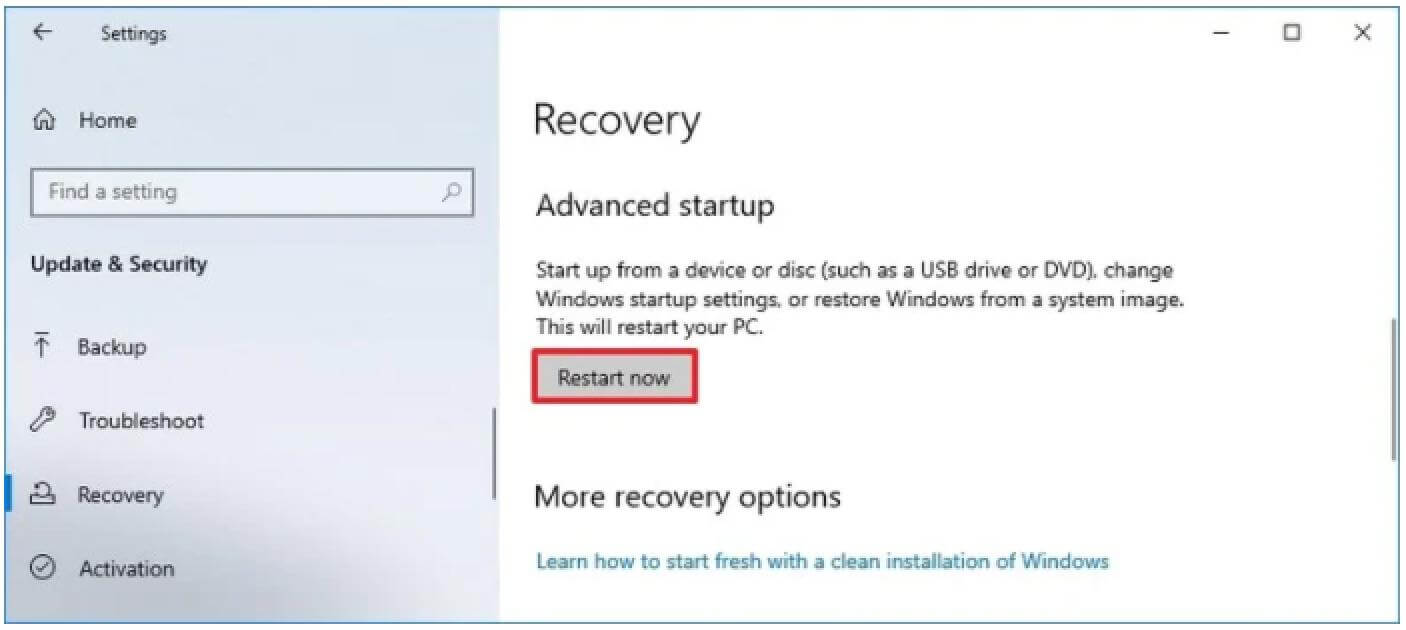
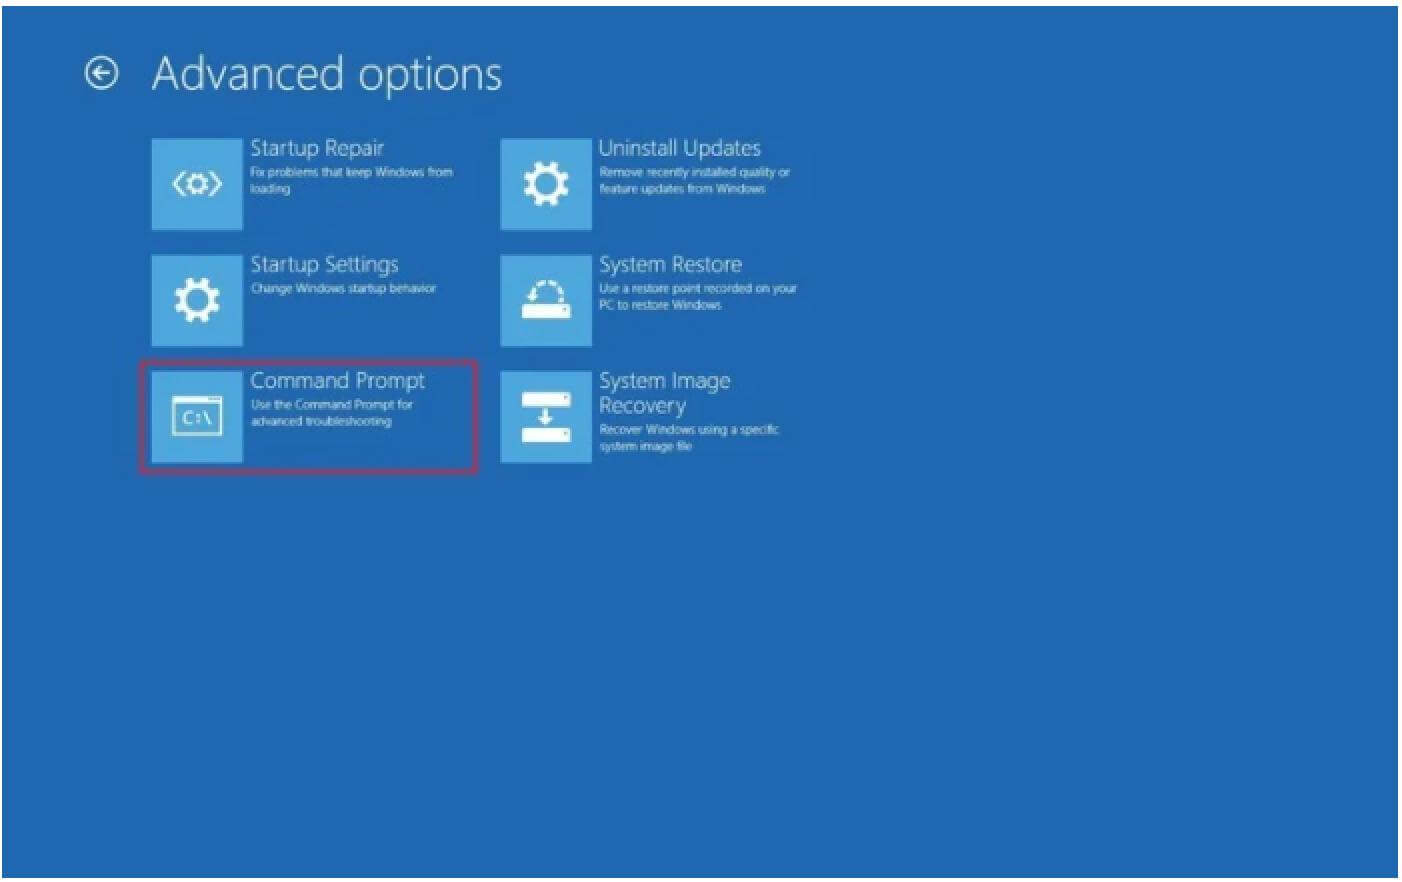
1. Open Settings, click Update & Security. Click Restore. Under the Advanced Startup section, click the Restart Now button.
2. Click Troubleshooting Options, click Advanced Options. Click on Command Prompt in Advanced Options.
3. Type the following command to verify that the drive meets the requirements and press Enter:
mbr2gpt /validate
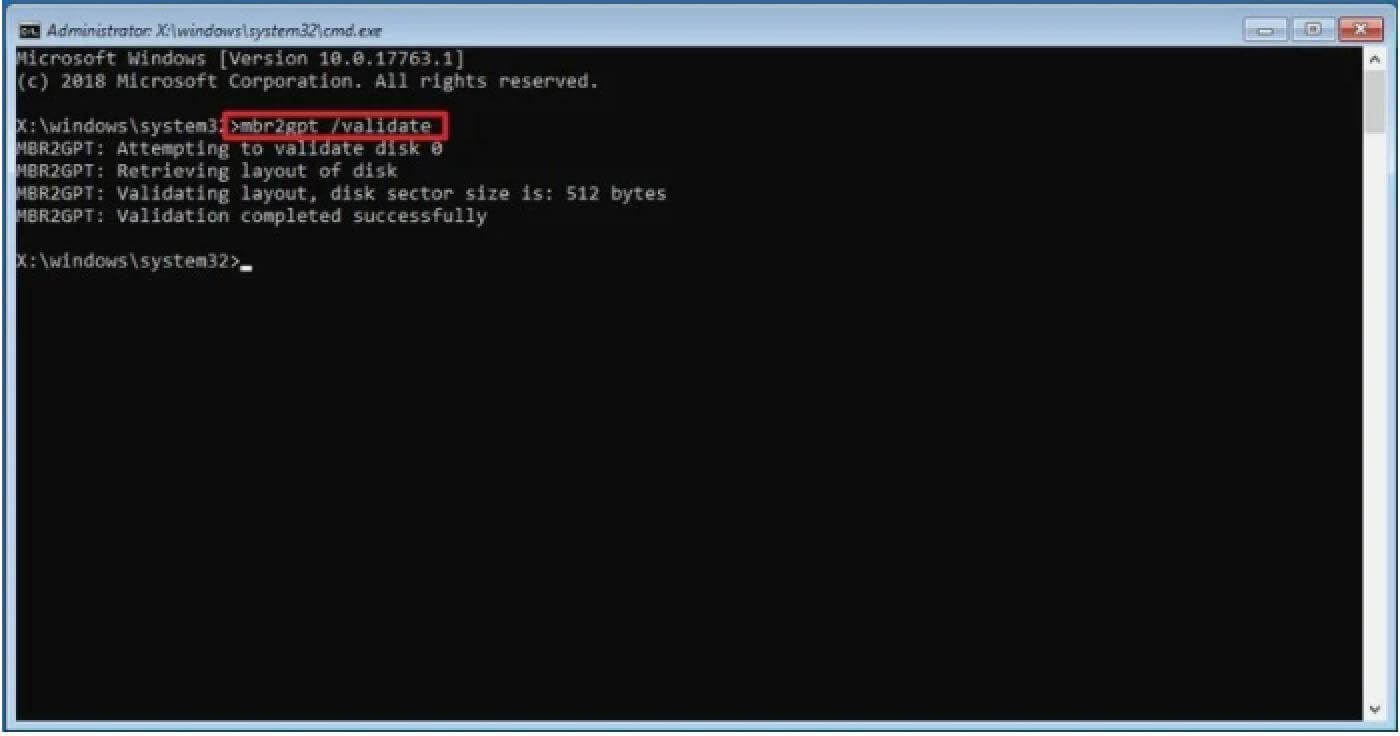
💡 Tip: mbr2gpt.exe is located in the "System32" folder inside the "Windows" folder. If you want to see all available options, use the mbr2gpt /? command.
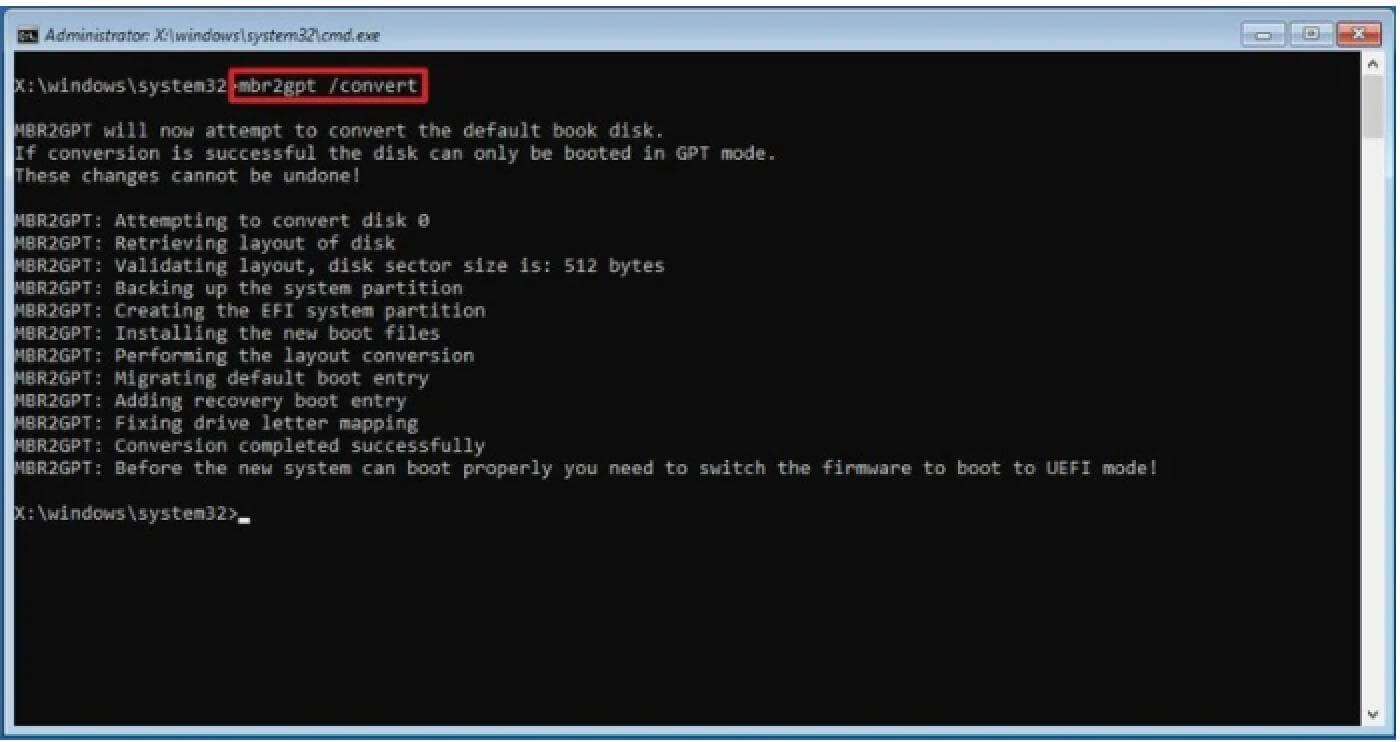
4. Type the following command to convert the drive from MBR to GPT and press Enter:
mbr2gpt /convert
5. Click the Close button, and click the Shut down your PC option.
After completing these steps, the command line tool will change the partition type to GPT to meet the system requirements for installing Windows 11.
If the conversion is successful, the return code should be "0", but there will be an error code if the process fails.
🎯 Special reminder:
This conversion operation has specific risks, which may cause the system to fail to start. Before doing this operation, you can use a backup tool to back up the system; use tool software to convert to ensure system security.
How to Enable Secure Boot for Windows 11
Follow the steps below to start Secure Boot, but you need to make sure you have changed the boot mode to UEFI before enabling Secure Boot. If you don't know how to check or don't know how to check the startup mode of your computer, you can refer to the previous two steps.
1. Open Settings, click Update & Security. Click Recovery, and under the Advanced Startup section, click the Restart Now button.
2. Select Troubleshoot.
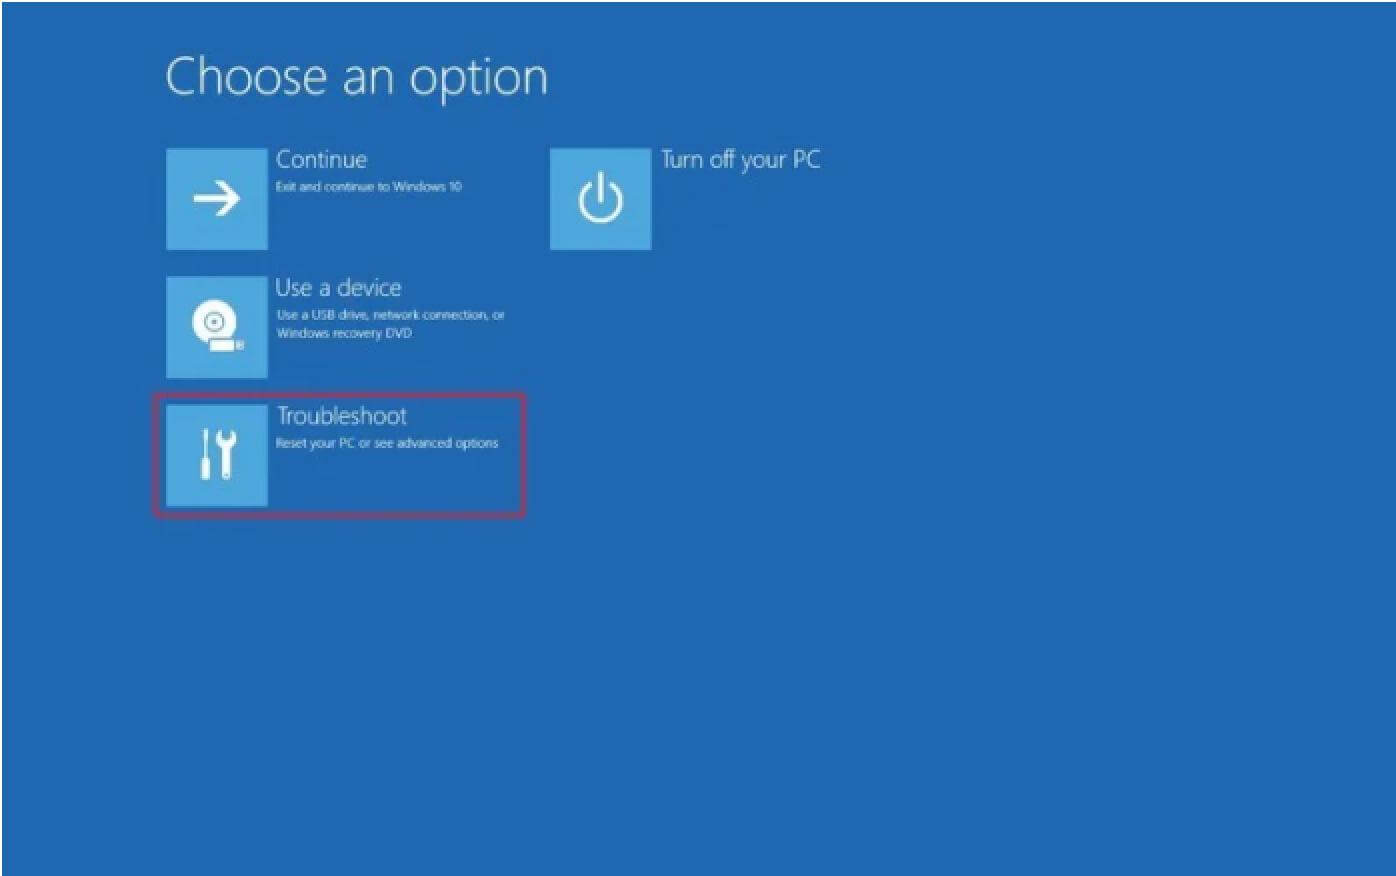
3. Click Advanced Options.

4. Click the UEFI Firmware Settings option.
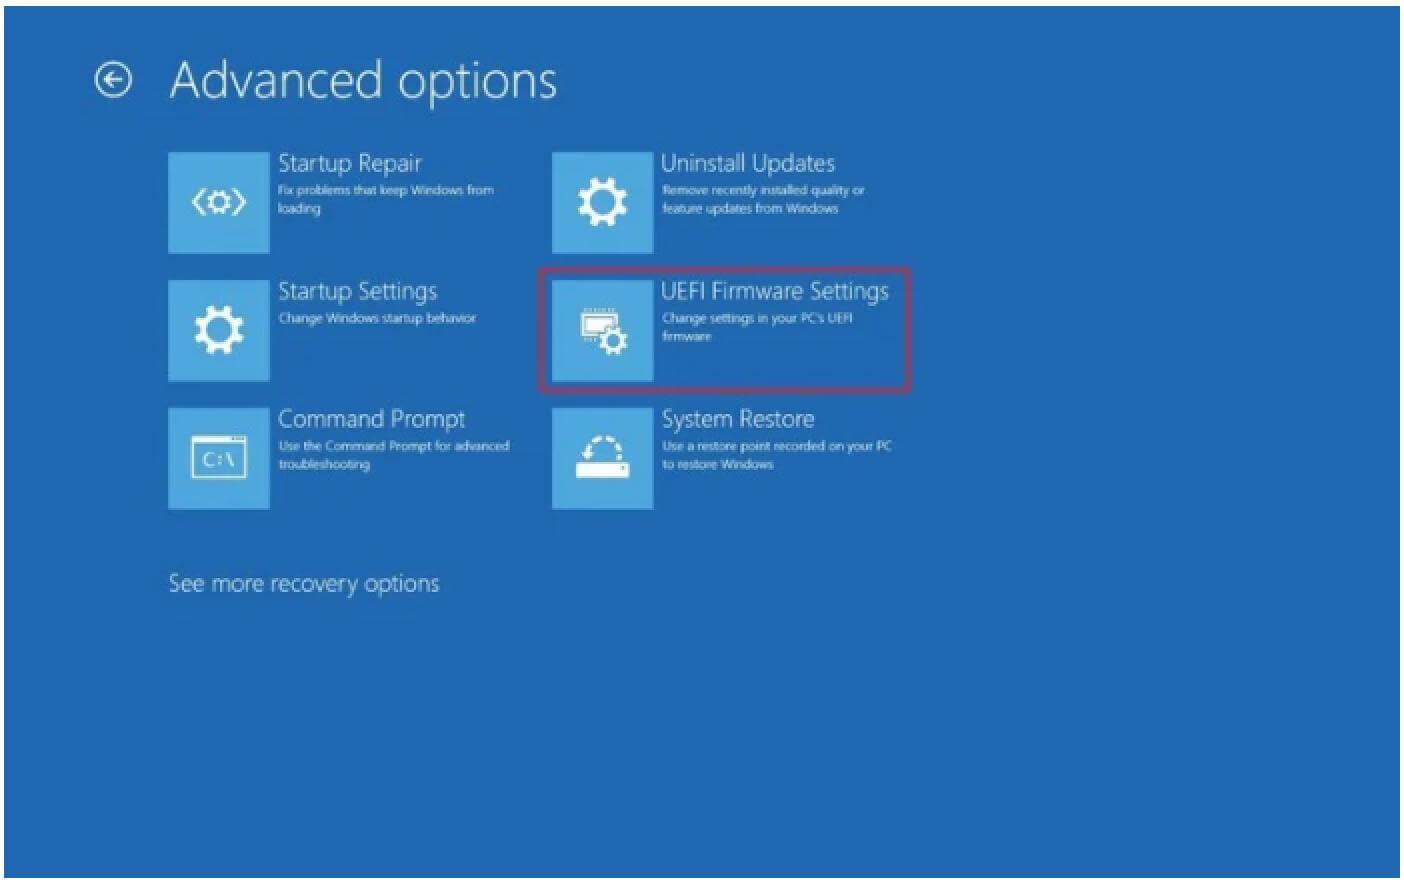
5. Now, your computer will reboot again and boot in BIOS.
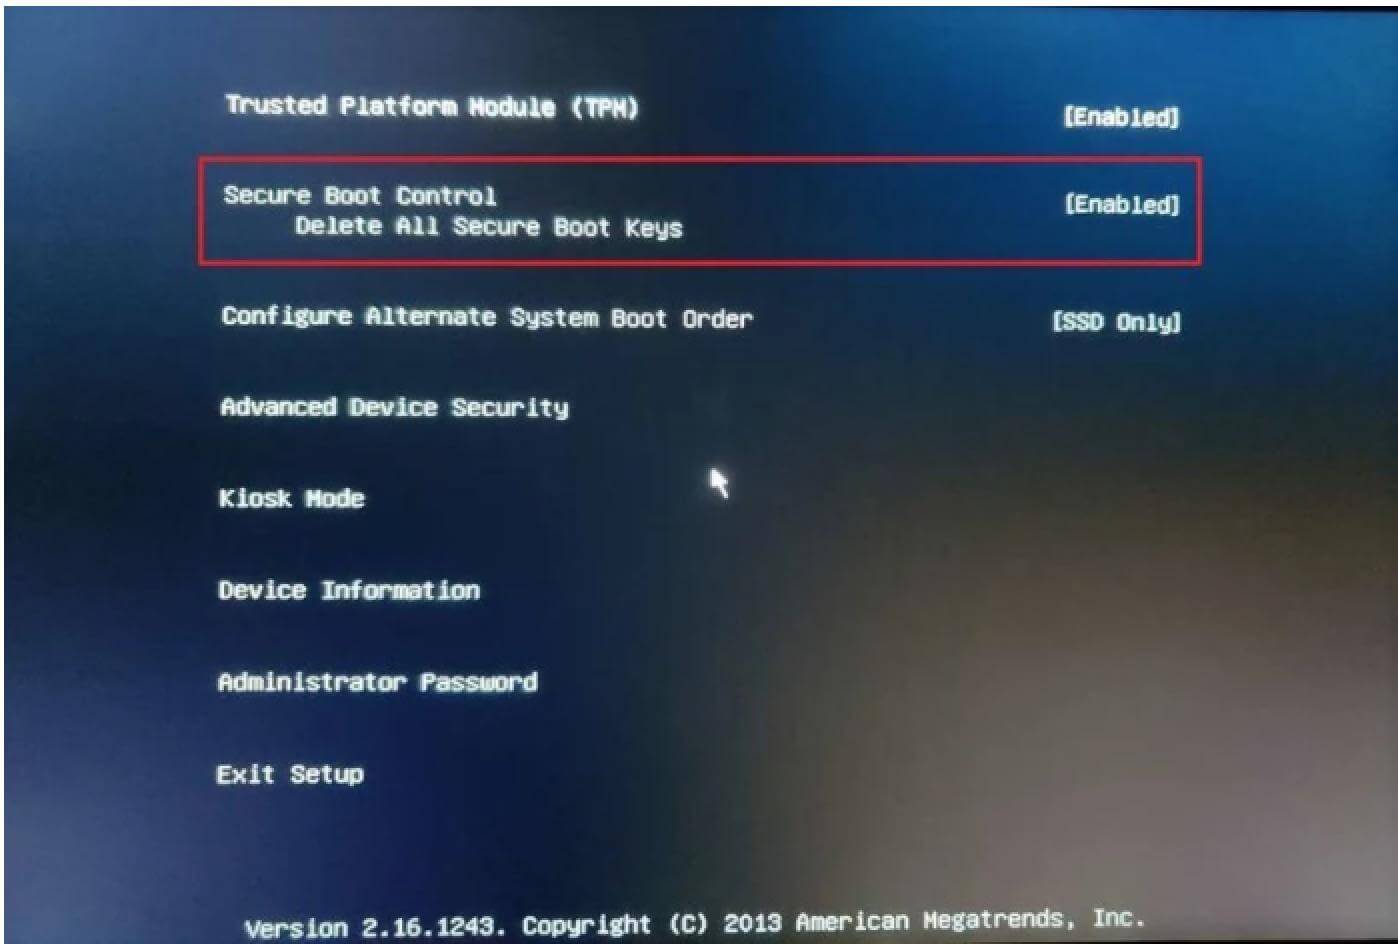
6. Under BIOS settings, you need to click on the Security tab.
7. Find the Secure Boot option and press Enter
8. Select the Enabled option and press Enter
Download and Install Windows 11
You have now enabled Secure Boot for your computer. If you want to check the status, you can use this tool to check if your PC meets the system requirements for Windows 11. You will also find Windows 11 download and installation solutions on the same page. Donemax has developed a toolkit to help you install Windows 11 easily.
More info: Does Secure Boot affect performance?
Some users are concerned that enabling Secure Boot will slow down their computers. The answer is not. Enabling Secure Boot will only increase protection and prevent your computer from being attacked by viruses. It will only protect your computer and will not slow down your computer.
Conclusion
Enabling Secure Boot is a crucial and mandatory step to ensure your PC meets Microsoft's strict security standards for Windows 11. Far from slowing down your system, this feature acts as an essential hardware-level defense mechanism, protecting your computer from sophisticated rootkits and malware before the operating system even loads. By checking your System Information, converting older MBR partition drives to modern GPT formats via the built-in `mbr2gpt` tool, and switching your BIOS mode to UEFI, you can cleanly bypass upgrade errors and secure your data. Before making major changes to your system's partition structure or BIOS settings, it is always a best practice to protect your digital assets. Consider utilizing a dedicated tool like Donemax Disk Clone to create a full system backup, ensuring you can upgrade to Windows 11 with complete peace of mind.
Donemax Disk Clone
An award-winning disk cloning program to help Windows users and Mac users clone HDD/SSD/external device. It also can create full bootable clone backup for Windows PCs and Macs.
Related Articles
- Nov 16, 2024Can I Use a Mac Without Login Password?
- Jun 06, 2025Reformat External Hard Drive on Windows or Mac Without Losing Data
- Jun 26, 2026Apple M4 vs M4 Pro vs M4 Max Chips: Specs, Benchmarks & Features
- Oct 24, 2024Safari vs. Chrome on Mac: A Comprehensive Comparison
- Dec 09, 2024How to Use a Digital Camera on Mac: A Comprehensive Guide?
- Jul 11, 2025How to Use an USB Drive on Mac?

Contributing Writer
Charles
Charles, who lives in Sydney, Australia, is an editor & writer of Donemax Team. He is good at writing articles related with Apple Mac computers, Windows operating systems, data recovery, data erasure, disk clone and data backup, etc. He loves reading and playing tennis in his spare time and is interested in testing new digital devices such as mobile phones, Macs, HDDs, SSDs, digital cameras, etc.

Editor in chief
Gerhard Chou
In order to effectively solve the problems for our customers, every article and troubleshooting solution published on our website has been strictly tested and practiced. Our editors love researching and using computers and testing software, and are willing to help computer users with their problems
Hot Donemax Products

Clone hard drive with advanced clone technology or create bootable clone for Windows/Mac OS.

Completely and easily recover deleted, formatted, hidden or lost files from hard drive and external storage device.

Certified data erasure software - permanently erase data before selling or donating your disk or any digital device.