
Powerful, safe and easy-to-use disk cloning software for disk clone, partition clone and digital device clone.
How to install Windows 11 system from USB? What are the benefits of using a USB stick? The USB disk will directly read the install.wim image in the Windows 11 system iso image during installation, and this method is suitable for those devices that fail the detection to upgrade the Windows 11.
Preparation tools:
1. A USB flash drive greater than or equal to 8GB.
2. Networked computer.
3. A copy of the Windows 11 ISO image.
Steps to Install Windows 11 from USB
Step 1: Use a third-party tool to create a USB disk installer
We will use Rufus's third-party tool to create a Windows 11 bootable USB, but you can also choose other software.
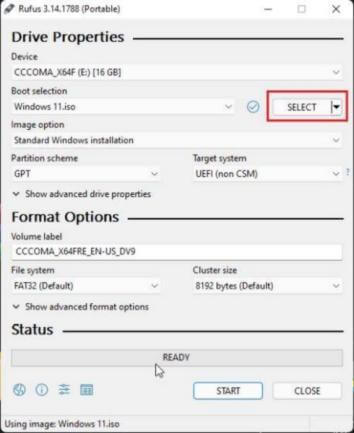
1. Insert the USB flash drive into your computer. Next, start Rufus, and it will automatically select the USB device. Now, click on Select and choose the Windows 11 ISO image. You run Rufus on the same PC where Windows 11 is installed to create a USB stick to boot. It allows Rufus to automatically pre-select the correct value based on your system configuration, introducing unnecessary errors.
2. If you are creating the USB disk installer on another computer, you check the partition scheme of the target computer in advance. Press the "Windows + X" keyboard shortcut and open Disk Management. Here, right-click on "Disk 0" and open Properties. Then, switch to "Volumes" and check the partition style.
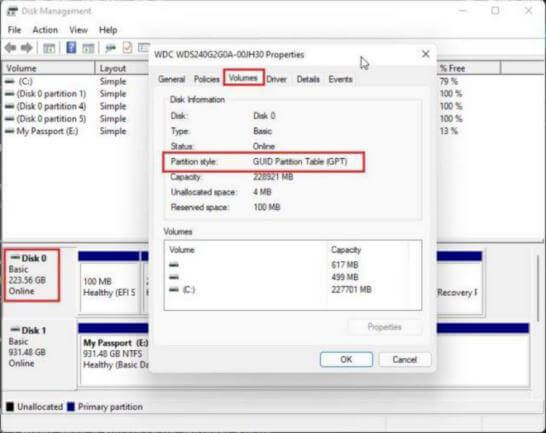
Note: Since upgrading to Windows 11 requires the GPT partition style, you can convert MBR to GPT using the methods provided later in our article.
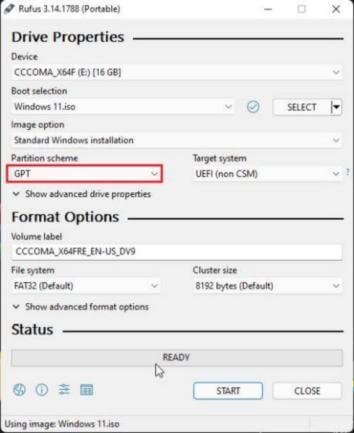
3. Selected "GPT" under "Partition Scheme." And keep everything default and click "Start."
Once done, close Rufus and insert the Windows 11 USB stick installer into the target machine.
Step 2: Clean and install Windows 11 from the USB stick installer
1. To install Windows 11 from USB, you need to restart your computer. When the PC starts up, you must press the start key continuously.
Note: On HP laptops, pressing the "Esc" key during boot brings up the boot menu. It would be best to look up the boot key on the Internet for other laptops and desktops.
It should be one of these: F12, F9, F10, etc.
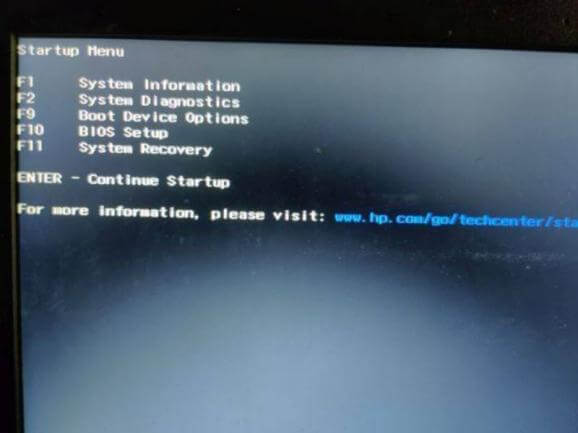
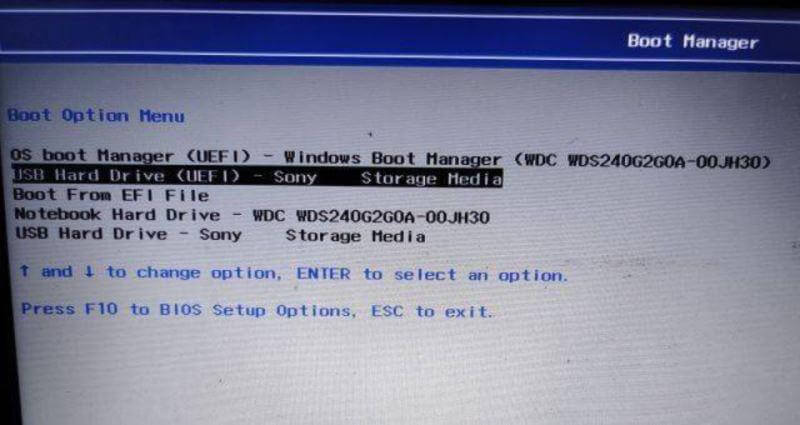
2. Then, press "F9" (Laptop/Desktop keys can be different) to open "Boot Device Options." Here, select the USB stick installer you created and press Enter.
3. You will now boot into the Windows 11 installer settings. Select Next, and then select Install Now.
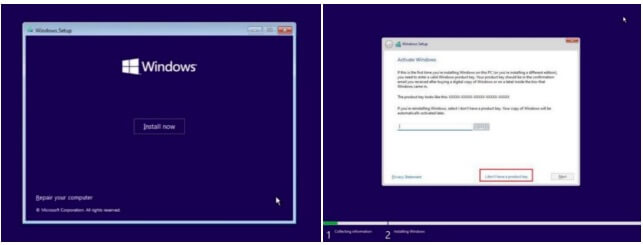
4. After that, you may be asked to select the Windows 11 version. If you use a Windows-activated laptop, the version will be automatically selected based on your previous configuration.
5. Now, click Customize. It allows you to install Windows 11 on a specific drive. This way, you don't have to wipe the entire disk.
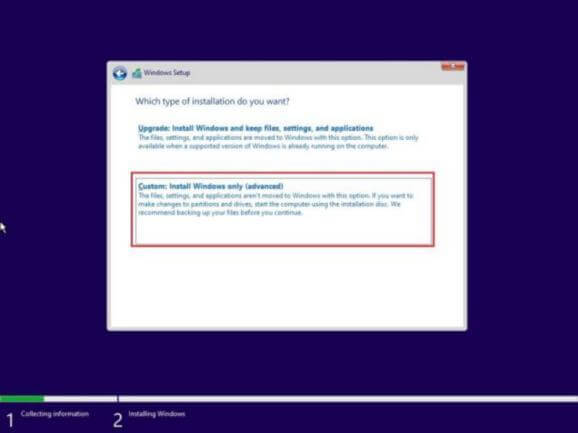
6. On the partition page, determine the "C" drive based on the drive size and click "Next" to install Windows 11 on your PC. This will only wipe your C drive, including from the desktop, my documents, downloaded programs, and files - all within the C drive and will not touch other partitions. Start installing from the USB stick installer to your PC.

7. After the installation is complete, your PC will restart automatically. Remove the USB stick installer during the boot process, and you will see the Windows 11 Out of Box Boot (OOBE) settings.
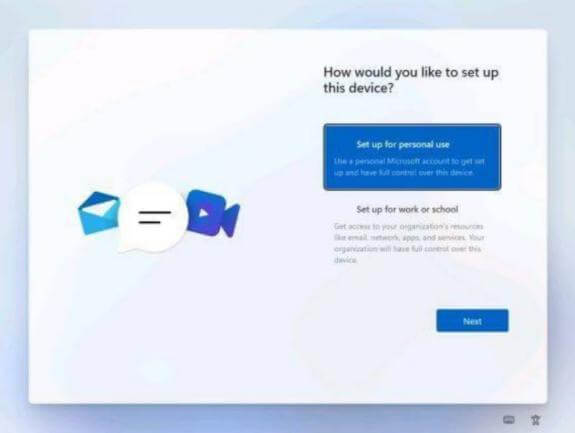
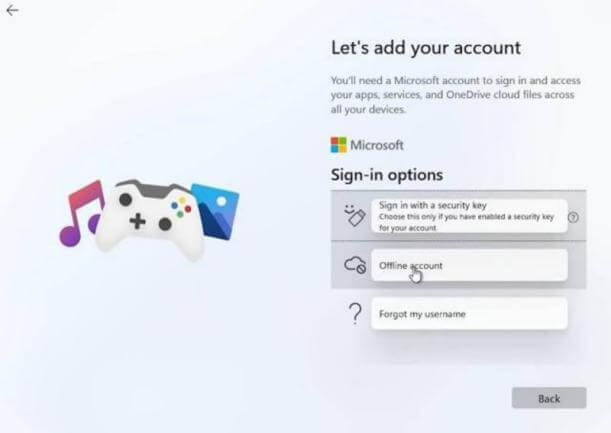
8. During installation, if you are using Windows 11 Home, you cannot create an offline account. An active internet connection will be required to sign in to a Microsoft account. Using another Windows 11 version, you can go the offline route: Sign-in Options -> Offline Accounts -> Limited Experience.
Note: Home users can remove the Microsoft account from Windows 11 and use a local account once signed in.
How to Convert MBR to GPT for Windows 11 Installation
Method 1: Convert MBR to GPT using the Diskpart command line
One of the best solutions for MBR to GPT conversion is to use the Diskpart command-line interface. As a built-in command-line utility, Diskpart can be used to partition or manage storage. However, after executing the Diskpart command to partition, your data will be lost. Therefore, it is recommended to backup your data beforehand. To use this solution, you first need to clear the disk space and convert it from the hard disk MBR to GPT. The following steps can achieve this:
Step 1: Click the Start menu and look for the "Diskpart.exe" file. Just run the file to perform the conversion.
Step 2: Open a command-line interface.
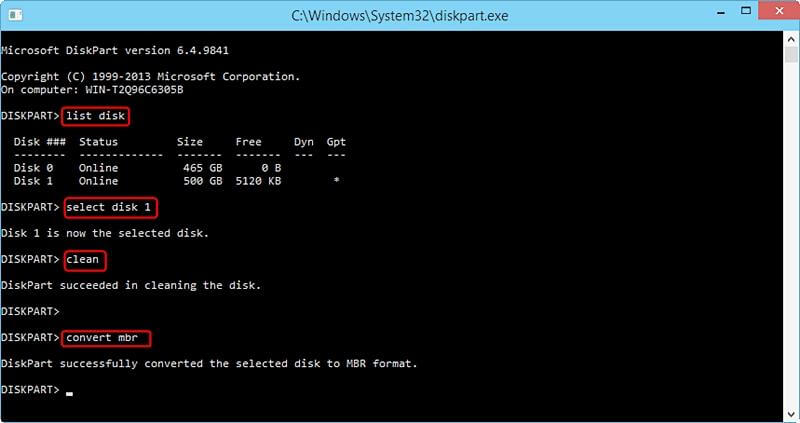
Step 3: Write the command "list disk" and press Enter. Generate a list of all disks on the system.
Step 4: Now, you can choose the disk you want to convert. For example, if you're going to select disk n, write "select disk n" and press Enter again.
Step 5: After selecting the disk, you need to clean it up. This can be done by simply providing the "Clean" command.
Step 6: You can convert it to any format (MBR or GPT). To convert it to GPT, enter the command "convert gpt". Likewise, write the "convert mbr" command to perform a GPT to MBR conversion.
Method 2: Convert MBR to GPT with Windows Disk Management
If the above techniques don't work or seem a bit confusing, you can also convert MBR to GPT with the help of Windows Disk Management. It provides a quick and easy way to manage and convert disks from one format to another. Disk management is also a built-in tool for every Windows operating system.
In addition to converting disks from one format to another, it can also be used to format disks, create new disks, shrink partitions, and perform various other tasks. MBR to GPT can be converted using the Disk Management tool by following these steps:
Step 1: First, open the Disk Management tool. From the Start menu, you can search for it or go to Control Panel > Storage Space > Administration > Disk Management.
Step 2: After opening the Disk Management tool, select the disk you want to convert.
Step 3: Right-click on it and select the "Convert to GPT Disk" option.
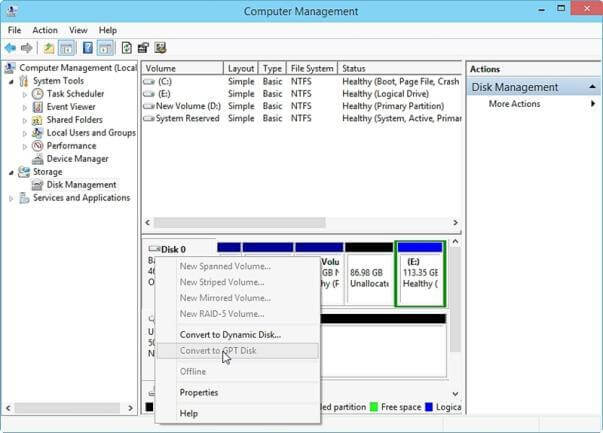
Note: To get this option, you need to ensure the disk is not already partitioned. In this case, you need to delete all partitions beforehand and then convert MBR to GPT.
Important hint
Your installation process will have certain risks, and it is necessary to back up your important data safely. You can choose DMclone for Windows to back up your data. Just download and install DMclone on your Windows PC.
Windows 11 Disk Cloning - DMclone
- Clone hard drive partition, entire disk, HDD, SSD, USB flash drive, memory card, external hard drive on Windows 11.
- Simple steps to clone data from one disk to another.
- 100% safe and very easy to use.
Then you can run it to help you clone the data. If you want to clone an entire disk on Windows, follow these steps:
Step 1. Open DMclone on your Windows PC and select Disk Clone Mode - Disk Clone.
Step 2. Select the source and destination disks. DMclone clones the source disk to the target disk. Click Next.

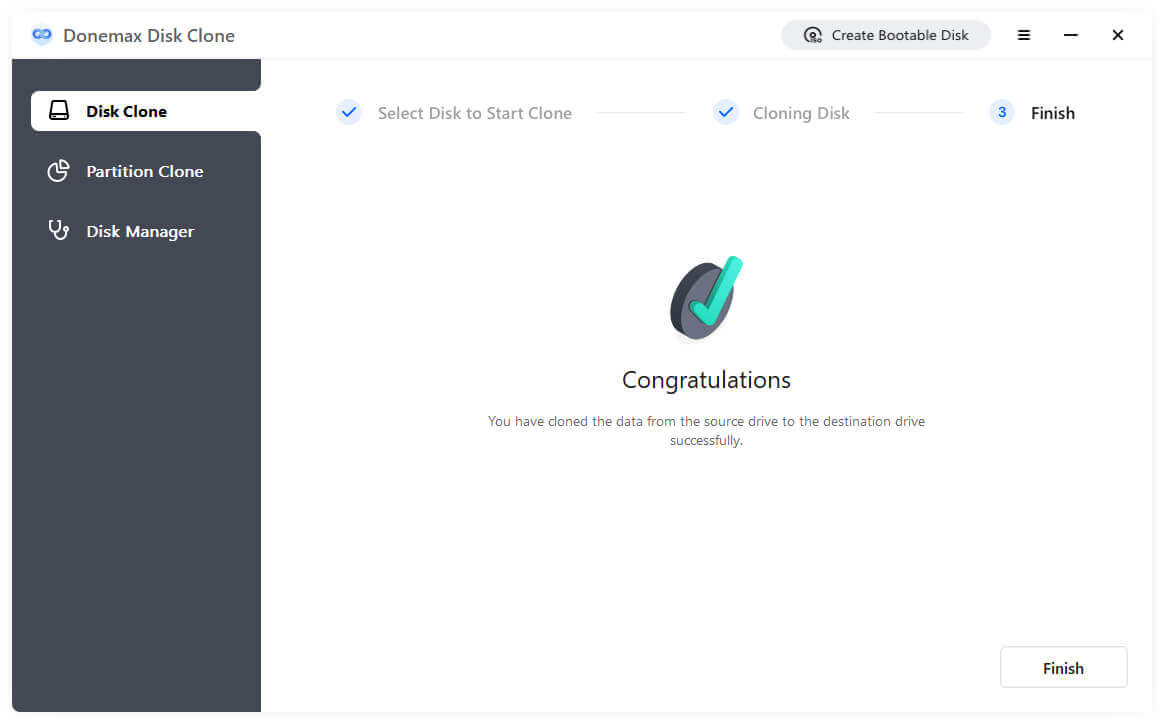
Step 3. You can edit the layout and click the clone button.

DMclone will quickly clone data from the source disk to the target disk.
DMclone
Hot Articles
- How to Enable Secure Boot for Windows 11(Complete Guide)
- How to Install Windows 11 from USB
- The Difference between Windows 11 and Windows 10| Windows 11 VS Windows 10
- Should You Upgrade to Windows 11? What Benefits of Windows 11?
- TPM for Windows 11 Update | Windows 11 Download Without TPM 2.0
- Windows 11 Home VS Professional: The Differences and Similarities
- What to Do When Windows 11 Not Booting|Fixes to Get Your PC Running
- How to Enable TMP 2.0 for Windows 11 Upgrade
- Fixes to Get Rid Of Windows 11 Black and Blue Screen of Death
- Solutions to Fix 'Cannot Download Windows 11' Issue