Written byStevenUpdated on Aug 03, 2026

Before we start: When using an NTFS drive on MacBook Neo, you will find it's read-only be default. If you want to make it writable quickly, use the software Donemax NTFS for Mac. It can enable NTFS writable on Mac with 1-click.
PAGE CONTENT:
Have you plugged an external hard drive or flash drive into your new MacBook Neo, only to realize you can open files but cannot save, edit, or delete anything? If your external drive was previously formatted on a Windows PC, it is almost certainly using the NTFS file system.
By default, macOS allows you to view and copy files from an NTFS drive, but it blocks you from writing new data to it. This can be frustrating when you need to transfer large files, edit documents, or back up important data on your MacBook Neo.
Fortunately, mounting an external NTFS drive as writable on your MacBook Neo is simple when you use the right approach. In this comprehensive guide, we will walk you through the most effective methods to gain full read and write access to your NTFS drives safely and effortlessly.
To understand why this happens, it helps to look at how different operating systems format hard drives. NTFS (New Technology File System) is the proprietary file system created by Microsoft for Windows operating systems.
Apple designed macOS to use its own native file systems, such as APFS (Apple File System) and Mac OS Extended (HFS+). While Apple built basic NTFS reading support into macOS so users could view Windows files, native NTFS writing capability is disabled by default.
This restriction applies across all Mac models, including the latest MacBook Neo. When you connect a Windows-formatted drive to your MacBook Neo, macOS mounts the volume in read-only mode to prevent accidental file corruption. To enable write access, you need a reliable bridge between macOS and NTFS.
The easiest, fastest, and safest way to mount an external NTFS drive as writable on MacBook Neo is by using professional NTFS driver software. Donemax NTFS for Mac is specifically designed to eliminate read-only limitations seamlessly.
Donemax NTFS for Mac operates easily to make NTFS drive writable. Once installed, run the software and choose the NTFS drive, make it writable and the software will mount it with full read-write permissions at blazing-fast speed. You can create new folders, copy, paste, edit, and delete files just like you would on a native Mac drive.
Step-by-Step Guide to Use Donemax NTFS for Mac:
Step 1: Download and Install: Download Donemax NTFS for Mac from the official Donemax website and install it on your MacBook Neo.
Step 2: Connect Your NTFS Drive: Plug your external NTFS hard drive, SSD, or USB flash drive into your MacBook Neo using a USB port or hub.
Step 3: Enable Read-Write Access: Launch Donemax NTFS for Mac. Select your connected NTFS drive from the list and click 'Enable Writable' (or allow auto-mount).
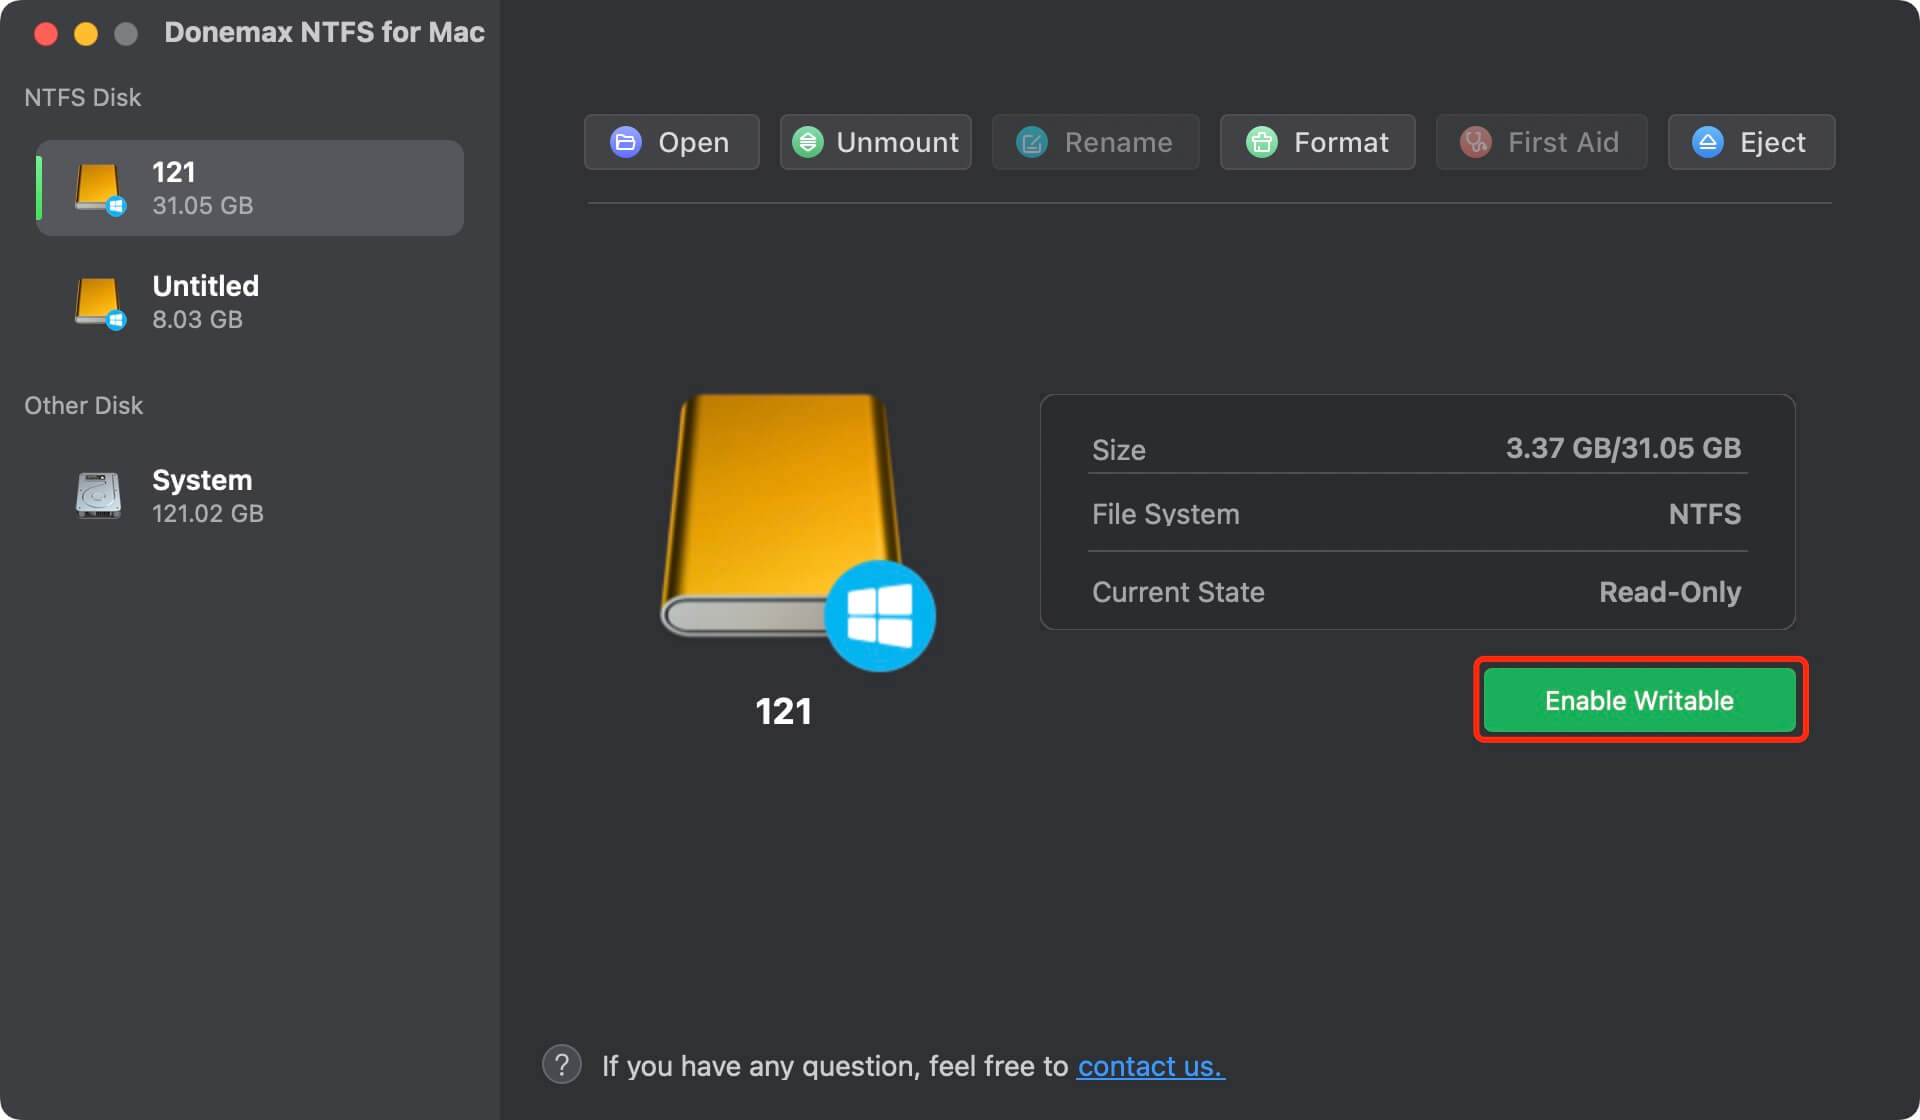
Step 4: Start Writing Files: Open Finder. You can now freely edit, add, or delete files on your NTFS drive without any restrictions.
Why Choose Donemax NTFS for Mac?
If you plan to use your external drive frequently between both Mac and Windows computers, and the drive does not contain any vital files (or you have backed them up), reformatting the drive is another permanent option.
File systems like exFAT and FAT32 are natively supported with full read and write access on both macOS and Windows. However, keep in mind that reformatting completely erases all existing data on the drive.
Steps to Format NTFS Drive in Disk Utility:
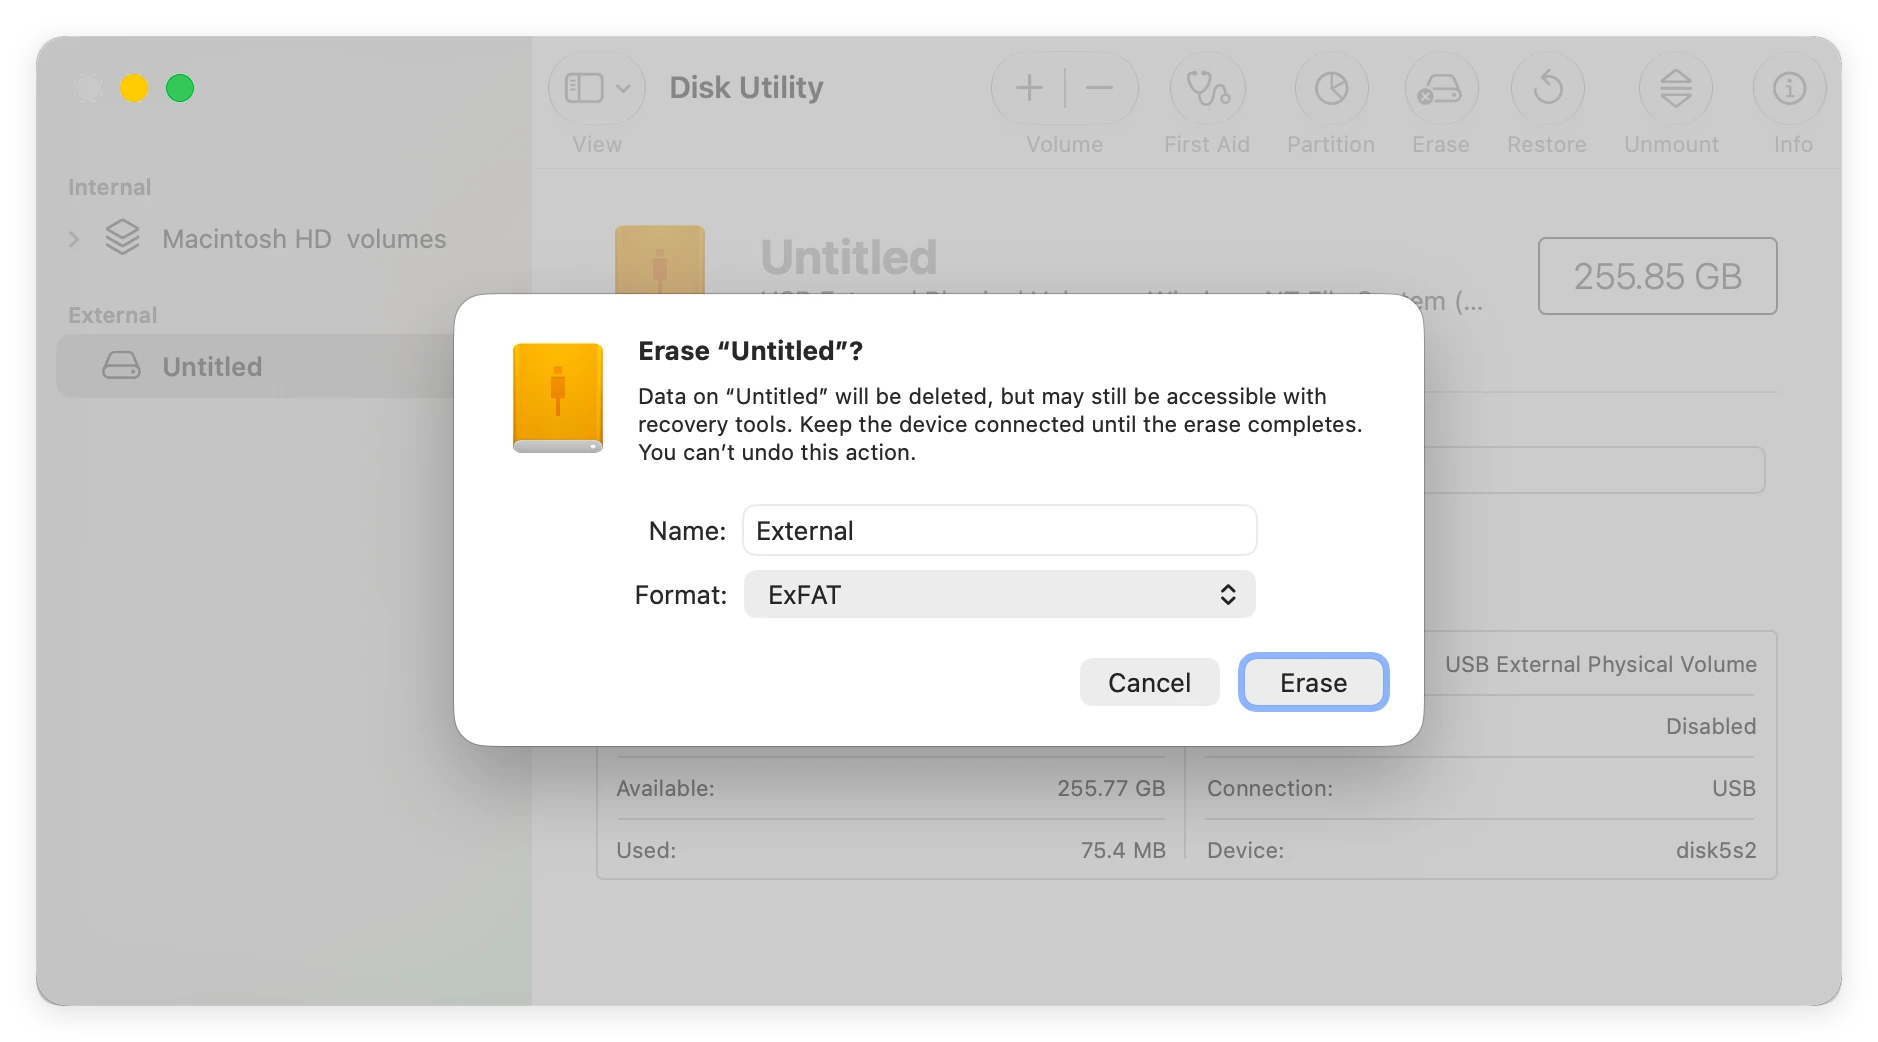
💡 Note: While exFAT works on both platforms, formatting can take time and requires extra storage space to back up your files first. If you want to keep your files intact without transferring gigabytes of data, Method 1 remains the best choice.
To keep your external drives healthy and protect your valuable files, keep these simple practices in mind when using external NTFS drives on your MacBook Neo:
Mounting an external NTFS drive as writable on your MacBook Neo does not have to be complicated. While macOS defaults to read-only mode for Windows-formatted drives, software solutions make full read-write access simple and instant.
Using Donemax NTFS for Mac is the most efficient and reliable method to gain complete control over your external NTFS drives without losing files or dealing with technical command lines. Download Donemax NTFS for Mac today to experience fast, hassle-free NTFS read-write access on your MacBook Neo!
Steven
Steven has been a senior writer & editor of Donemax software since 2020. He's a super nerd and can't imagine the life without a computer. Over 6 years of experience of writing technical solutions and software tesing, he is passionate about providing solutions and tips for Windows and Mac users.
Gerhard Chou
In order to effectively solve the problems for our customers, every article and troubleshooting solution published on our website has been strictly tested and practiced. Our editors love researching and using computers and testing software, and are willing to help computer users with their problems