
Written byLucienUpdated on Aug 03, 2026

Before we start: Cannot fix RAW drives with CHKDSK? How to fix the drive without losing data? First, use the software Donemax Data Recovery to get back the files and save to another drive. Then try to fix the drive with third-party tools or reformat the drive for a new file system.
PAGE CONTENT:
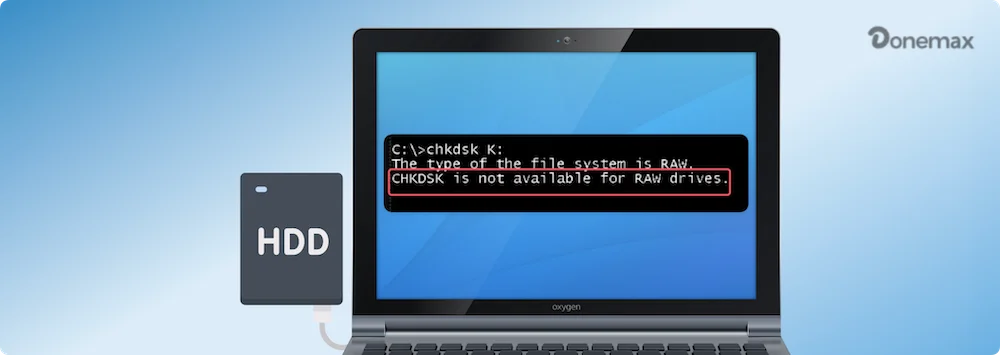
When you're trying to run CHKDSK to fix a hard drive issue, encountering the error message "CHKDSK is not available for RAW drives" can be frustrating. This message usually pops up when your drive has switched to a RAW file system, meaning it's no longer accessible or recognized by your operating system as a readable file format. A RAW drive prevents access to data stored on it, making it essential to understand why this happens and, more importantly, how to fix it.
In this detailed guide, we will explain what the RAW file system is, why CHKDSK doesn't work for RAW drives, and how you can recover your data and resolve this issue effectively.
The error message "CHKDSK is not available for RAW drives" indicates that your drive's file system is damaged or missing. CHKDSK, the standard Windows command-line tool for scanning and repairing disk issues, only works with recognized file systems like NTFS, FAT32, or exFAT. When the file system switches to RAW, CHKDSK can't function, as it requires an existing, readable file system.
Understanding why a drive turns RAW can help prevent similar issues in the future. Several factors can cause a drive to switch to a RAW state:
When a drive becomes RAW, it leads to several serious issues:
Before attempting any fix, it's important to note that fixing a RAW drive might result in data loss. Therefore, recovering data from the drive before proceeding with any formatting or repair efforts is strongly recommended.
Data recovery software - such as Donemax Data Recovery can help you deeply scan the RAW drive and recover all existing/lost data.
1. Download and install Donemax Data Recovery on your computer, launch it after installing.
2. Open Donemax Data Recovery, select the RAW drive to start data recovery.
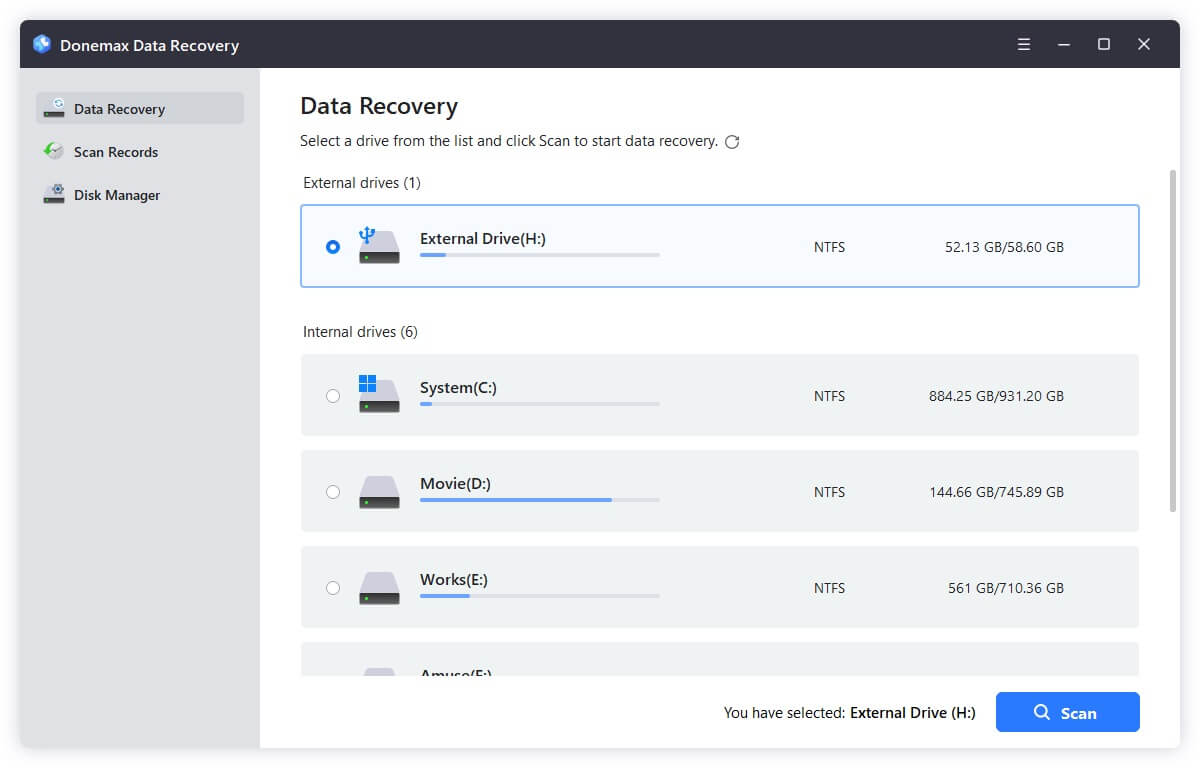
3. Click on Scan button to deeply scan the RAW drive and find all recoverable files.
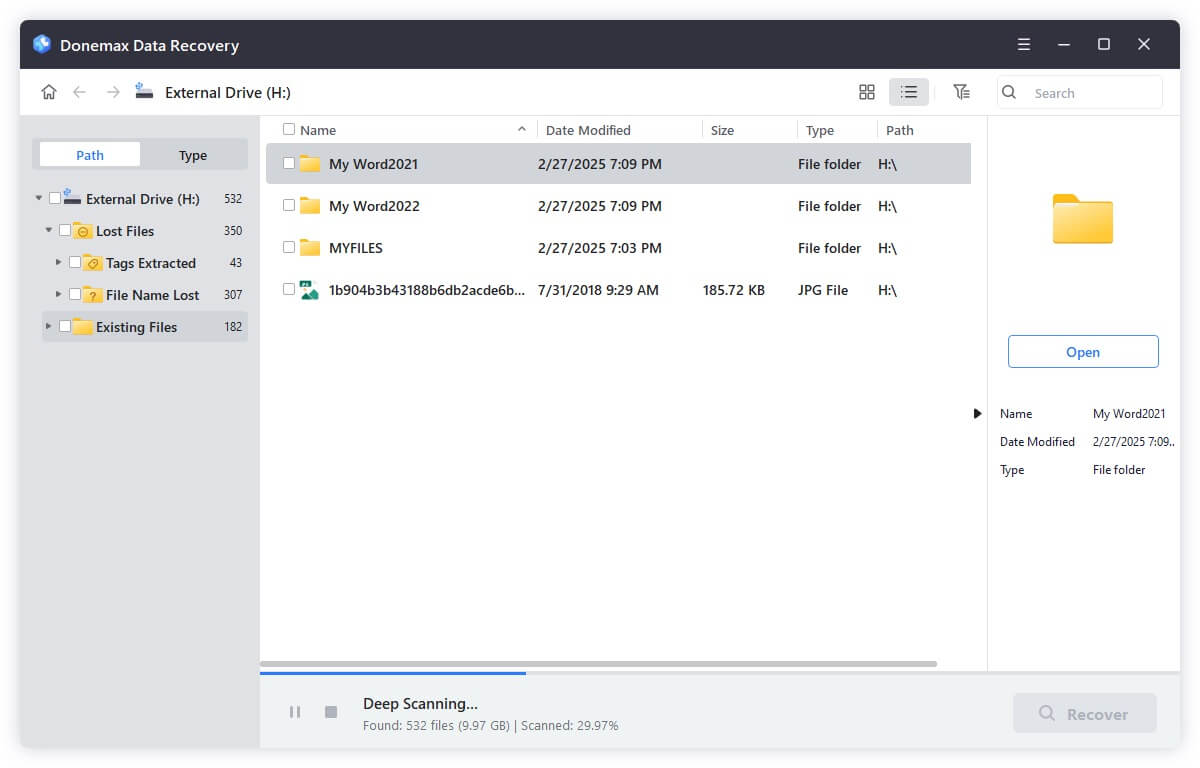
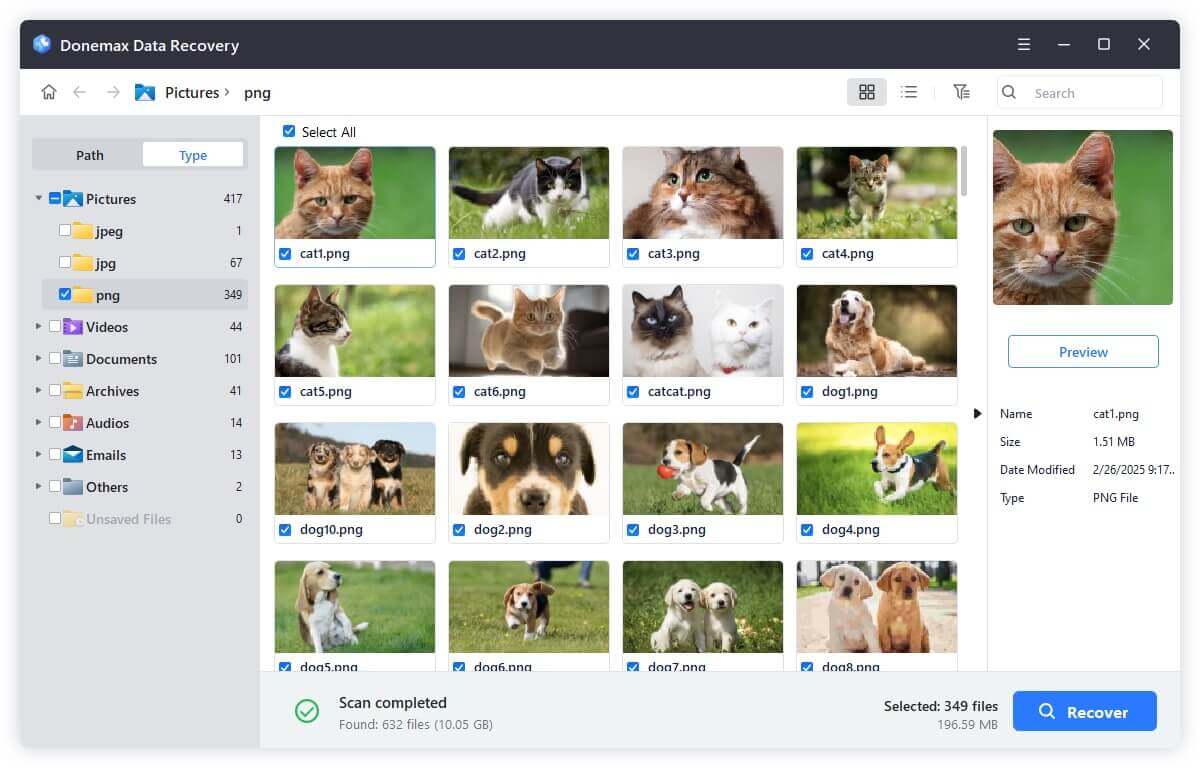
4. Once the scan is completed, you can preview all recoverable files. Then select the wanted files, click on Recover button.
Method 1: Convert RAW to NTFS Using Command Prompt (CMD)
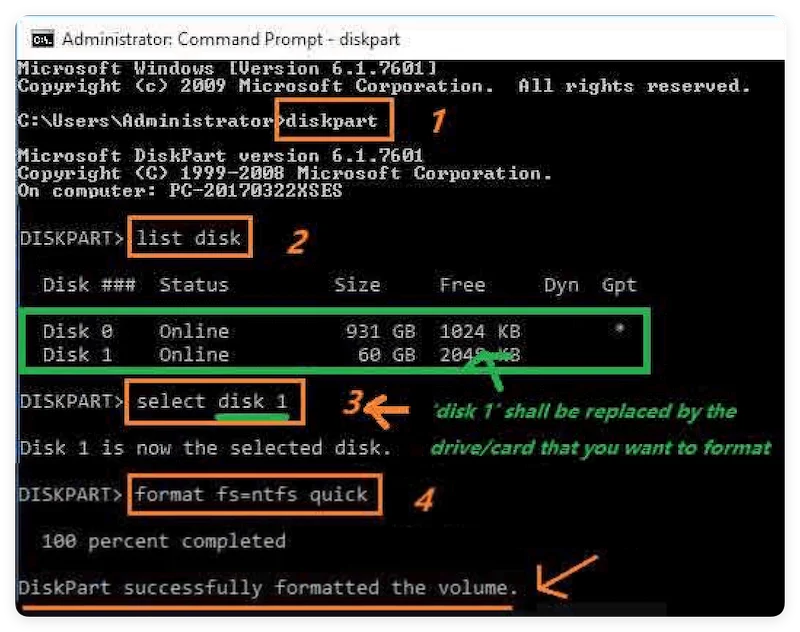
The most straightforward way to fix a RAW drive is by converting it back to a usable file system such as NTFS using Command Prompt. Here's how to do it:
1. Open Command Prompt as Administrator: Press Win + X and select Command Prompt (Admin) from the menu.
2. Use Diskpart to Select the RAW Drive: In the Command Prompt window, type the following and press Enter: diskpart
Type the command below to list all available drives and press Enter: list disk
Identify the RAW drive from the list and select it by typing: select disk X
Replace X with the drive number of the RAW drive.
3. Format the Drive: After selecting the correct drive, type the following command to format it to NTFS: format fs=ntfs quick
This command will quickly format the drive to NTFS, allowing you to reuse the drive.
Method 2: Use Third-Party Disk Repair Software
If you're not comfortable using Command Prompt or need a more user-friendly solution, you can use third-party disk repair software. Some popular tools that help fix RAW drives include:
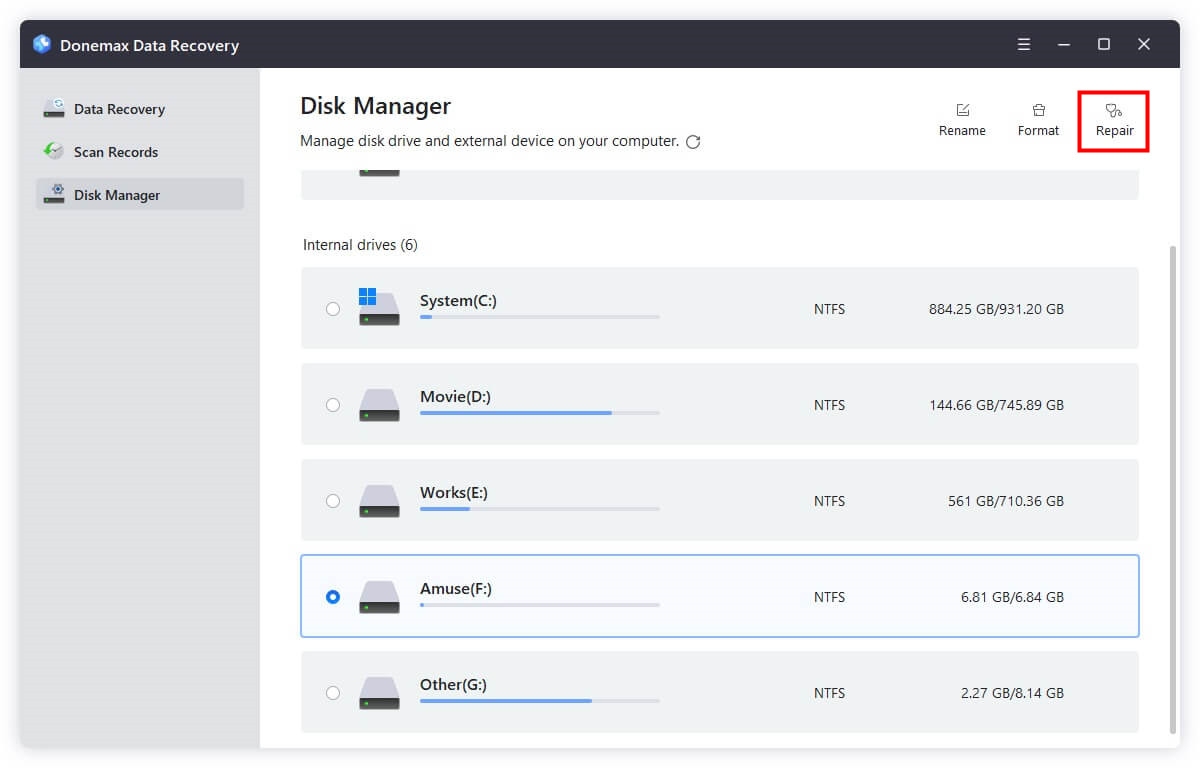
Third-party tools provide step-by-step instructions and a graphical interface, making the process simpler. However, be sure to choose reliable software to avoid data corruption or security issues.
Method 3: Format the RAW Drive (as a Last Resort)
If the methods above don't work, formatting the drive is often the final option. Formatting will erase all data, so ensure you've recovered everything important first.
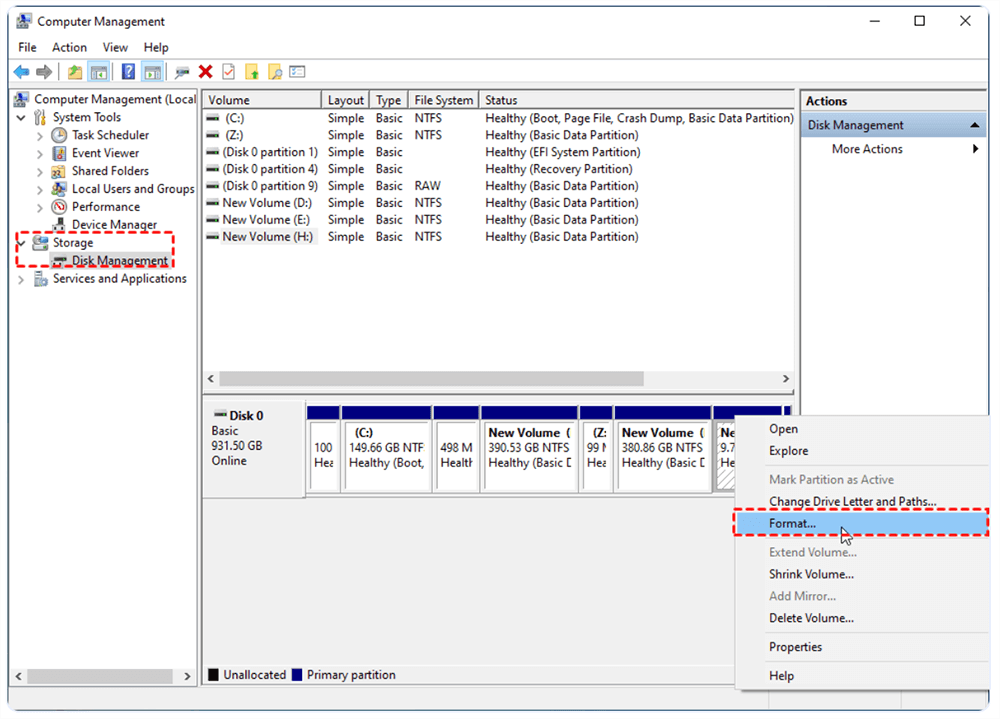
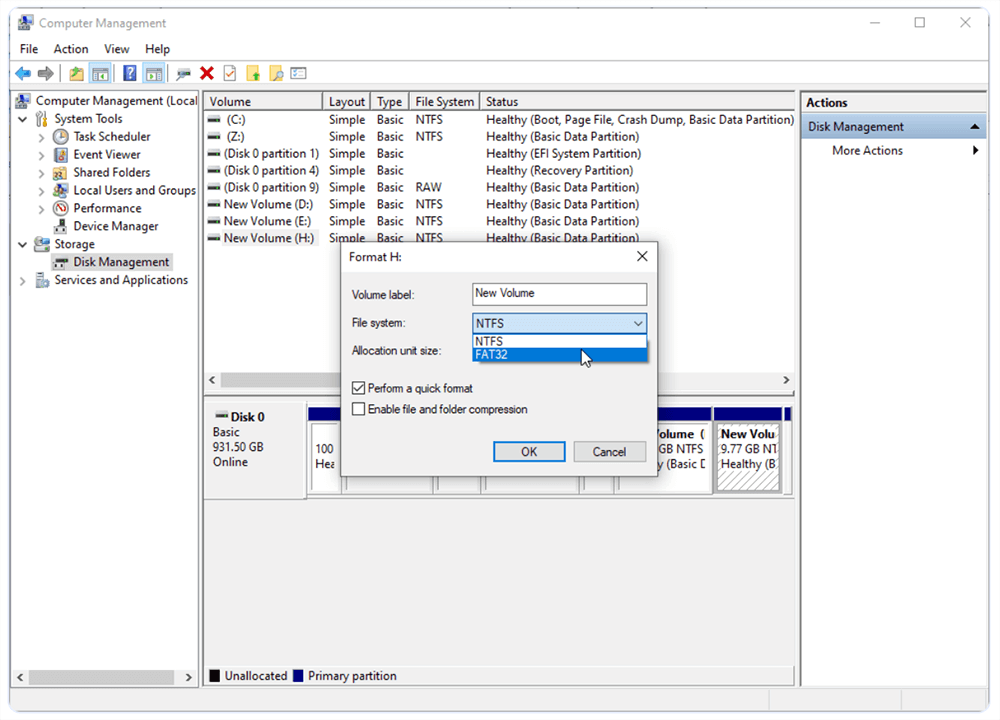
Once the format is complete, the drive will be usable again, but all previous data will be lost unless it was recovered beforehand.
Preventing your drive from turning RAW is possible by following a few best practices:
Encountering a RAW drive and the "CHKDSK is not available for RAW drives" error can be a daunting experience, especially when important data is at risk. The key to resolving this issue is to first recover your data and then attempt to convert or repair the drive. Using Command Prompt, third-party tools, or formatting can help restore your drive to a usable state, but always ensure that you have a reliable data recovery process in place before proceeding with any repairs.
With the right steps and preventive measures, you can effectively deal with RAW drive issues and avoid them in the future. Prioritize data safety and take immediate action to prevent data loss whenever a RAW drive problem arises.
Donemax Data Recovery
Powerful, safe & easy-to-use data recovery software. Easily and completely recover deleted, formatted, or other lost data. The tool supports PC, Mac, HDD, SSD, USB drive, camera, SD card, RAID and other storage devices.
Lucien
Lucien is a writer and a chief programmer of Donemax software who has worked in the company for 5+ years. He has written much of the content on the site and devotes to providing troubleshooting and solution for Windows and Mac users including disk cloning, data recovery, migration, eraser, error fixes.
Gerhard Chou
In order to effectively solve the problems for our customers, every article and troubleshooting solution published on our website has been strictly tested and practiced. Our editors love researching and using computers and testing software, and are willing to help computer users with their problems