
Written byChristinaUpdated on Jul 11, 2025
How to Use an USB Drive on Mac?
Approved byGerhard Chou
Before we start: The guide will show you how to set and use USB hard drive or flash drive on Mac. If the drive use NTFS file system, Donemax NTFS for Mac can help you enable writable access.
PAGE CONTENT:
USB drives have become an essential tool for external storage and transfer. The drives are convenient and portabiefor users across various platforms. If you're a Mac user, understanding how to set USB drives on Mac effectively can enhance your productivity. In this article, we will learn the entire process of using a USB drive on a Mac.
Types of USB Drives
Before diving into the usage of USB drives on a Mac, it's important to understand the different types available:
► USB Flash Drives
USB flash drives are tiny, lightweight storage units that attach to the USB connection on computers. They come in a variety of sizes, from a few gigabytes to many terabytes. The flash drives are perfect for file transfers. People frequently use thumb drive for regular operations like media storage and document exchange.
► External Hard Drives
External hard drives offer a larger storage capacity compared to flash drives. Users often use external disk for backing up significant amounts of files. These include entire system backups, photos, videos, and large software applications. These drives can be connected via USB and are usually bulkier than flash drives.
How to Use an USB Drive on Mac?
#1 Connect the Drive to a Mac
Connecting a flash drive or external disk to your Mac is a straightforward process. Here's how to do it:
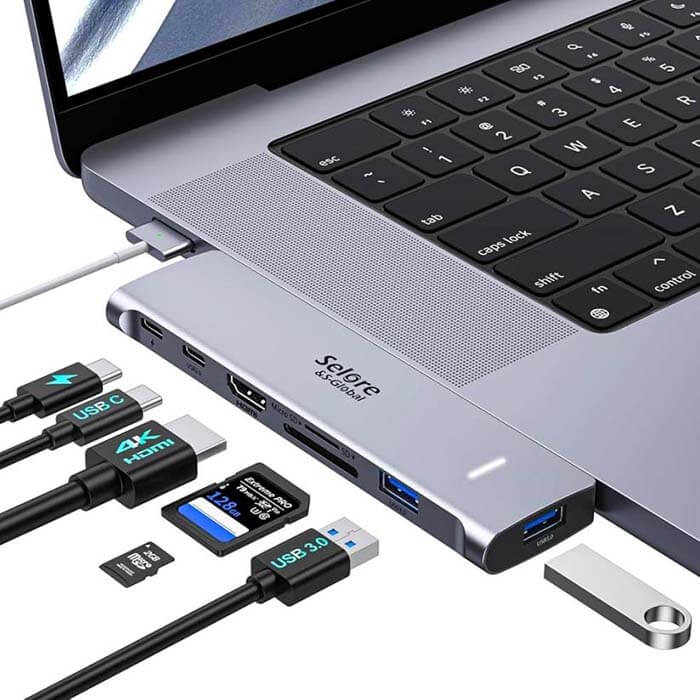
- Locate the USB Port: Most Macs come equipped with USB ports, either standard USB-A ports or USB-C ports. If your Mac has USB-C ports, you may need an adapter for standard USB drives.
![Locate the USB Port]()
- Insert the Drive: Gently insert the flash drive or USB disk into the appropriate port. Make sure you fully insert the drive until you feel resistance.
- Wait for Recognition: After connecting the drive, your Mac should automatically recognize it. You may hear a sound indicating the connection, and the drive icon should appear on your desktop.
Troubleshooting Tips for Connection Issues:
If Mac annot recognize your drive, try the following troubleshooting tips:
- Check the Port: Ensure that the USB port is functioning properly. Try connecting the drive to a different port on your Mac.
- Inspect the Drive: Check for physical damage on the drive itself. If possible, test it on another computer to see if it works.
- Restart Your Mac: Sometimes, restarting the system can solve the connection issues.
- Update macOS: Make sure your macOS operating system is up to date. Upgrading the system can solve the compatible issues in some cases.
#2 Access the Drive
After connecting the drive properly, you'll need to access it to manage your files.
- Open Finder: To launch a Finder window, click the Finder icon on your Dock.
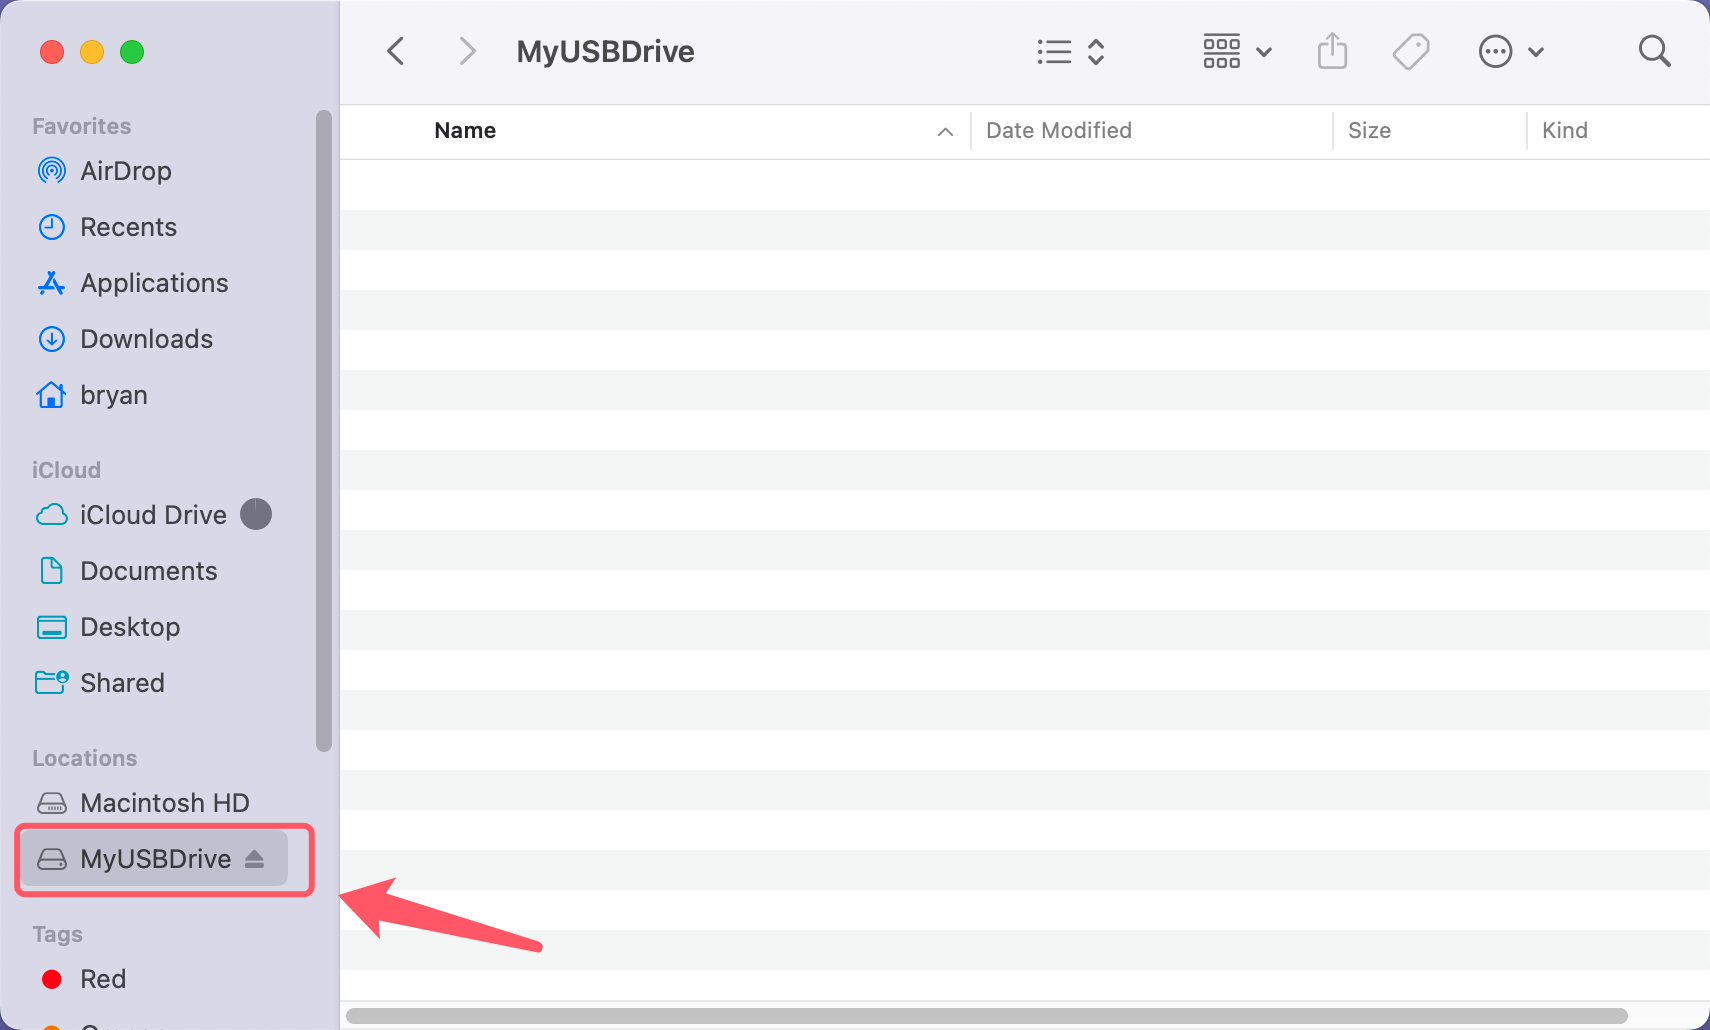
- Locate the Drive: In the Finder sidebar, look for your drive under the "Devices" or "Locations" section. It should display the drive name, often labeled as "Untitled" or a custom name you may have assigned.
![How to Find the USB Drive in Finder]()
- Click to Open: Clicking the flash drive or USB hard drive name to access its contents. The files and folders stored on the drive will appear in the Finder window.
#3 Use the Drive
Now that you've accessed the drive, let's explore how to use it effectively.
► Transferring Files to and from the Drive:
Transferring files to and from your drive is simple and you can do the job in multiple ways.
1. Drag-and-Drop Method
- Open the folder on your Mac containing the files you want to transfer.
- Select the files you wish to move.
- Drag the selected files to the drive or a specific folder.
2. Copy and Paste Method
- Select the files on your Mac that you want to move.
- Right-click and choose Copy (or press Command + C).
- Open the drive or a folder, right-click inside it, then select Paste (or press Command + V).
► Creating Folders on the Drive:
Organizing your files into folders can keep your drive tidy.
- Open the Drive: Access your drive in Finder.
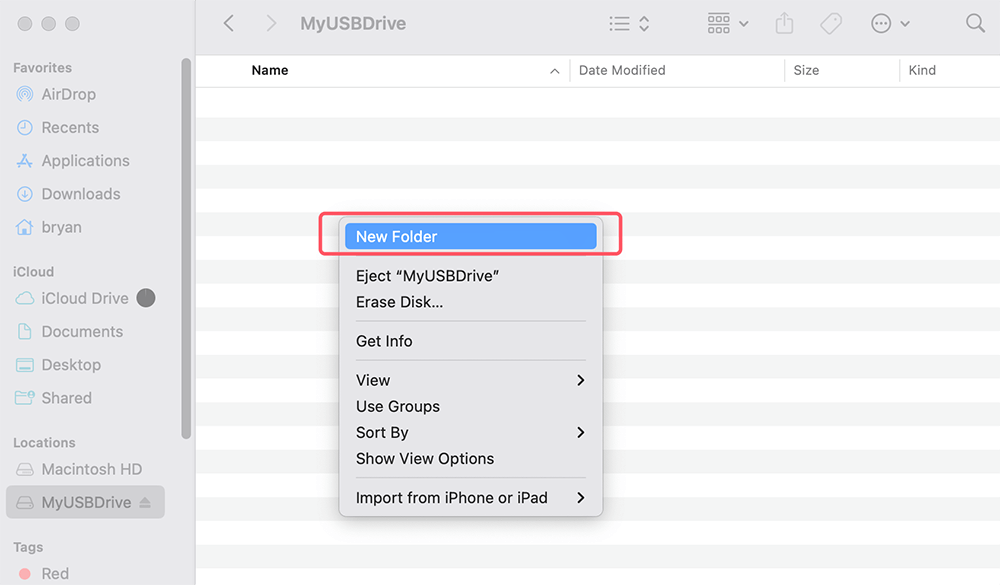
- Create a New Folder: Either hit Command + Shift + N or right-click in a blank area of the disk window and choose "New Folder."
![Creating Folders on the USB Drive]()
- Give the Folder a Name: Input the folder's name and hit Enter. For improved organization, you may now drag & drop files into this folder.
#4 Format the Drive
Sometimes, you may need to format your drive. Especially, when you have compatible issues or want to erase all data.
When and Why to Format:
- Changing File Systems: If macOS cannot recognize the drive because of file system (e.g., NTFS), you can format it to ExFAT or FAT32.
- Cleaning Up: If you're giving the drive away or no longer need the files, formatting erases everything securely.
How to Format Using Disk Utility:
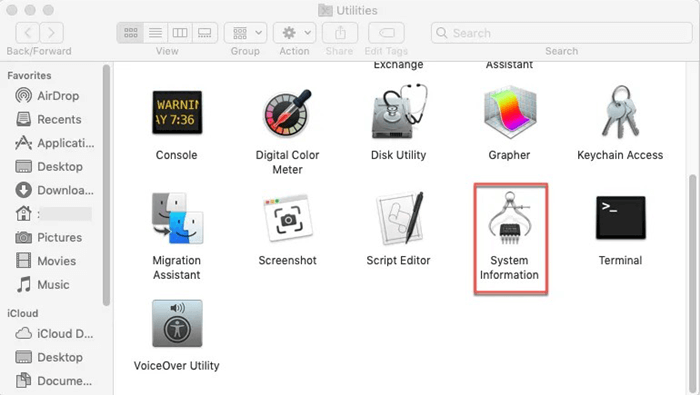
- Open Disk Utility: Use Spotlight (Command + Space) and type "Disk Utility." Press Enter to open the application.
- Select the Drive: In Disk Utility, locate and select your drive from the sidebar.
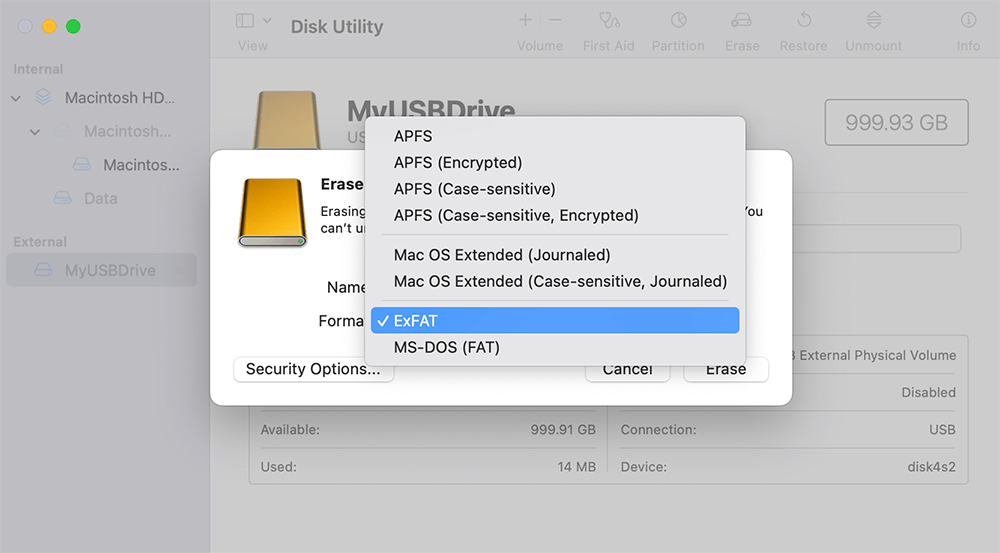
- Erase the Drive: Click on the "Erase" button at the top.
- Choose Format: You can choose exFAT or FAT32 for cross-platform compatible.
![Choose Format]()
- Name the Drive: Enter a name for the drive.
- Confirm Erasure: Click "Erase" to format the drive. Wait for the process to complete, then click "Done."
![Confirm Erasure]()


💡 Note: If you have lost data when formatting a drive on Mac, you can use Mac data recovery software. The software can deeply scan the formatted drive and get the lost data back.
How to Unformat Drive on Windows & Mac
Run data recovery software to deeply scan the formatted drive. Recover all deleted, formatted and lost files.
#5 Safely Eject the USB Drive
When you use a USB drive, your Mac may still be writing or reading data from it, even if you think you're done. Ejecting the drive ensures that all data transfers are complete. It can minimize the risk of corruption.
- Locate the Drive: Find the USB drive icon on your desktop or in Finder.
- Eject the Drive: Right-click on the USB drive icon and select Eject. Instead, you can click the Eject button next to the drive name in Finder.
![Eject the Drive]()
- Wait for Confirmation: Wait for the drive icon to disappear from the desktop before physically disconnecting the drive. This indicates that you can safely remove the flash drive or external drive.

Fix Issues When Using USB Drive on Mac
While using USB drives on a Mac is generally straightforward, you may encounter some common issues. Here are solutions for these problems:
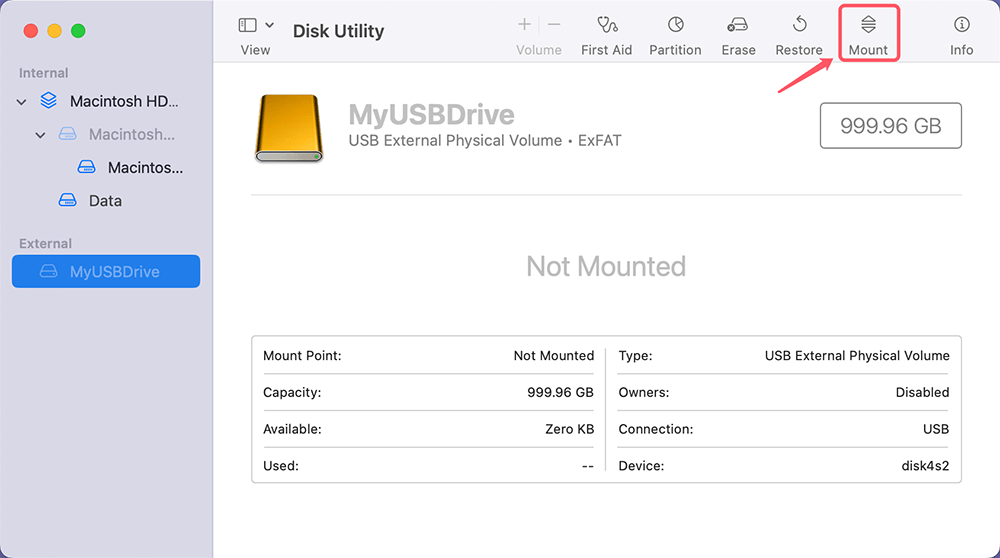
#1 USB Drive Not Mounting
If your USB drive doesn't appear on your desktop or in Finder:
- Check Connection: Ensure the drive is firmly connected and try a different USB port.
- Disk Utility: Open Disk Utility to see if it can recognize and mount the drive. If it appears, select it and click on the Mount option.
![Use Disk Utility]()
- Reformat if Necessary: If the drive is not mounting because of file system issues, you can format it.
(SOLVED) USB Drive Not Mounting on Mac
Find the solution to fix USB drive not mounting on Mac without losing data...
#2 Error Messages
You may encounter error messages when accessing the USB drive. Common errors include:
- "The disk you inserted was not readable by this computer": This usually indicates an incompatible file system. Reformatting the drive may be necessary.
- "The operation couldn't be completed": This can happen if there are permission issues or physical damage. Try using another computer to access the drive.
#3 USB Drive Read-only on Mac
If you cannot write data to the USB drive, you can check the file system of drive. If this drive is an NTFS drive, you can try these solutions to fix this issue:
- Use Disk Utility to format the USB drive to ExFAT, FAT32 or APFS, HFS+ which is compatible with macOS.
- Install an NTFS driver - such as Donemax NTFS for Mac, run it to enable writable for NTFS drive on Mac.
Conclusion
USB drives are invaluable tools for Mac users, providing a convenient means of storing and transferring data. By understanding how to connect, access, use, and safely eject USB drives, you can optimize your productivity and ensure your data remains secure. Whether you're backing up important files or sharing documents with others, mastering the use of USB drives will enhance your digital experience on your Mac.
FAQs About Using USB Drive on Mac
🇶1. How to format an USB drive for Mac?
Disk Utility, Terminal or third-party USB drive formatting tools can help you easily format an USB drive for Mac. For example, run Disk Utility and format the USB drive:
- Open Disk Utility and connect the USB drive to your Mac.
- Select the USB drive, click on Erase button.
- Select ExFAT or FAT32 as the Format, click on Erase button again.
- When it gets finished, click on Done button.
![How to format an USB drive for Mac]()
If you want to format the USB drive to NTFS, you can use third-party NTFS for Mac tool to force the drive to NTFS.
🇶2. How to mount an USB drive on Mac?
Just open Disk Utility, select the USB drive and click on Mount button.
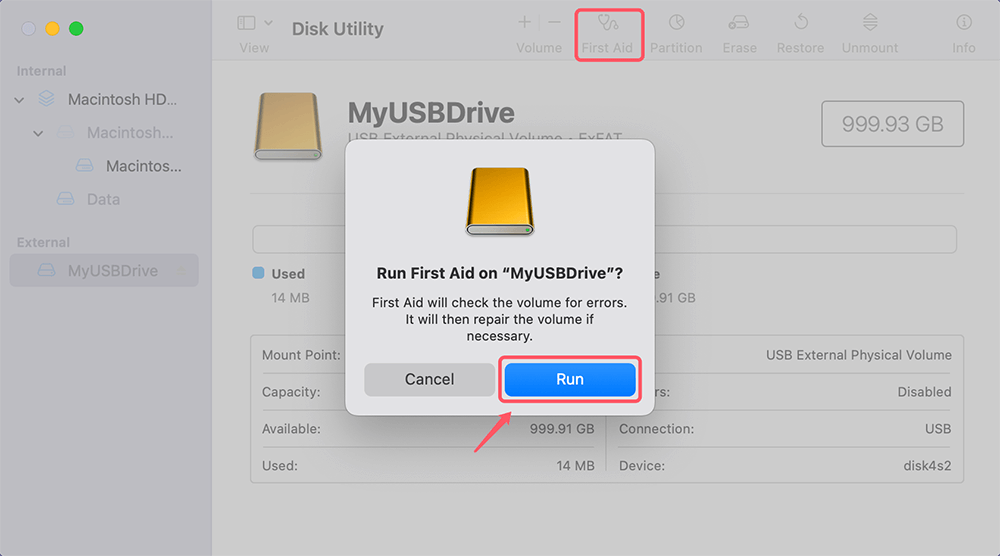
If Mount button is grayed out, just click on Erase button or Partition button to erase the USB drive, or click on First Aid button to repair the damaged USB drive.
🇶3. How to fix a corrupted USB drive on Mac?
Open Disk Utility, select the USB drive, click on First Aid button to repair the damaged file system.
🇶4. How to fix USB drive not showing up on Mac?
Here are some solutions you can try:
- Reconnect the USB drive to your Mac or try the USB drive on another Mac/Windows PC.
- Click Finder > Settings > click General and Sidebar, make sure External disks is selected.
- Open Disk Utility, select the USB drive, click on Mount button.
🇶5. Can I use an NTFS USB drive on Mac without formatting?
Yes, NTFS for Mac tool allows you to read-write NTFS drive on Mac without any limitation:
Step 1. Connect the USB drive to your Mac.
Step 2. Download and install the reliable NTFS for Mac tool - Donemax NTFS for Mac, then open it from Launchpad.
Step 3. Find and select the USB drive, click on Enable Writable button.

🇶6. Can I use the USB drive as the Time Machine backup disk?
Make sure the storage size of the USB drive is equal or bigger than the Mac's internal storage. Then use Disk Utility to format the USB drive to APFS or Mac OS Extended.
Open Time Machine, Click "Add Backup Disk" and set the USB drive as the backup disk.
Related Articles
- Jun 06, 2025Reformat External Hard Drive on Windows or Mac Without Losing Data
- Jul 01, 2024How to Delete Partition on Mac?
- Nov 13, 2024Apple M3 Chip vs. M4 Chip: A Comprehensive Comparison
- Apr 02, 20242025 Best 6 Disk Utility Alternatives for Mac
- May 26, 2024How to Add Pictures for Mac Background?
- Dec 09, 2024How to Use a Digital Camera on Mac: A Comprehensive Guide?

Contributing Writer
Christina
Christina is the senior editor of Donemax software who has worked in the company for 4+ years. She mainly writes the guides and solutions about data erasure, data transferring, data recovery and disk cloning to help users get the most out of their Windows and Mac. She likes to travel, enjoy country music and play games in her spare time.

Editor in chief
Gerhard Chou
In order to effectively solve the problems for our customers, every article and troubleshooting solution published on our website has been strictly tested and practiced. Our editors love researching and using computers and testing software, and are willing to help computer users with their problems
Hot Donemax Products

Clone hard drive with advanced clone technology or create bootable clone for Windows/Mac OS.

Completely and easily recover deleted, formatted, hidden or lost files from hard drive and external storage device.

Certified data erasure software - permanently erase data before selling or donating your disk or any digital device.