Best data recovery software - easily and completely recover deleted, formatted or lost files.
When we use the computer, everyone often encounters the computer's blue screen and crashes. The new Windows 11 is no exception. What problem causes our computers to have blue, black, and even green screens? How should we solve it?
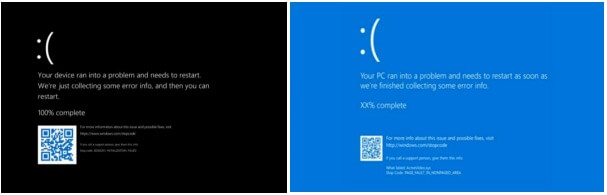
The blue screen of death error has always been a nightmare for Windows users. The main reasons for the blue screen are application crashes, faulty system operation, etc. And this error message has been there from Windows 3.0 to Windows 10. Some users in Windows 11 reported that the blue screen or black screen should be some problems with the original blue screen (just a way of presentation modified by Microsoft). So how do we safely restart when we encounter a black screen? Do as follows:
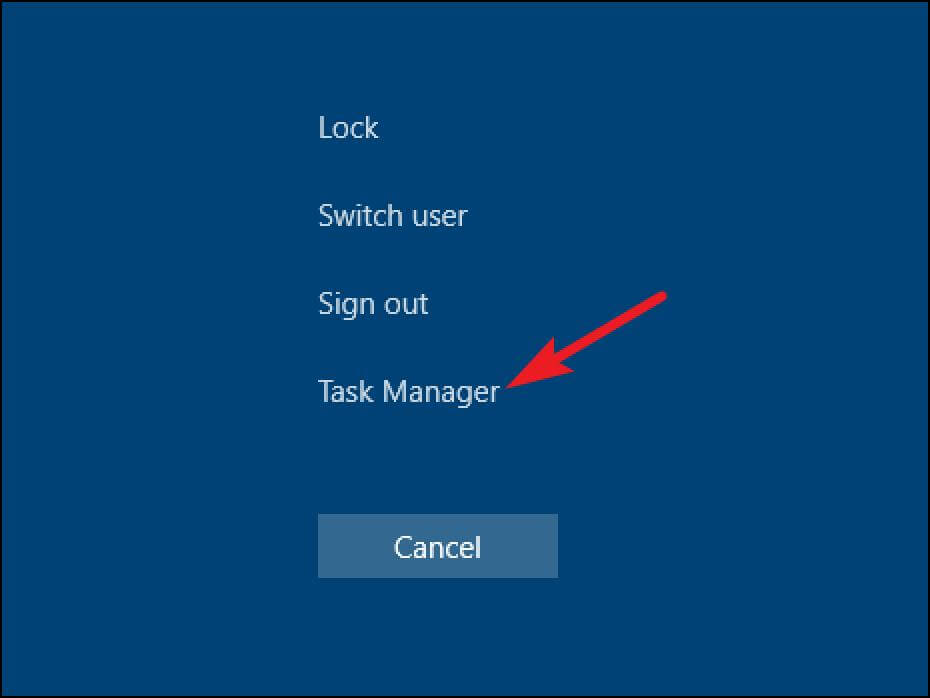
1. When the computer has a black screen, press the shortcut key "Ctrl+Shift+Esc" to open "Task Manager."
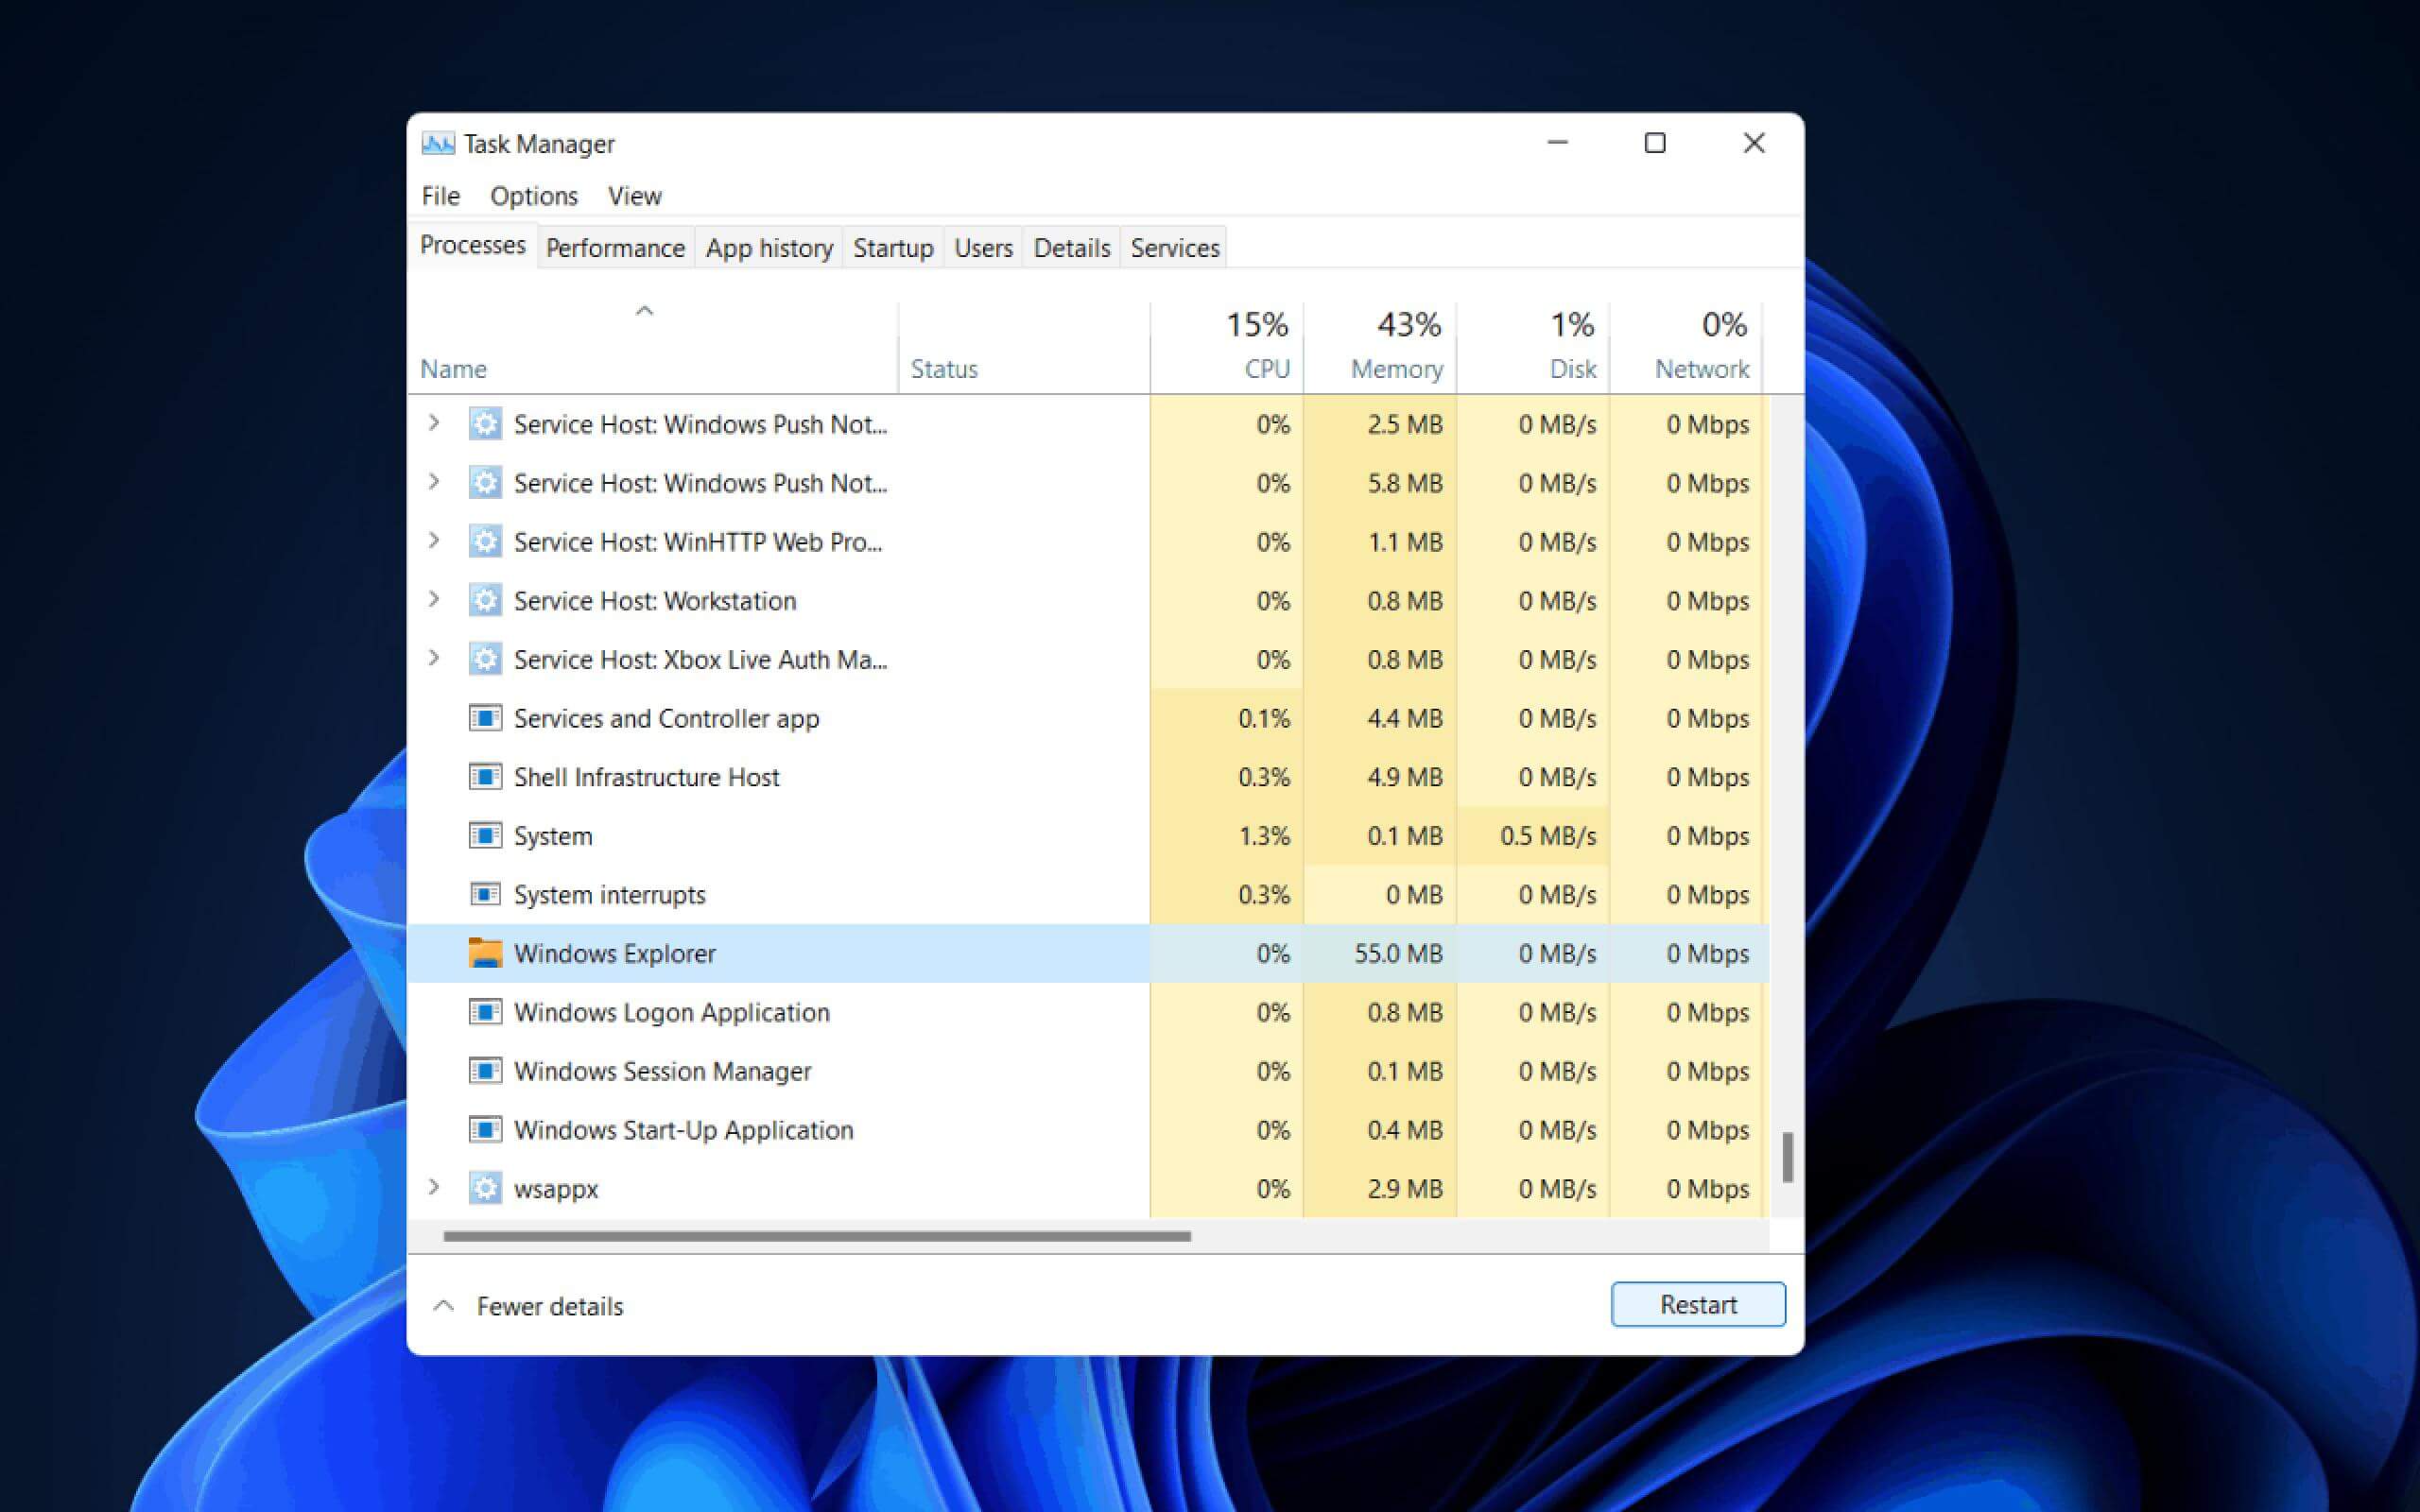
2. Then click "File" in the upper left corner and select "New File."
3. Then enter "explorer.exe" in it and click OK.
Reasons for Windows 11 Blue and Black Screen
Before we start talking about how to fix it, it's essential to understand why the blue screen occurs. You probably won't get a message with some error-checking values, but you can Google and find out why it's happening on your system. These problems can occur for various reasons, such as damaged hardware, driver issues, software or application incompatibilities, system file errors, etc.
Note: Some of the discussed methods may result in data loss. Therefore, if you cannot back up your system data, use reliable data recovery software to recover data from the affected Windows system. Donemax Data Recovery is recommended to restore your lost data quickly.
Follow the instructions below:
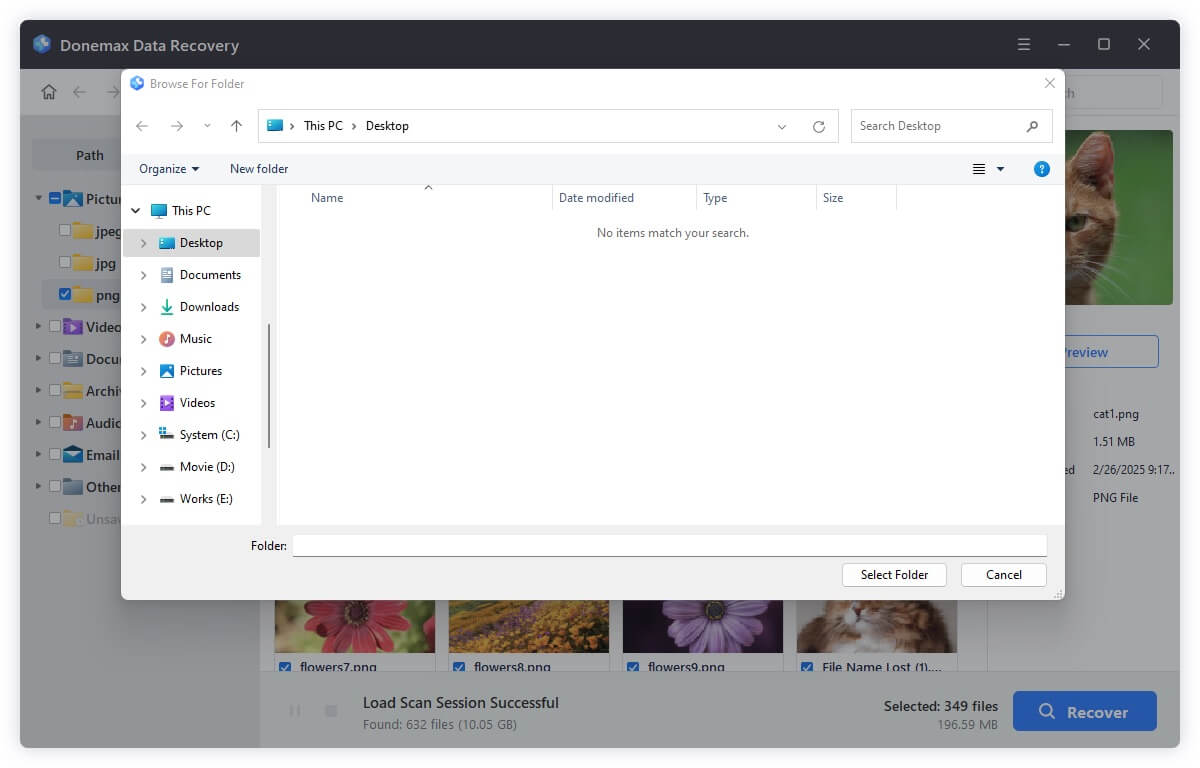
Step 1. Choose a location and start scanning
Launch Donemax Data Recovery Wizard and select the partition from which you lost data. Then, click Scan.

Step 2. Find the file you need.

Step 3. Select the file and click Restore to restore the file to a safe place.
Detailed Fixes for Windows 11 Black Screen of Death
Fix these issues as much as possible to make it safer to start your PC in safe mode and prevent any problems that might arise while fixing the freezing error.
How to start Windows 11 Safe Mode:
1. Reboot your PC, and the moment it starts showing you the Windows Logo on the monitor screen, reboot it again.
2. Repeat this step two more times, and after that, it should reach the automatic repair environment.
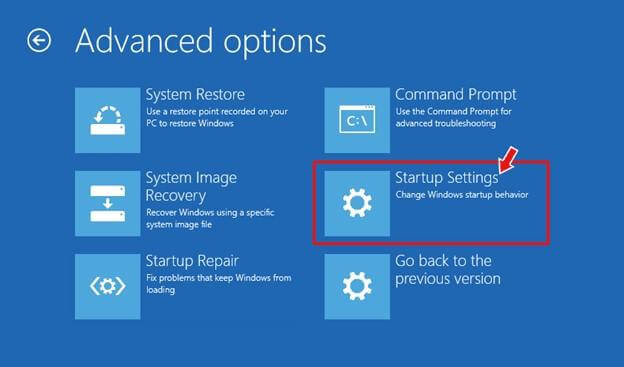
3. There, click Advanced options > Troubleshoot > Advanced options > Startup Settings.
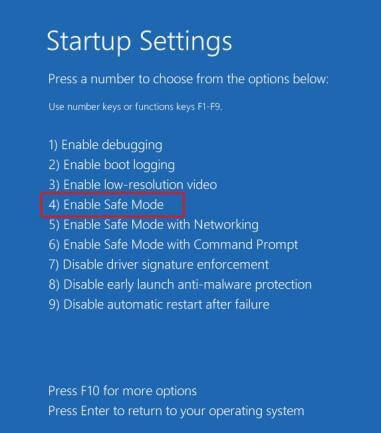
4. Click Restart, and once the system is rebooted, press F4 to enable safe mode.
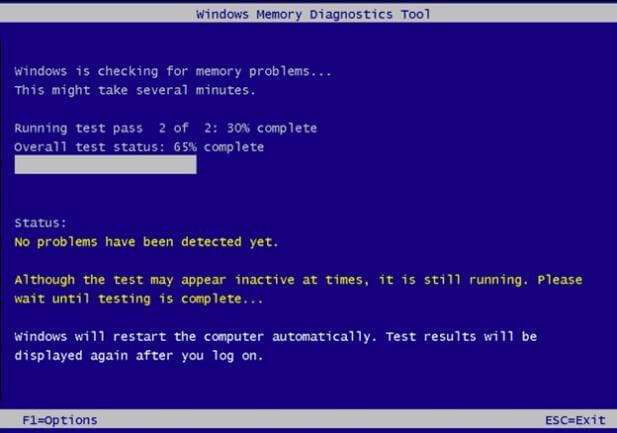
Method 1: Run the Windows Memory Diagnostic Tool
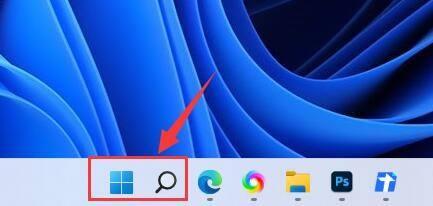
1. Type "Windows Memory Diagnostics" in the Windows search box and open it.
2. Select Restart now and check for problems (recommended).
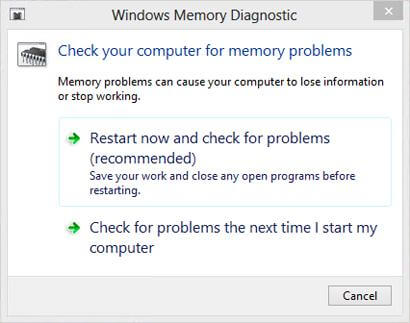
3. After restarting the PC, the diagnosis interface will appear. After the diagnosis is over, restart the PC again to check whether the repair is completed.
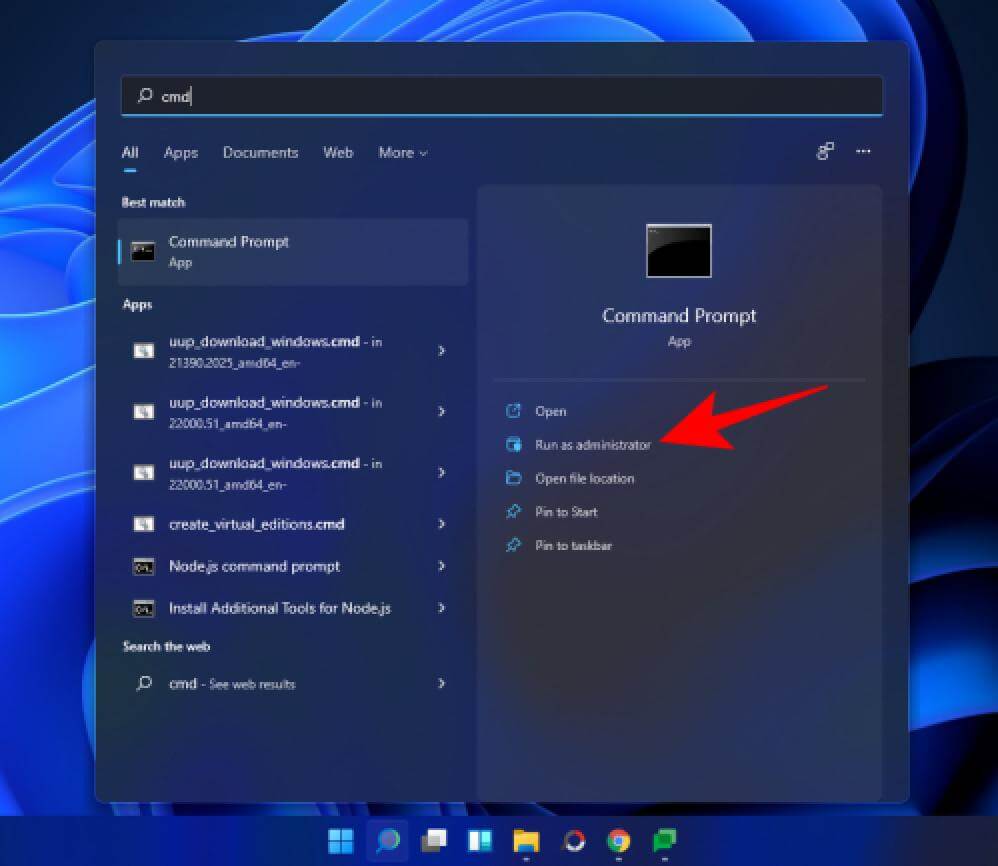
Method 2: Run An SFC Scan
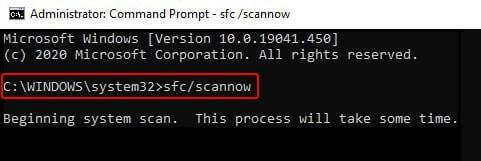
1. Run the Command Prompt utility as an administrator. Click the search button at the bottom of the screen, enter cmd, and select "Run as administrator" on the right
2. In the Command Prompt window, type SFC /scannow and press Enter.
3. The process may take some time, check if the error disappears after completion.
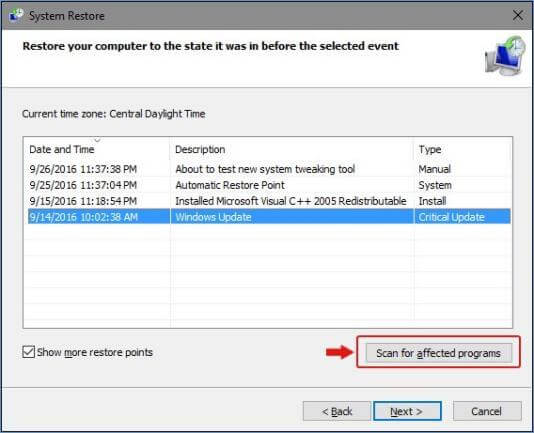
Method 3: Perform A System Restore
1.In the Windows search box, type "Create a restore point" to open it, Under System Protection, click System Restore.
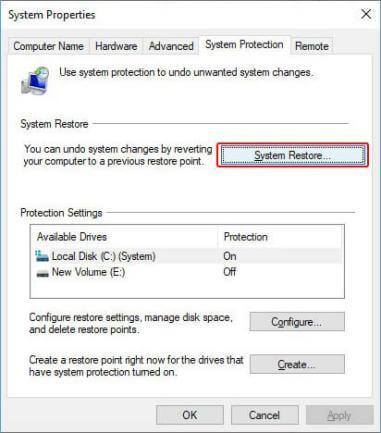
2. Then select Next > Next and select a restore point, then click Scan for affected programs. The process will scan for programs, applications, and files affected by this process. When done, select Next, then Finish to end it.
Note: This method will restore your device to default or selected restore point, affecting your applications, programs, system files, etc. To recover your data, we recommend using the powerful data recovery software Donemax Data Recovery to recover your lost data.
Method 4: Update/Rollback/Disable/Uninstall Device Driver
Update device drivers:
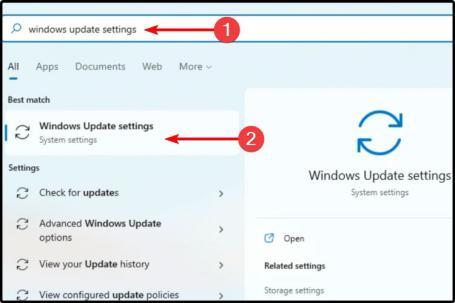
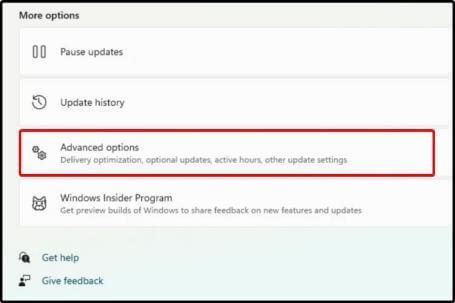
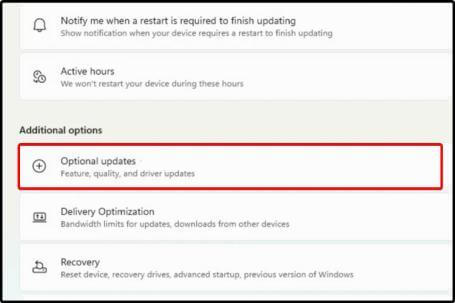
1.Press the Windows key, then type Windows Update Settings and click it. Choose advanced options. Click Optional Updates.
2. In the displayed list of available drivers, select the driver you want to install and select "Download & Install".

Roll back the driver:
1. Press and hold Windows+Q on the keyboard, search for the keyword Device Manager and open it.
2. In the Device Manager, right-click the selected item and select Properties.
3. Switch to Driver in the Properties panel.
4. Click Rollback Driver.
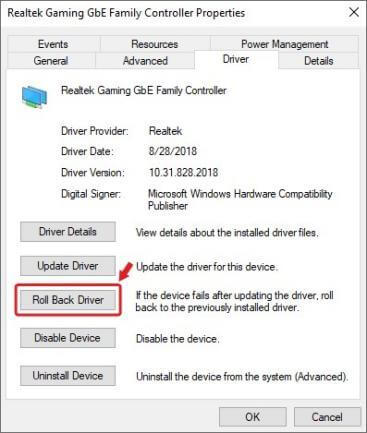
Disable device drivers:
In the Rollback Driver screen, you can also disable the device.
Uninstall the device driver:
You can also delete the driver for this device when rolling back the driver.
Donemax Data Recovery
Hot Articles
- How to Enable Secure Boot for Windows 11(Complete Guide)
- The Difference between Windows 11 and Windows 10| Windows 11 VS Windows 10
- Should You Upgrade to Windows 11? What Benefits of Windows 11?
- TPM for Windows 11 Update | Windows 11 Download Without TPM 2.0
- Windows 11 Home VS Professional: The Differences and Similarities
- What to Do When Windows 11 Not Booting|Fixes to Get Your PC Running
- How to Enable TMP 2.0 for Windows 11 Upgrade
- Fixes to Get Rid Of Windows 11 Black and Blue Screen of Death
- Solutions to Fix 'Cannot Download Windows 11' Issue
- Reinstalling Windows 11 Without Data Loss (Best Solution)