Written byLucienUpdated on Apr 17, 2026
Permanently Wipe External Drive: 100% Secure & Unrecoverable
Approved byGerhard Chou
Before we start: If you will sell, donate or dispose of an old external hard drive, you can use disk wipe software - such as Donemax Data Eraser to clean the external hard drive. It will securely and permanently erase all data (existing data and deleted/formatted data included) from the external hard drive, no trace left.
PAGE CONTENT:
External hard drives are invaluable tools for storing large volumes of data, performing backups, and transferring files between devices. However, over time, these drives can become cluttered, infected with malware, or simply filled with old data you no longer need. Whether you're trying to speed up your device, get rid of sensitive information, or prepare the drive for resale, cleaning your external hard drive properly is crucial. In this comprehensive guide, we'll walk you through how to clean an external hard drive safely and effectively - step by step.
Why Clean Your External Hard Drive (HDD or SSD)?
Cleaning an external hard drive can mean different things depending on your goals:
- Freeing up space by deleting unnecessary files.
- Removing malware or corrupted data.
- Resetting the drive before giving it away or selling it.
- Improving drive performance by eliminating junk and fragmentation.
- Organizing files for better efficiency.
Understanding what kind of "clean" you need helps you choose the best approach -whether it's a simple cleanup, a format, or a full secure wipe.
Make sure to copy any important files to another storage medium or a cloud service such as Google Drive, OneDrive, or Dropbox. Formatting or wiping a drive will erase everything, and deleted files are not always recoverable without specialized software.
Top 4 Methods to Clean an External Hard Drive
Choose a method to wipe your external hard drive clean.
Method 1. Manual File Cleanup
This method involves selectively deleting unnecessary files.
- Plug in your external hard drive.
- Open File Explorer (Windows) or Finder (Mac).
- Browse through folders and delete redundant files.
![Delete All Files from the External Hard Drive]()
- Empty the Recycle Bin (Windows) or Trash (Mac) to permanently remove files.

This is suitable when you just need to free up some space, but it won't remove hidden system files or malware. The deleted files are not lost permanently and can be recovered by data recovery software.
Method 2. Use Built-in Cleanup Tools
Windows: Disk Cleanup
- Type Disk Cleanup in Windows search box, and open Disk Cleanup.
- Select your external drive.
![Select your external drive]()
- Choose file types to delete (Temporary files, Recycle Bin contents, etc.).
![Choose file types to delete]()
- Click OK and then Delete Files.


Method 3. Format the External Hard Drive
If you want a more thorough clean, formatting is ideal. It wipes the file system clean and sets up the drive as new.
📍 Warning: Formatting erases all data on the drive. Back up before proceeding.
How to Format on Windows:
- lug in the external drive.
- Open File Explorer and right-click the drive.
- Select Format.
![Select Format]()
- Choose a file system:
- NTFS – Best for Windows-only use.
- exFAT – Cross-compatible with Windows and macOS.
- FAT32 – Older standard, 4GB file size limit.
- Uncheck Quick Format for a deeper clean (optional).
![Uncheck Quick Format for a deeper clean]()
- Click Start.


How to Format on macOS:
- Open Disk Utility.
- Select your external drive from the left panel.
- Click Erase.
- Choose a format:
- APFS – Ideal for macOS systems.
- ExFAT – Best for use between Windows and Mac.
- Click Erase.
![How to Format on macOS]()

Formatting removes viruses, corrupt system files, and unwanted data, making your drive function like new.
Method 4. Securely Wipe the External Hard Drive (Permanent Erasure)
Formatting an external hard drive removes the file system and clears directory structures, but it doesn't completely erase the underlying data. In fact, with the help of data recovery tools, formatted data can often be restored unless it's been properly overwritten. That's why when privacy and security are a concern - such as before donating, selling, or recycling a drive - a secure wipe is essential.
Secure wiping refers to the process of overwriting every sector of the hard drive with random data or specific patterns to ensure that no information can be retrieved, even by advanced forensic tools.
If these remnants fall into the wrong hands, the consequences can range from identity theft to corporate espionage.
How Secure Wipe Works?
Secure wipe utilities overwrite every bit of the disk with new data - often multiple times. Common methods include:
- Single-pass overwrite: Data is replaced once with random bits or zeros.
- 3-pass DoD 5220.22-M standard: Overwrites the drive three times: first with a specific character (e.g., 0s), second with its complement (e.g., 1s), and third with random characters.
- 7-pass overwrite (NSA standard): More extreme method used by the U.S. government for top-secret data. Slower but more secure.
While a single pass is usually sufficient for consumer-level wiping, multi-pass options add extra layers of security.
Best Secure Wipe Tool - Donemax Data Eraser
If you want to wipe an external hard drive clean, you can try Donemax Data Eraser which offers erasure methods including HMG Infosec Standard 5, NIST 800-88, Peter Gutmann's algorithm, DoD 5220.22-M, U.S. Army AR380-19, DoD 5220.22-M ECE, etc. Once the data is erased by Donemax Data Eraser, the data is lost for good, can't be recovered by any method.
Step 1. Download and install Donemax Data Eraser on your PC or Mac and connect the external hard drive to your Mac.
Step 2. Open Donemax Data Eraser, choose Erase Hard Drive mode. Then select the external hard drive.

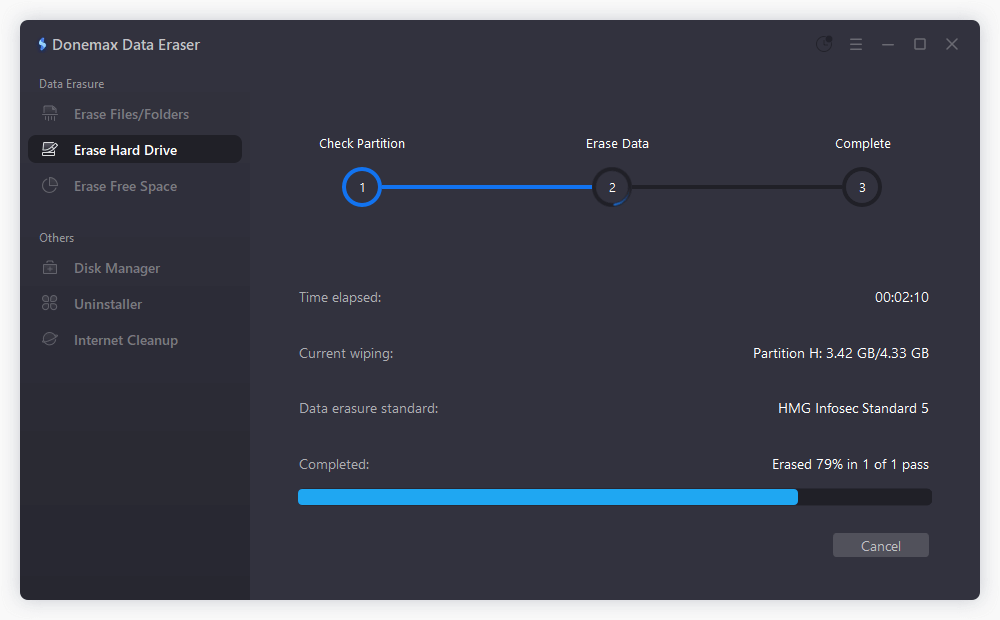
Step 3. Click on Erase Now button. Then Select a data erasure standard, click on Continue button to wipe the external hard drive.

Now, it will securely and permanently erase all data (including existing data, hidden data, deleted/formatted/lost data) from the external hard drive.
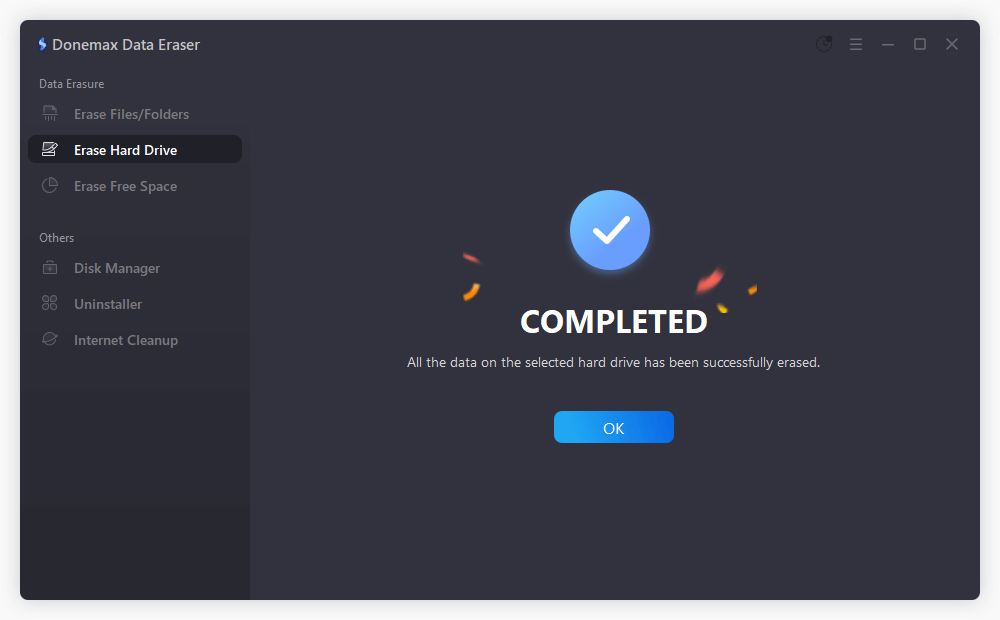
Once the process gets finished, all data stored on the external hard drive is lost for good, can't be recovered by any method.
Time Considerations
The time it takes to securely wipe a drive depends on:
- Drive size
- Number of overwrite passes
- Drive type (HDD vs. SSD)
- Interface (USB 2.0 vs. USB 3.0 or USB-C)
For example:
- A 1TB HDD with 1-pass wipe = ~1-2 hours
- A 1TB HDD with 7-pass wipe = ~6-10 hours
- SSDs = Much faster with encryption + secure erase commands
Verifying the Wipe
Some tools provide logs or confirmation once wiping is complete. If you're extra cautious, try running a recovery program like Donemax Data Recovery afterward to confirm no data can be recovered.
Clean an External Hard Drive with Errors or Corruption
If your external hard drive is malfunctioning or showing file system errors, these steps may help:
1. Run CHKDSK (Windows)
- Open Command Prompt as administrator.
- Type:
chkdsk X: /f /r /x
![Run CHKDSK (Windows)]()
Replace X: with your external drive's letter.
- Let the system scan and repair errors.

2. Use First Aid (macOS)
- Open Disk Utility.
- Select the external drive.
- Click First Aid and let it check/repair file system issues.
![Use First Aid (macOS)]()

3. Reformat the Drive
If errors persist, reformatting the drive will reset the file system. Just make sure to back up salvageable data beforehand.
4.Consider Professional Recovery Tools
If your drive is unreadable:
- Use tools like Donemax Data Recovery to recover data before cleaning.
- If that fails, professional data recovery services may be necessary.
Tips After Cleaning Your External Hard Drive
After you've cleaned your external hard drive, follow these practices to keep it running smoothly:
◾Safely Eject the Drive: Always eject the drive properly before unplugging to prevent data corruption.
◾Recheck Available Storage: Go to File Explorer or Finder and verify that your storage space reflects the cleanup effort.
◾Create an Organized File Structure: Group your files into logical folders (e.g., Documents, Media, Backups) to avoid future clutter.
◾Enable Antivirus Scanning: Set your antivirus software to scan external drives automatically on plug-in.
◾Set a Cleanup Routine: Schedule regular maintenance (e.g., once a month) to keep your external drive optimized.
FAQs About Cleaning an External Hard Drive
Not quite. Cleaning can involve removing files manually, while formatting resets the entire file system. For full cleanup, formatting is more thorough.
Manual cleanup may not detect hidden malware. Formatting and antivirus scans are recommended for virus removal.
If the drive was quick-formatted, data might still be recoverable using recovery tools. Secure wipes, however, make data nearly impossible to recover.
Use a secure wipe tool like Donemax Data Eraser, DBAN or CCleaner with multiple overwrite passes to ensure no data can be recovered.
- NTFS – Windows-only systems.
- exFAT – Cross-platform compatibility.
- APFS – macOS-specific.
Choose based on how and where you'll use the drive.
Conclusion
Cleaning an external hard drive can range from simply deleting junk files to performing a secure wipe before resale. The method you choose depends on your goal - freeing up space, improving performance, removing viruses, or protecting personal data.
To recap:
- Always back up important data first.
- Scan for malware and check the health of the drive.
- Use manual cleanup, built-in tools, or formatting as needed.
- Perform a secure wipe when data privacy is essential.
- Maintain your drive with regular cleanups and safe handling practices.
A well-maintained external hard drive lasts longer, performs better, and gives you peace of mind when storing or transferring critical data.
Donemax Data Eraser
One of the best data erasure programs for permanently erase data from PC, Mac, HDD, SSD, USB drive, digital camera and other devices. Once the data is erased, it is lost for good, cannot be recovered by any method.
Related Articles
- May 30, 2025How to Wipe A Drive with CCleaner?
- May 06, 2024How to Factory Reset Gopro HERO12 Black Before Selling or Donating It?
- Sep 11, 2025Wipe Operating System and User Data from My Computer
- Jan 08, 2024What Is Drive Eraser or Drive Wiper for Windows?
- Mar 05, 2026How to Wipe A Hard Drive on Windows 11/10/8/8.1/7?
- Jul 02, 2024How to Securely Wipe SSD Without Shortening the Service Life of the SSD?

Contributing Writer
Lucien
Lucien is a writer and a chief programmer of Donemax software who has worked in the company for 5+ years. He has written much of the content on the site and devotes to providing troubleshooting and solution for Windows and Mac users including disk cloning, data recovery, migration, eraser, error fixes.

Editor in chief
Gerhard Chou
In order to effectively solve the problems for our customers, every article and troubleshooting solution published on our website has been strictly tested and practiced. Our editors love researching and using computers and testing software, and are willing to help computer users with their problems