Written byStevenUpdated on Sep 14, 2026

Before we start: Are you planning to sell, donate, or recycle your external hard drive? Or maybe you just need to give an old drive a fresh start for a new project? Before you hand over or repurpose your storage device, there is one crucial step you cannot afford to skip: wiping your data completely. Donemax Data Eraser can wipe the data permanently from external drive and prevent data recovery.
PAGE CONTENT:
Many people assume that deleting files and emptying the Recycle Bin or Trash is enough. Unfortunately, standard file deletion leaves your sensitive personal documents, financial records, photos, and password files fully recoverable using basic data recovery software. Even formatting a drive only clears the file directory, leaving the raw underlying data intact until overwritten.
If you want to ensure your private files are destroyed beyond any possibility of retrieval, you need a complete and permanent wipe. In this comprehensive guide, we will walk you through exact step-by-step methods to permanently wipe an external hard drive on both Windows and Mac operating systems.
Before diving into the steps, it is vital to understand why standard formatting does not guarantee total privacy.
Standard Formatting (Quick Format)
When you perform a standard format on Windows or Mac, the operating system creates a new file table and marks the storage space as 'available.' However, your original files remain untouched on the disk sectors. Data recovery programs can easily rebuild these files in just a few clicks.
Three Methods to Recover Quick Formatted Hard Drive
Donemax Data Recovery can deeply scan the quick formatted hard drive (SSD included) and find all deleted/erased files.
Complete Data Wiping (Data Sanitization)
Data wiping completely overwrites every single sector on the external hard drive with binary zeros, ones, or random pseudorandom patterns. This process destroys the underlying code of original files. Once a drive is wiped using secure sanitization standards, no recovery tool or forensic specialist can restore the lost data.
Wiping a drive is a permanent action. Once completed, the data is gone forever. Follow these critical preparation steps before beginning:
Windows offers several built-in methods as well as specialized software solutions for drive wiping. Here are the most effective ways.
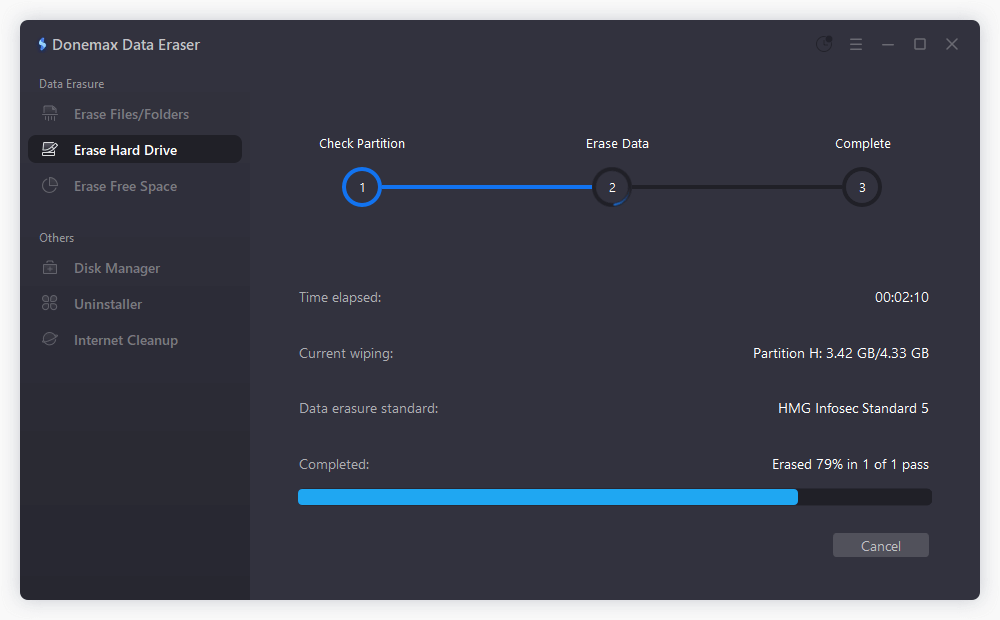
For complete peace of mind, using dedicated data erasure software is the fastest and safest approach. Donemax Data Eraser provides military-grade data sanitization algorithms that render data recovery impossible while preventing hardware damage.
Step 1: Connect Your Drive. Download and install Donemax Data Eraser on your Windows PC. Connect your external hard drive via USB.
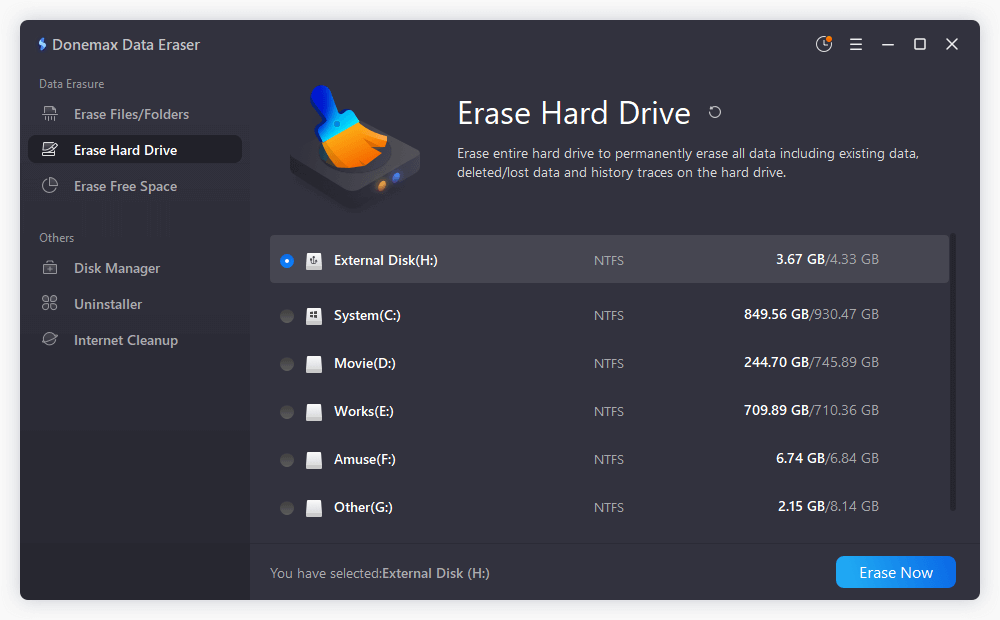
Step 2: Choose Wipe Mode. Launch the software and select the 'Erase Hard Drive' mode from the left navigation panel. Select your external hard drive from the list of storage devices and click the 'Erase Now' button.
Step 3: Select Erasure standard. Choose a data erasure standard from the drop-down list. Donemax Data Eraser supports international sanitization standards including DoD 5220.22-M, U.S. Army AR380-19, and Peter Gutmann 35-pass wiping algorithms
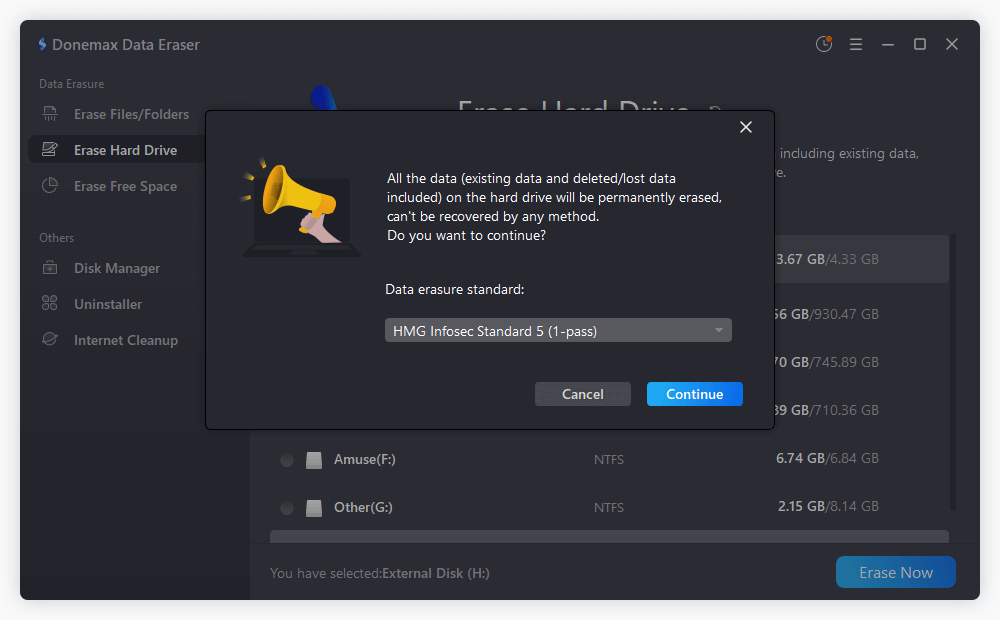
Step 4: Execute Wipe. Click the 'Continue' button. Confirm the operation to start overwriting every sector of the external drive. Once the wiping process is done, all data on the external hard drive is gone forever. There will be no chance to recover the wiped data in any way.
Windows includes a built-in command line utility called Diskpart that can overwrite an external drive with zeros.
Step 1: Open Command Prompt. Press Windows Key + X and select 'Command Prompt (Admin)' or 'Terminal (Admin)'.
Step 2: Launch Diskpart. Type 'diskpart' and press Enter.
Step 3: List Disks. Type 'list disk' and press Enter. Carefully identify your external hard drive by its size (e.g., Disk 1 or Disk 2).
Step 4: Select Disk. Type 'select disk X' (replace X with your exact external disk number) and press Enter.
Step 5: Run Clean All. Type 'clean all' and press Enter. This command overwrites every block on the disk with zeros.
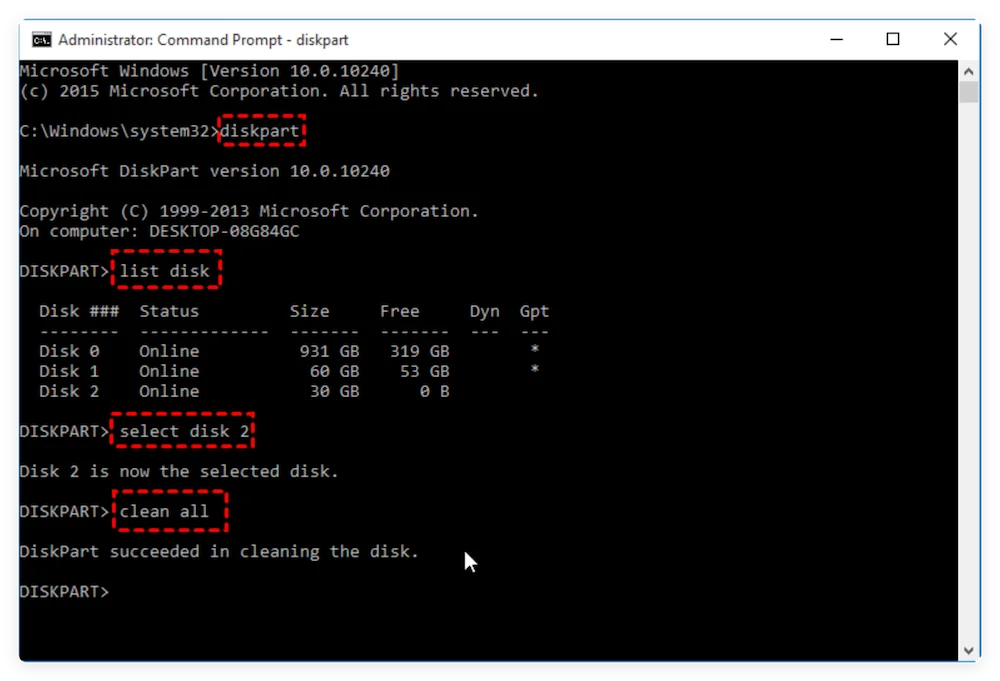
Note: The 'clean all' command does not display a percentage progress bar. The cursor will flash until the operation finishes, which may take hours for large external drives.
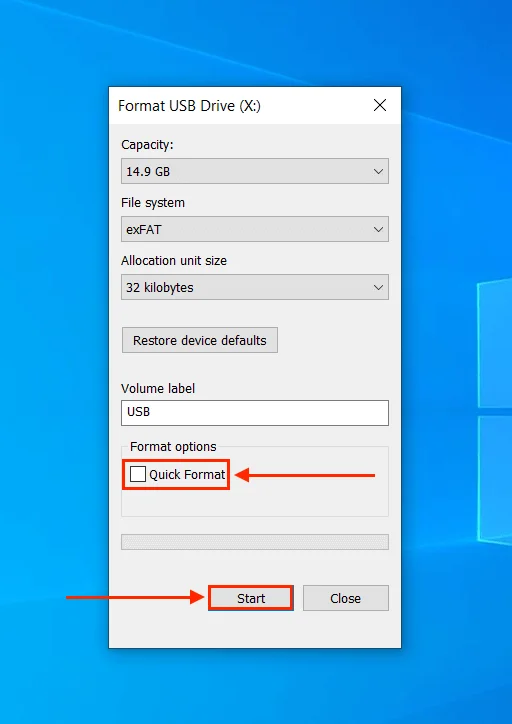
If you prefer a graphical interface without extra software, a Full Format on Windows 10/11 overwrites data with zeros.
Step 1: Open Explorer. Open 'This PC' in File Explorer.
Step 2: Start Format. Right-click your external drive and select 'Format'.
Step 3: Uncheck Quick Format. UNCHECK the box that says 'Quick Format'. Leaving it unchecked forces Windows to perform a full write format.
Step 4: Begin Process. Click 'Start' and confirm the warning prompt.
It is essential to treat Traditional Mechanical Hard Drives (HDD) and Modern Solid State Drives (SSD) differently during sanitization.
Whether you are transferring ownership of an external drive, disposing of old electronics, or clearing corporate storage, completely wiping your external hard drive is vital for protecting your private data.
While built-in tools like Windows Command Prompt (diskpart clean all) and Mac Disk Utility offer decent manual solutions, dedicated utilities like Donemax Data Eraser provide the fastest, safest, and most reliable method to ensure 100% unrecoverable data erasure across both Windows and Mac.
Donemax Data Eraser
The best data erasure program to permanently delete data. It works on PCs, Macs, HDDs, SSDs, USB drives, digital cameras, and other devices. Once the tool erases the data, no one can recover it by any method.
Steven
Steven has been a senior writer & editor of Donemax software since 2020. He's a super nerd and can't imagine the life without a computer. Over 6 years of experience of writing technical solutions and software tesing, he is passionate about providing solutions and tips for Windows and Mac users.
Gerhard Chou
In order to effectively solve the problems for our customers, every article and troubleshooting solution published on our website has been strictly tested and practiced. Our editors love researching and using computers and testing software, and are willing to help computer users with their problems