
100% Effective data recovery software to completely recover deleted, formatted and lost files.
Quick Navigation:
Windows 11 has been launched just recently, and everything about it is just excellent and appreciable. Moreover, Microsoft has introduced various new features, and all of them are just considerable.
Well, the only issue which most of the users are facing is in formatting and unformatting the hard drive on Windows 11. Multiple tools and methods are available to resolve this issue. We have described a few of the most commonly used approaches, which are pretty easy to follow!
Part 1. Format VS Unformat
The Format is a process of deleting all the files and preparing the storage for new files. Every one of us feels the need to format many times. For example, if viruses have infected your hard drive or hard drive has a RAW file system or if Windows report the disk is not formatted.
In addition to that, if you won't sell your PC or give it to someone that it's far better to format the hard drive. We want to get some space for the new files and therefore try to format the hard drive.
While at the other side, Unformat is recovering all the deleted files from formatted storage. As many times, we delete multiple crucial files just accidentally. So, unformat lets you recover all of your files deleted as a result of formatting. And for this purpose, you may have to install third-party software to help you do this job.
Part 2. Two Methods to Format Hard Drive on Windows 11
The following are the ways to format the hard drive on Windows 11. The first method can help you securely and quickly format hard drive on Windows 11 without third party software. However, the formatted data can be recovered. If you will sell your Windows 11 PC, you can use the second method to help you format and wipe your hard drive so that the lost data can not be recovered. Just choose one of the methods depending on your needs.
Method 1. Format hard drive with Disk Management.
Step 1. Open the Start menu and then type in Disk Management. Find and open Disk Management.
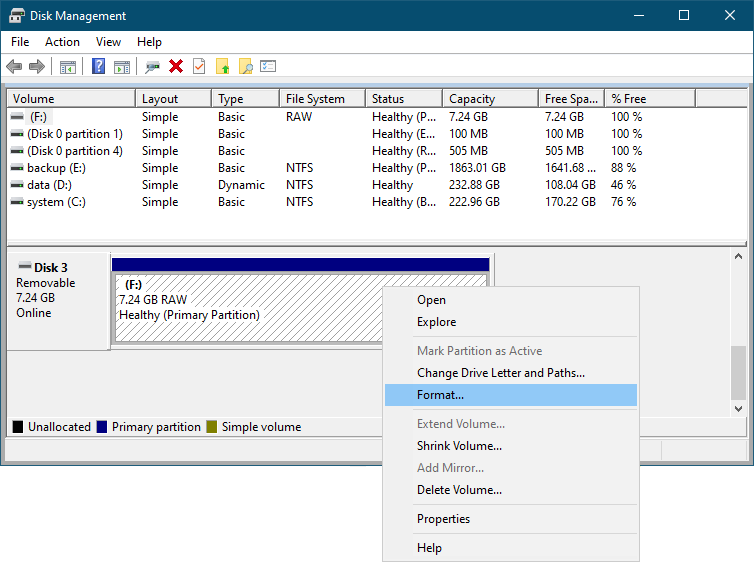
Step 2. Right-click on a volume which you are interested in formatting or wiping.
Step 3. Click on the Format.
Step 4. A message will appear on the screen from that message, and you will get a few options like changing the volume's name, file system, and many more.
Step 5. Choose to Perform a quick format. And if you want a thorough wipe that can delete all the unnecessary files, you would have to untick the Perform a quick format option.
Step 6. Click on the Ok button, and it will wipe out all of your files.
Choose the Ok button and then confirm the data wipe. You will get a clean hard drive just in minutes.
Method 2. Format and wipe hard drive with data eraser.
If you are going to sell, donate or dispose of your hard disk drive or Windows 11 PC, you'd better permanently erase all data from your hard drive to prevent data recovery. Whether the quick format method or high-level format method can not permanently erase your data - the formatted data can be easily recovered by data recovery software.
In order to permanently erase data from your Windows 11 hard drive, you need special data erasure tool - such as Donemax Data Eraser. This Windows 11 data erasure software can help you format and wipe a hard drive on Windows 11, all data on the hard drive will be erased forever, can not be recovered by any data recovery software.
Donemax Data Eraser
- Format and wipe hard drive on Windows 11.
- Permanently erase data from HDD, SSD, memory card, USB flash drive, digital camera, etc.
- Once your data is erased by Donemax Data Eraser, the data is gone forever, can't be recovered by any method.
Follow the steps below to format and wipe hard drive on Windows 11:
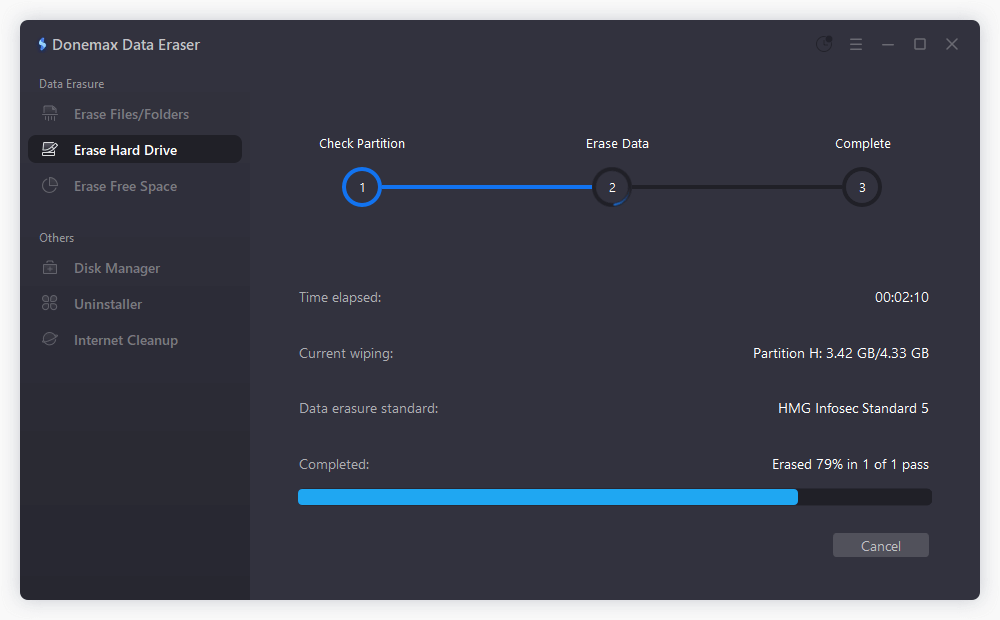
Step 1. Open Donemax Data Eraser on your Windows 11 PC, then choose data erasure mode - Erase Hard Drive.

Step 2. Select the hard drive you want to erase, then click on Erase Now button. Donemax Data Eraser will format and wipe the selected hard drive, all data on the hard drive will be erased permanently.
Part 3. How to Unformat Hard Drive on Windows 11?
Note: if your hard drive is erased by Donemax Data Eraser, the data can't be recovered by any data recovery software. If you format your hard drive using Disk Management or other built-in methods, all data on the formatted hard drive can be easily recovered by data recovery software.
Follow the steps below to unformat hard drive on Windows 11:
Step 1. Download and install Windows 11 unformat software - such as Donemax Data Recovery.
Donemax Data Recovery
- Quickly unformat hard drive on Windows 11 and get all lost data back.
- Recover permanently deleted files on Windows 11.
- Export data from inaccessible hard drive to your Windows 11 PC.
Step 1. Run Donemax Data Recovery on your Windows 11 PC. Then select the formatted hard drive to start data recovery.

Step 3. Click on Scan button. Donemax Data Recovery will deeply scan the formatted hard drive and find every recoverable file.

Step 4. Once the scan is completed, you can preview all recoverable files. Then select the wanted files and save them.

Donemax Data Recovery
Hot Articles
- Best 10 data recovery software for Windows and Mac OS
- Easy Way to Recover Permanently Deleted Files
- Fix Corrupted SD Card and Recover Lost Images and Videos
- Fix External Device Not Showing Up and Recover Data
- Recover Lost or Unsaved Word Documents
- Recover Deleted or Lost Hard Drive Partition
- Recover Lost Data on Windows 11 PC
- Recover Lost Data from Formatted SSD
- Recover Deleted Photos from Digital Camera
- How to Fix WD Portable Drive Not Showing Up