
Written byChristinaUpdated on May 26, 2026

Before we start: It's better to create Time Machine backs or sync data to iCloud to keep your data safe on MacBook Neo. If you deleted files and emptied trash without data backups, you can still try to recover the deleted files with Donemax Data Recovery for Mac.
PAGE CONTENT:
Opening up a sleek, ultra-portable MacBook Neo is an absolute joy. But no matter how advanced our hardware gets, the human element hasn't changed. We still make accidental mistakes. It only takes a single split-second distraction to highlight the wrong folder, press Command + Delete, and empty the Trash bin before realizing a month's worth of personal documents or precious family vacation photos just vanished into thin air.
If you are sitting in front of your computer screen right now panicking because your important files are gone, take a deep breath. Your data is likely still salvageable. We will walk you through exactly how to recover deleted files from A18 Pro MacBook Neo quickly and safely using modern, automated toolsets. Best of all, you don't need a computer science degree to get your data back.
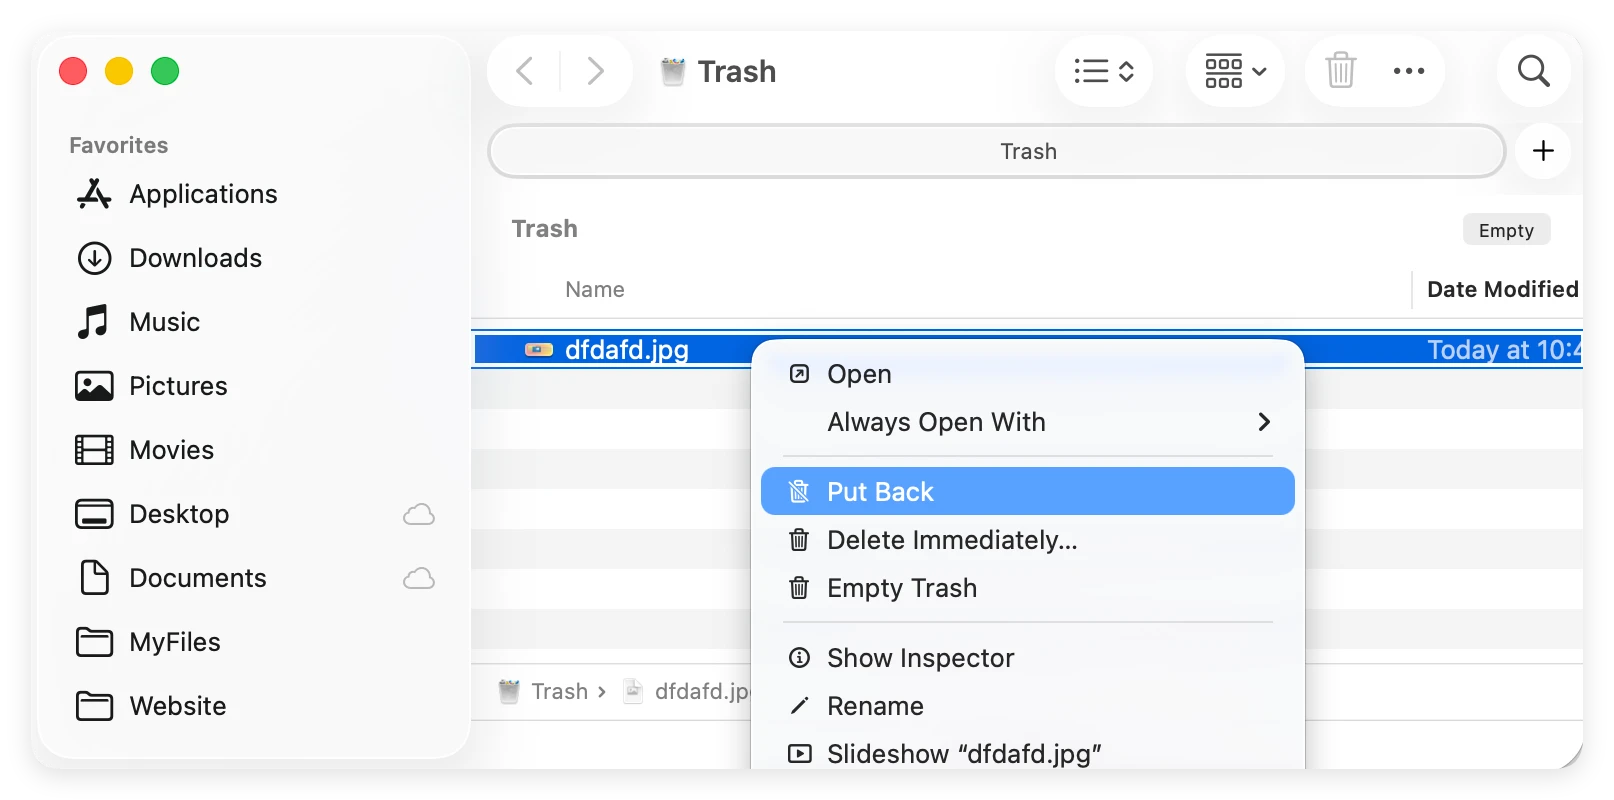
Before trying advanced recovery methods, always check the local Trash bin first. If you haven't emptied it yet, your files are just a couple of clicks away.
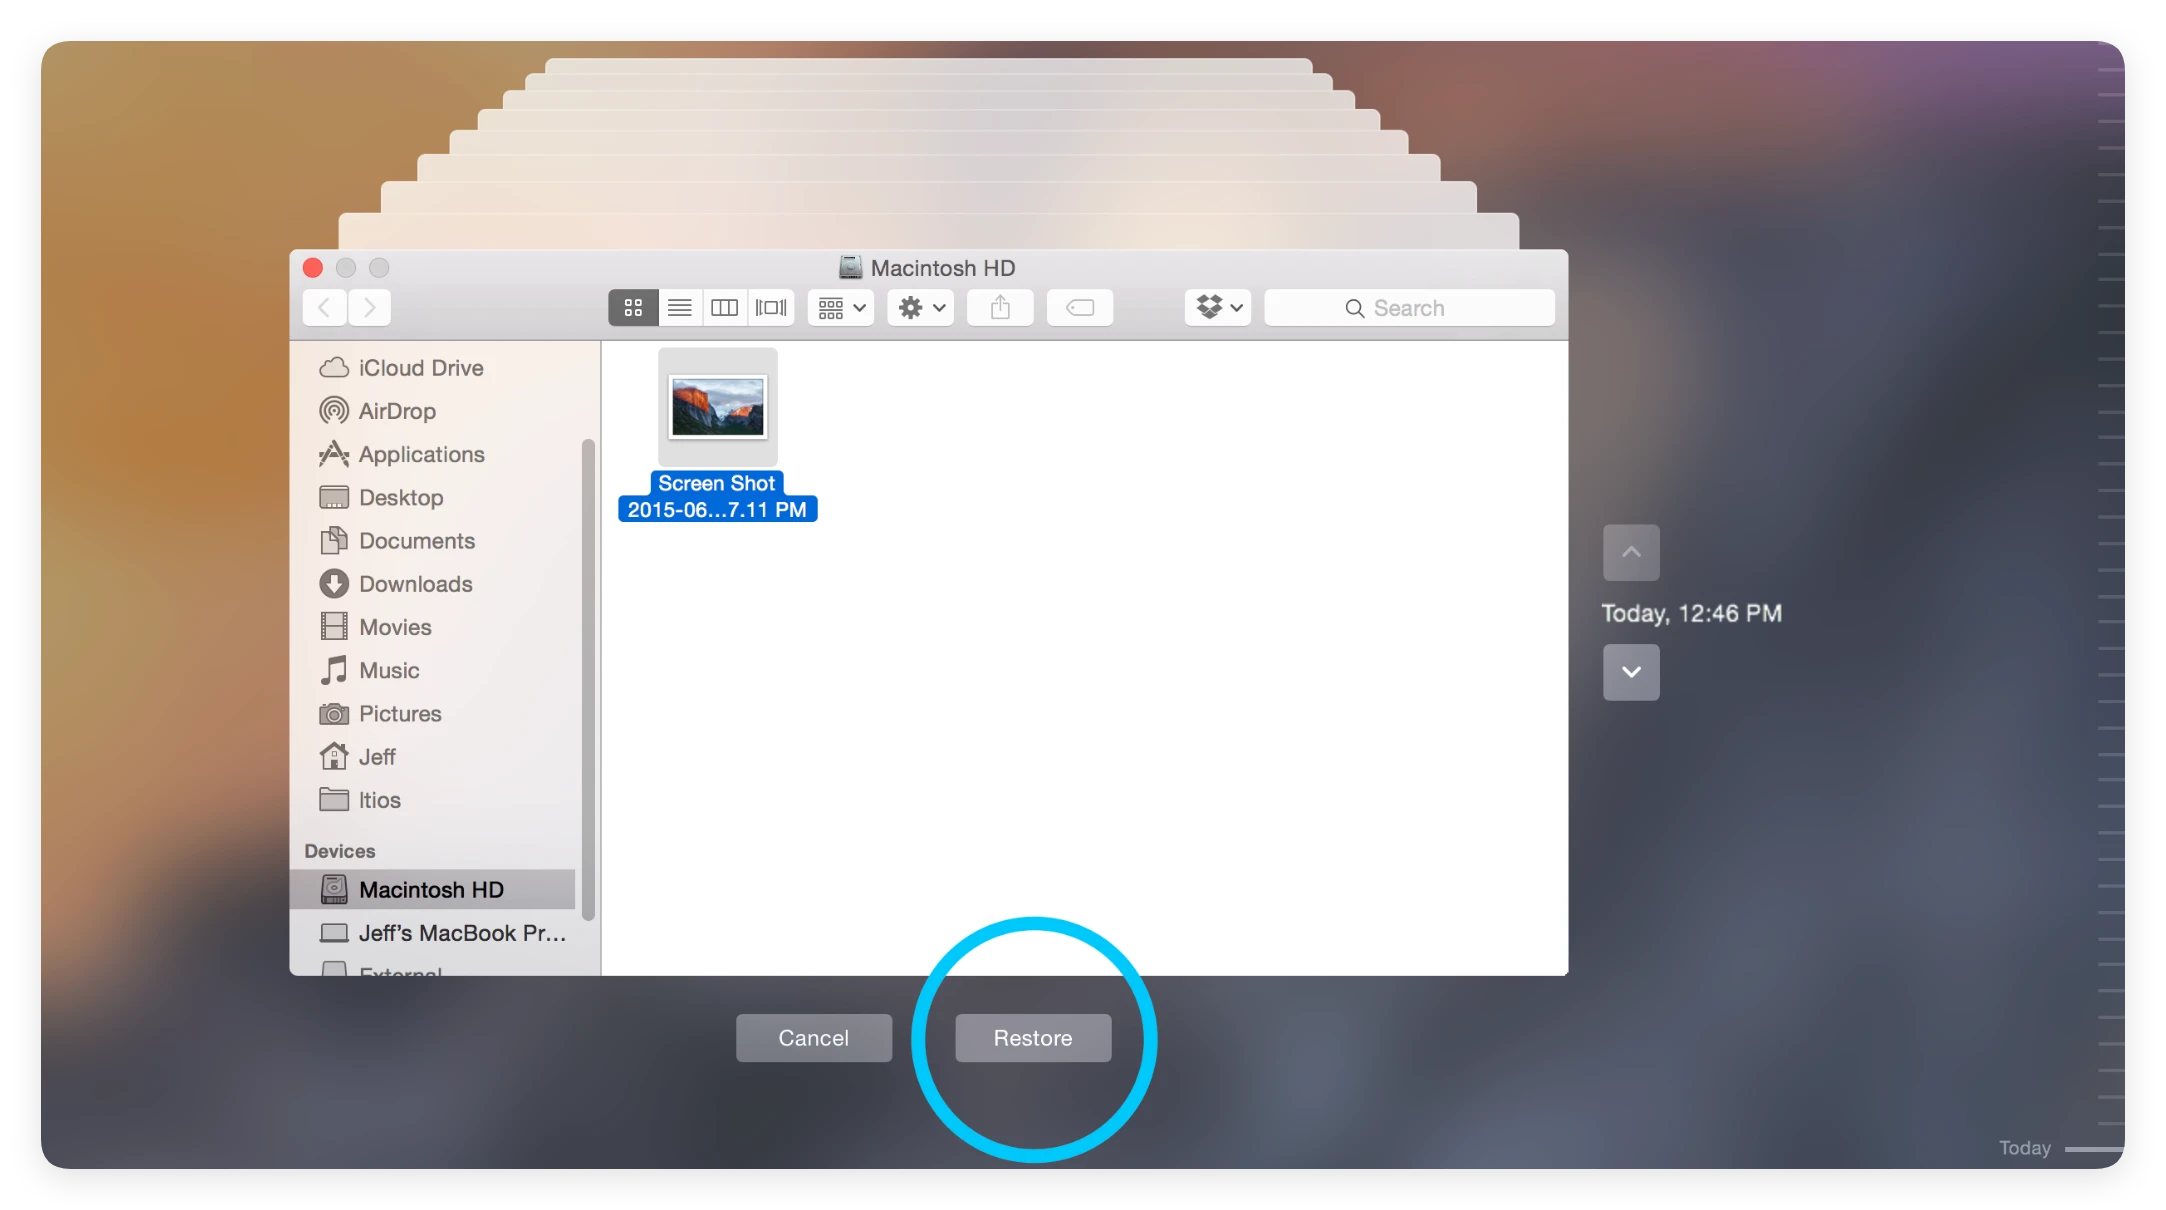
If you regularly connect an external drive to your MacBook Neo for backups, Apple's built-in Time Machine utility is your best line of defense for retrieving files after the Trash has been emptied.
If you have turned on Desktop and Documents syncing with iCloud on your MacBook Neo, your deleted files might still be waiting for you in the cloud.
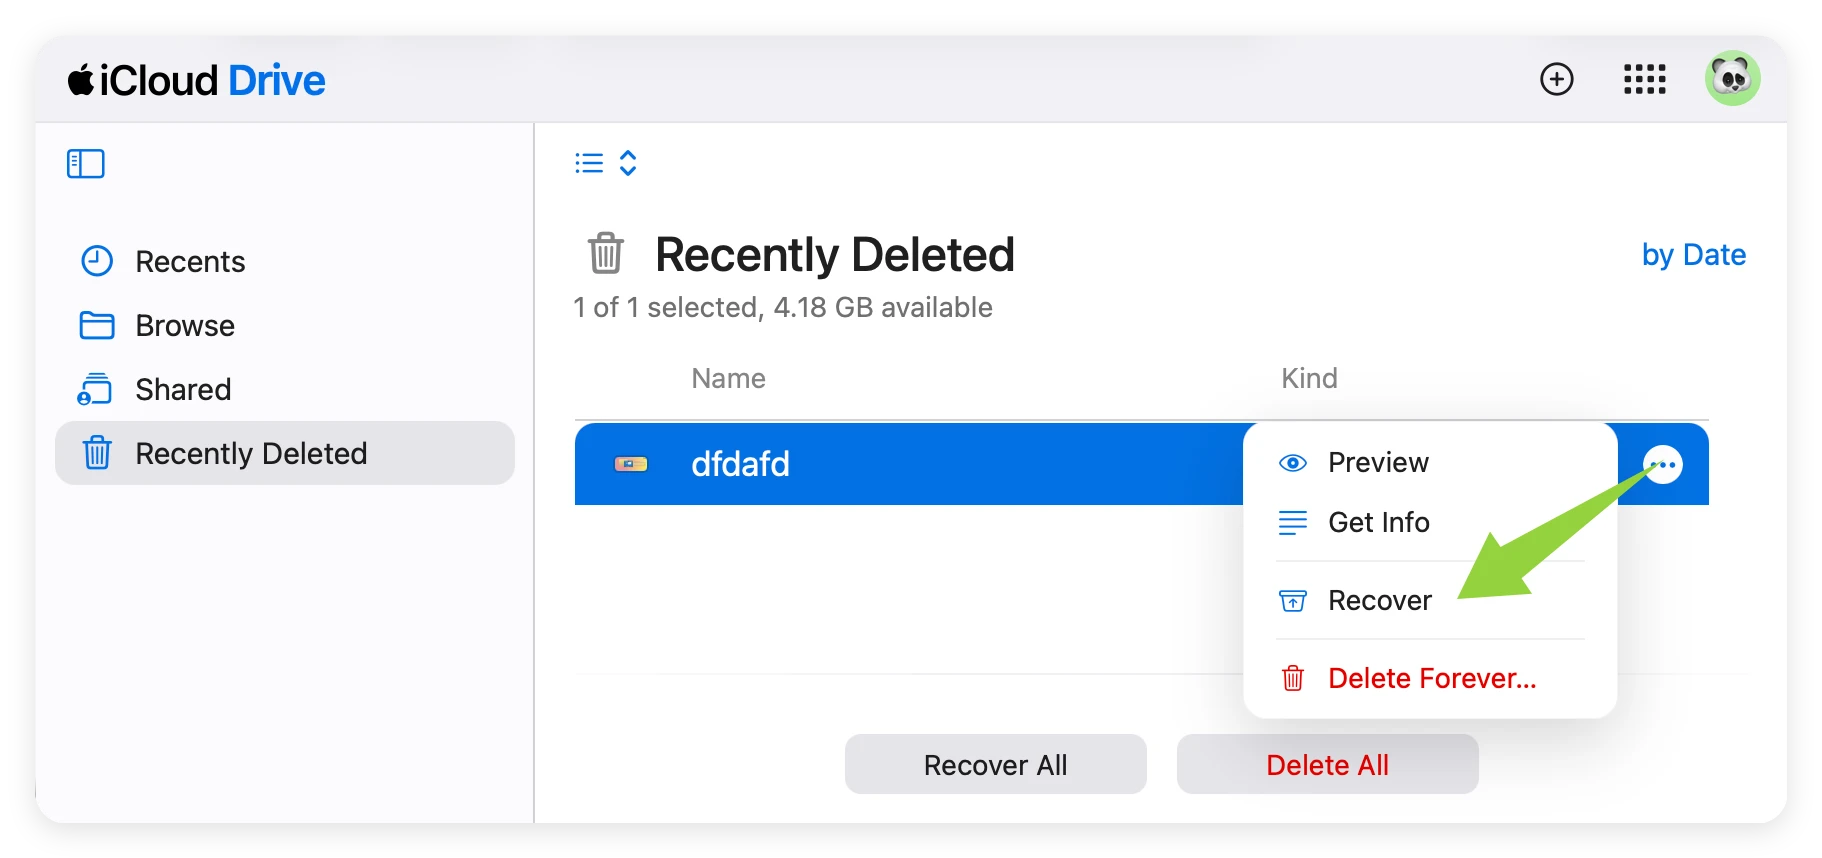
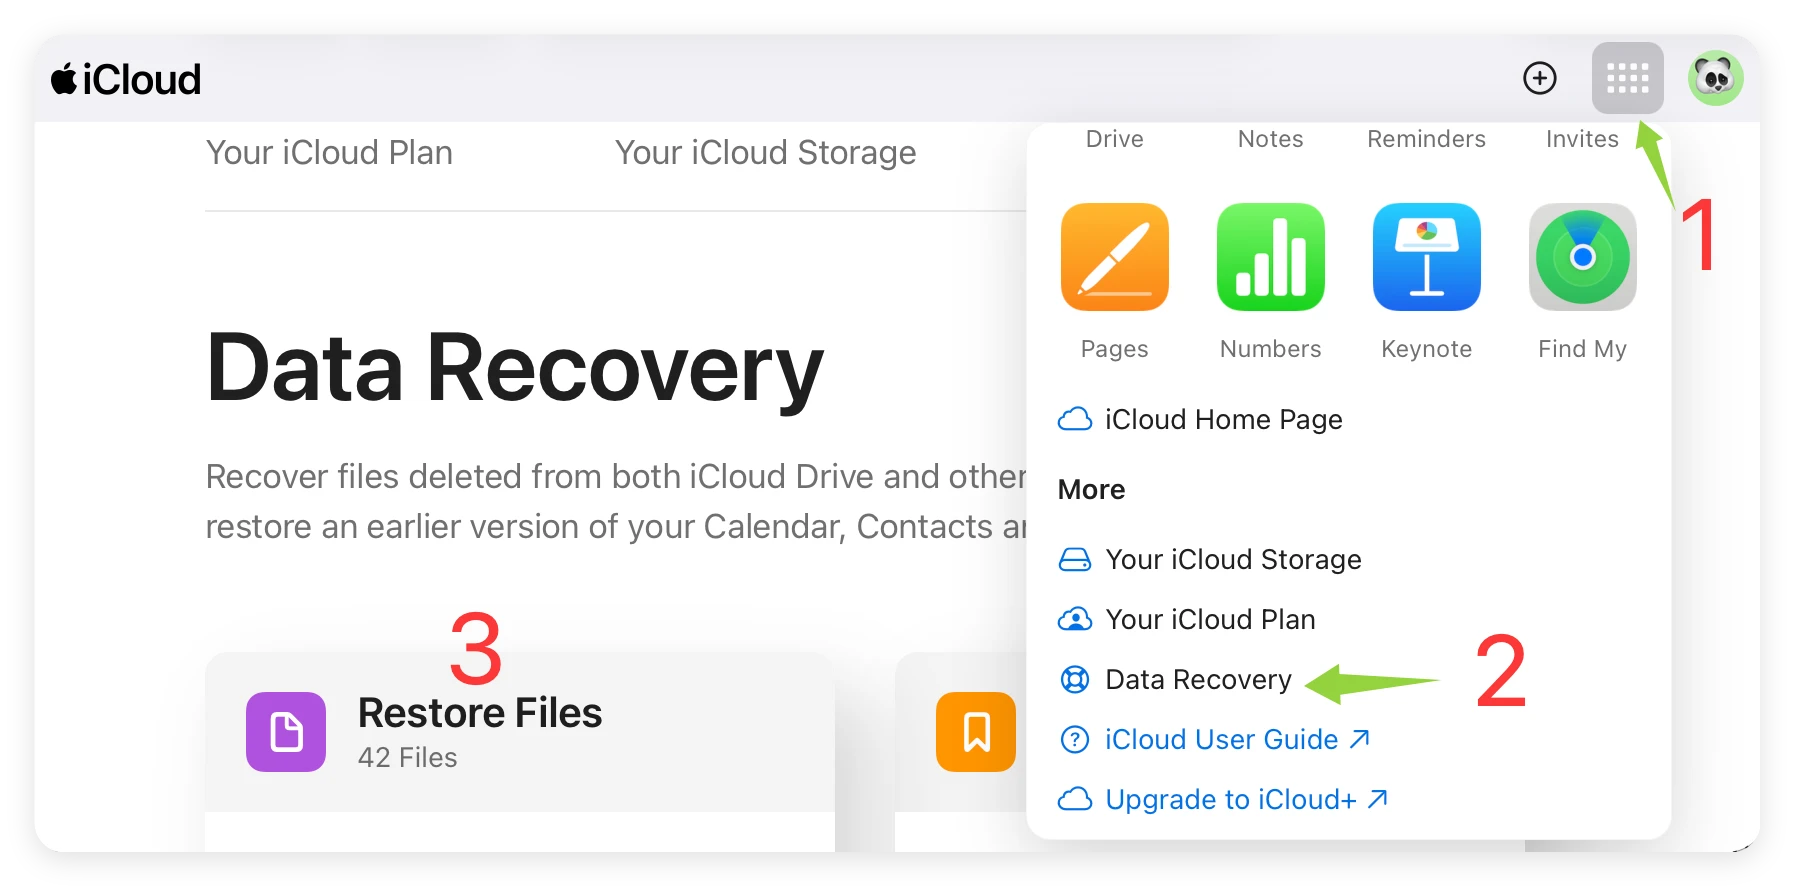
Alternative: You can also click the grid icon in the top right, go to Data Recovery, and select Restore Files to scan for older cloud backups.
If no backups available and Trash bin was emptied, there is still a chance to get back the deleted files. In such a case, you need a specialized tool. Donemax Data Recovery for Mac is a highly trusted utility built precisely to safely navigate the complex APFS file structures of modern Apple Silicon computers, including heavy-duty M5 Mac Pro series, and also for the MacBook Neo.
Donemax is designed to bridge the gap between heavy enterprise recovery and consumer simplicity. It features an intuitive, three-step wizard layout that completely automates the scanning process, ensuring home users can achieve professional results without paying a technician. Furthermore, it incorporates customized low-overhead scanning logic that protects your fanless MacBook Neo from overheating during long drive sweeps.
Let's walk through the actual recovery steps. If you are trying to rescue a large volume of files, it is highly recommended to connect an external USB thumb drive or external hard drive to your MacBook Neo before beginning, as you will need a safe place to save your restored data.
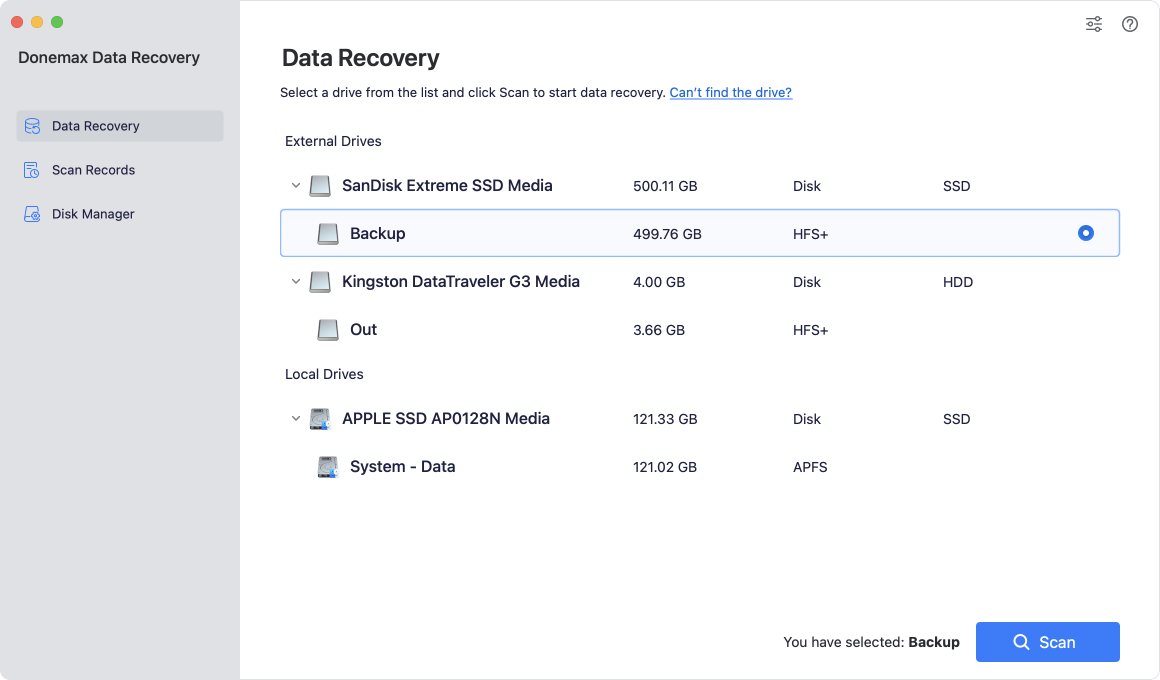
Step 1: Open the program from your Launchpad. The software will show all connected storage devices. Select the drive where the deleted files were located. Click the large blue Scan button located in the lower-right corner of the interface.
Step 2: Donemax will automatically run a deep scan of your storage space. It will combine a fast index analysis with an exhaustive raw data sweep, reconstructing lost directory structures on the fly. You can track the progress bar at the top of the interface and see found files populating in real-time categorized cleanly by folder layout or file type.
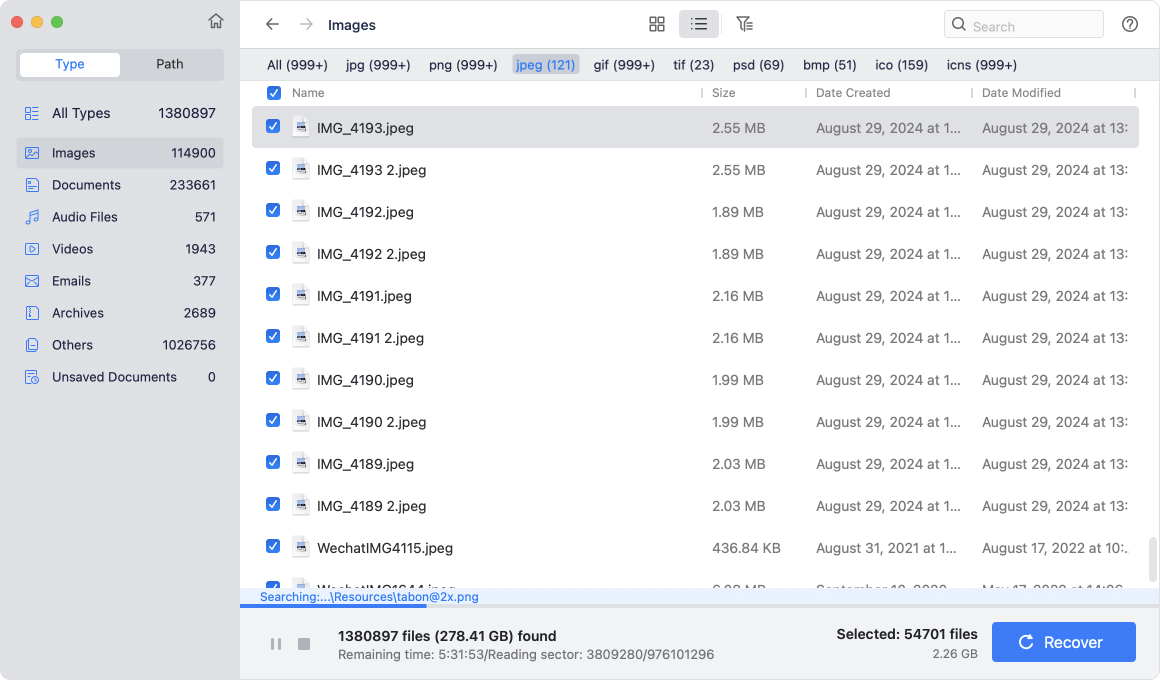
Step 3: Once the sweep finishes, click on any file to open the preview window. If a photo displays clearly or a document shows readable text, it is in perfect health and ready for rescue. Mark the check-boxes next to the specific files or folders you want to salvage. Click the Recover button. When the prompt asks where to save the files, select another drive to save.
💡 Warning: Never save recovered files back to the exact same internal drive partition where they were lost! Doing this can overwrite other deleted files that you might want to recover next.

Data loss can be incredibly stressful, but time is your greatest asset. By acting quickly, keeping your internal system usage completely idle, and using an optimization-aware tool like Donemax Data Recovery for Mac, you can salvage your missing information without risk.
Don't let automatic background system processes overwrite your deleted files. Grab your secure download of Donemax today, run an automated scan, and reclaim your important data with absolute confidence!
Donemax Data Recovery for Mac
Donemax Data Recovery for Mac is one of the best Mac data recovery software. It is easy-to-use and can help in recovering deleted, formatted, inaccessible or lost data from Mac HDD/SSD, external disk, USB drive, SD card, camera or other storage devices.
Christina
Christina is the senior editor of Donemax software who has worked in the company for 4+ years. She mainly writes the guides and solutions about data erasure, data transferring, data recovery and disk cloning to help users get the most out of their Windows and Mac. She likes to travel, enjoy country music and play games in her spare time.
Gerhard Chou
In order to effectively solve the problems for our customers, every article and troubleshooting solution published on our website has been strictly tested and practiced. Our editors love researching and using computers and testing software, and are willing to help computer users with their problems