
Written byChristinaUpdated on Jul 27, 2026

Before we start: Download and install Donemax Data Recovery for Mac, run it to deeply scan the Mac's internal SSD, then find the replaced files/folders. Just select them, click on Recover button to save them.
PAGE CONTENT:
Accidentally replacing a file or folder on your Mac can be frustrating, especially when the original file contained crucial data. Whether it was an important document, a project file, or personal media, the fear of permanent loss can be overwhelming. Unlike accidental deletions, where files can often be found in the Trash, macOS doesn't always store replaced files, making recovery more complex.
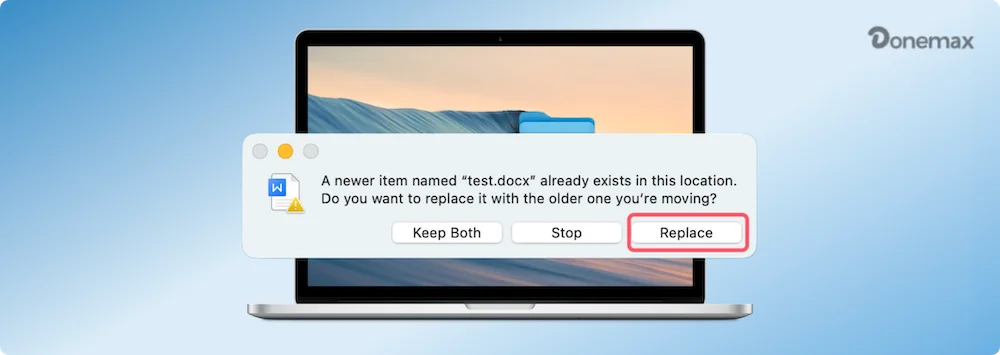
However, all hope is not lost. There are various ways you can try to recover replaced files or folders, depending on whether you have backups, cloud storage, or recovery software at your disposal. This guide will walk you through step-by-step techniques to help you retrieve your lost files effectively.
Data recovery software can deeply scan a hard drive and find all recoverable files including the replaced files/folders. If you don't have backups and your replaced file isn't recoverable through Time Machine, iCloud, or local snapshots, third-party data recovery software might be your best option. These tools scan your Mac's file system and storage sectors to recover lost, deleted, or overwritten files. While success isn't guaranteed, acting quickly improves your chances of retrieval.
When you replace a file on macOS, the system doesn't immediately erase the old version; instead, it marks the storage space as available for new data. Until new data overwrites that space, recovery software can scan and retrieve fragments of the lost file. However, once the data is overwritten, recovery becomes much more difficult.
That's why it's crucial to:
Below are some top-rated third-party recovery tools for macOS:
| Mac Data Recovery Software | Pros | Cons |
|---|---|---|
| Donemax Data Recovery for Mac |
|
|
| Do Your Data Recovery for Mac |
|
|
| Disk Drill |
|
|
| R-Studio for Mac |
|
|
Follow these steps to maximize your chances of recovery:
Step 1: Stop Using the Affected Drive. Once a file is replaced, macOS marks its old version as "free space." Any new file saved to the disk may overwrite it, reducing recovery chances. Do NOT install recovery software on the same drive where the lost file was stored. Avoid saving new files until recovery is complete.
Step 2: Download and Install Recovery Software. Download and install the best Mac data recovery software - Donemax Data Recovery for Mac on your Mac.
Step 3: Select the Drive and Scan for Lost Files. Launch the software for recovery. Choose the drive or partition that contained the replaced file. Choose Deep Scan for better results (this takes longer but is more effective).
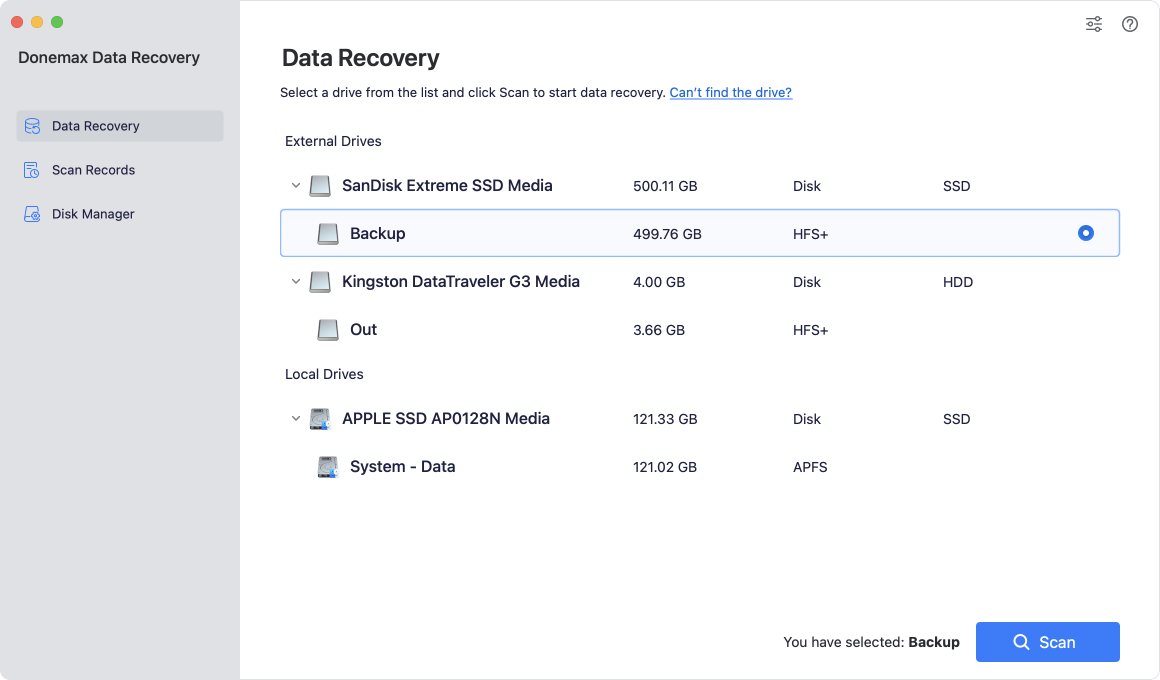
Donemax Data Recovery for Mac is able to deeply scan the selected drive and find all recoverable files.
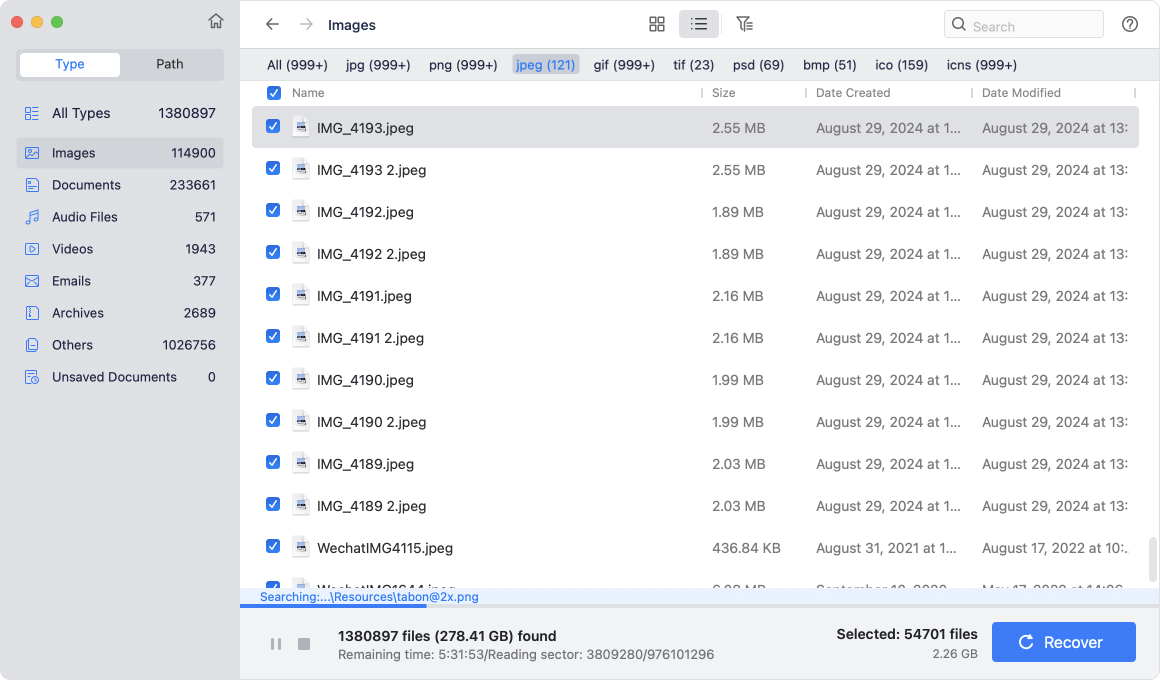
Step 4: Preview and Recover the File. Once scanning is complete, look for your file in the recovered list. If available, preview the file before recovering to confirm it's intact.
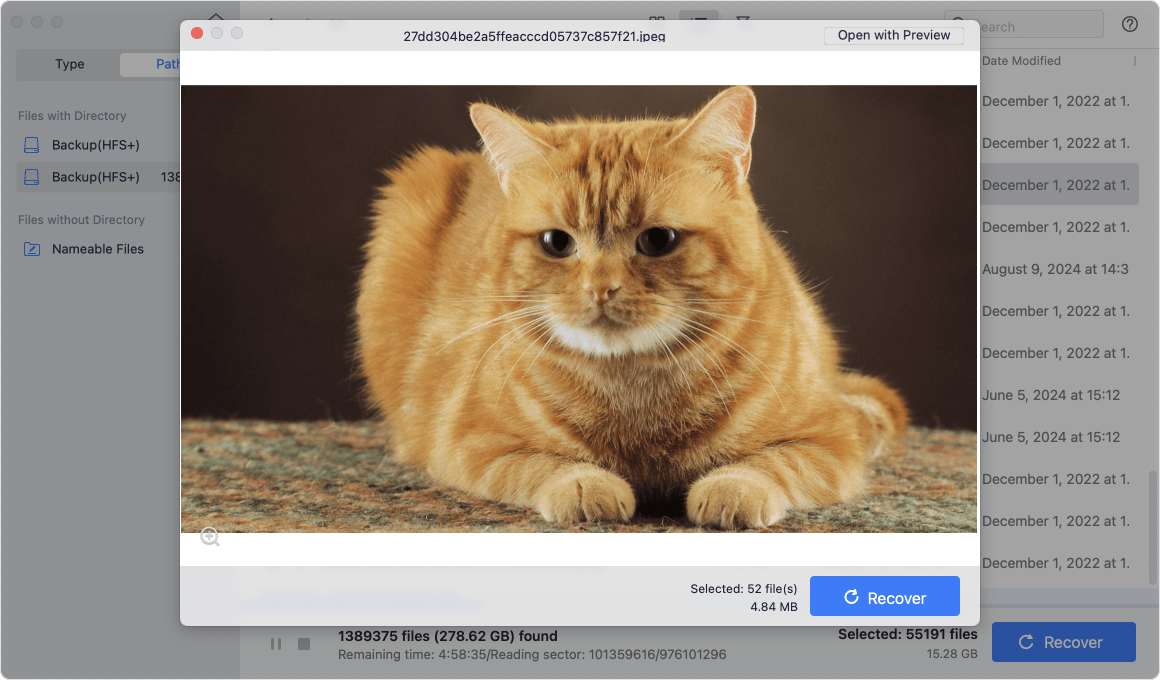
To avoid corruption, choose the file and save it to an alternate drive.
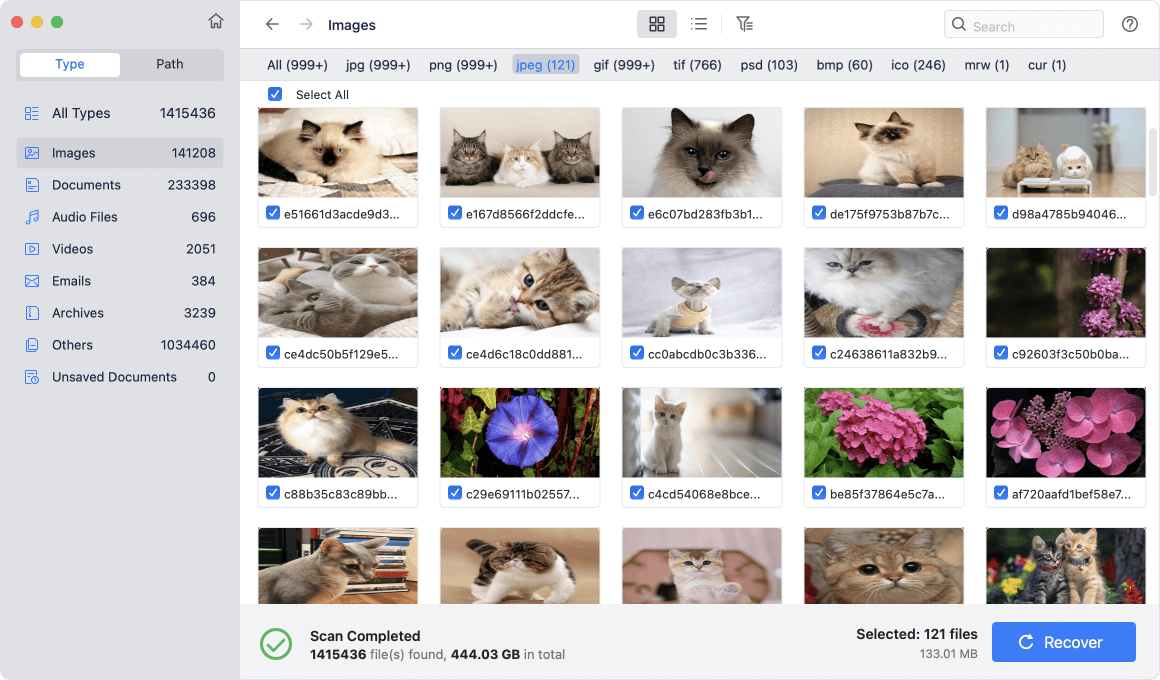
Open the recovered file to ensure it works correctly. If the file is corrupted, some tools offer repair functions for documents, images, and videos.
While macOS typically replaces a file without keeping a copy, some applications may move previous versions of replaced files to the Trash.
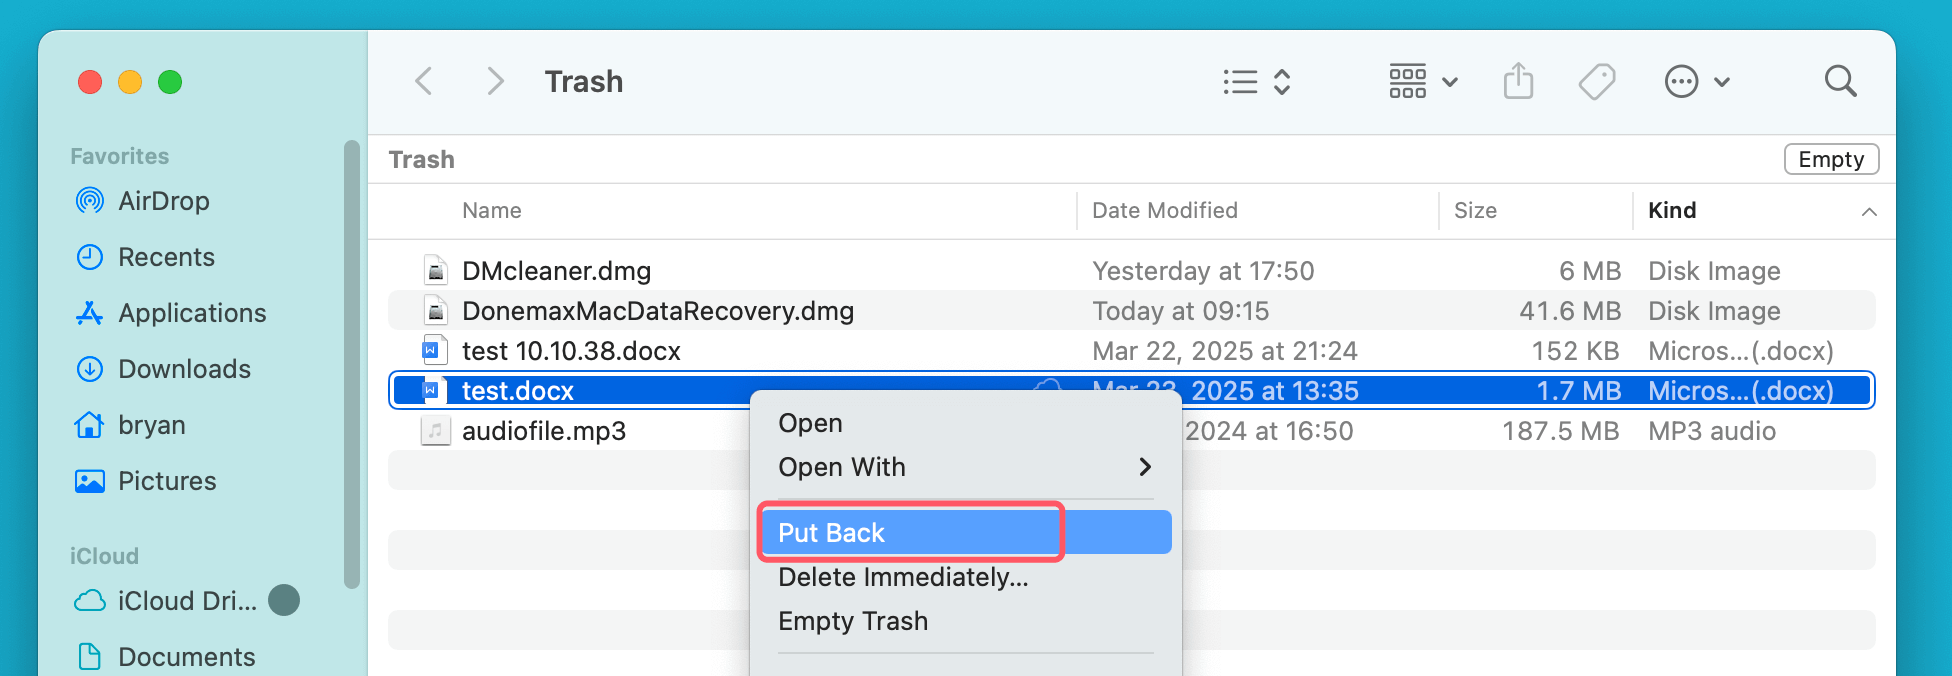
If your file isn't in the Trash, proceed to the next recovery methods.
It is macOS's built-in backup tool that can help restore files to a previous version. If you have Time Machine enabled, you may be able to recover your replaced file from a previous backup.
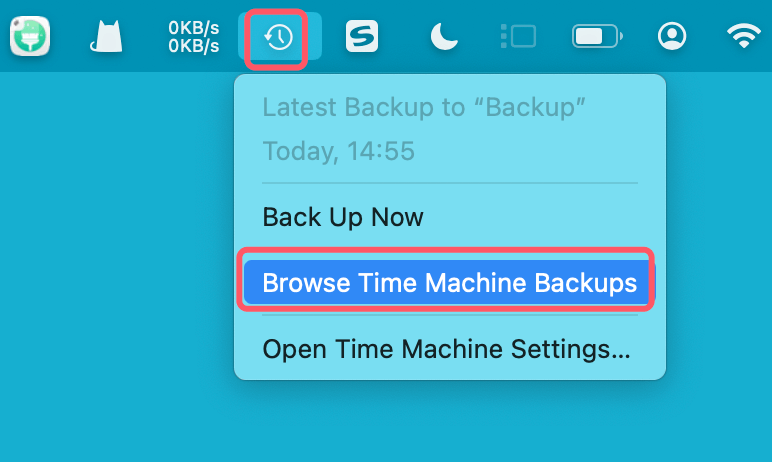
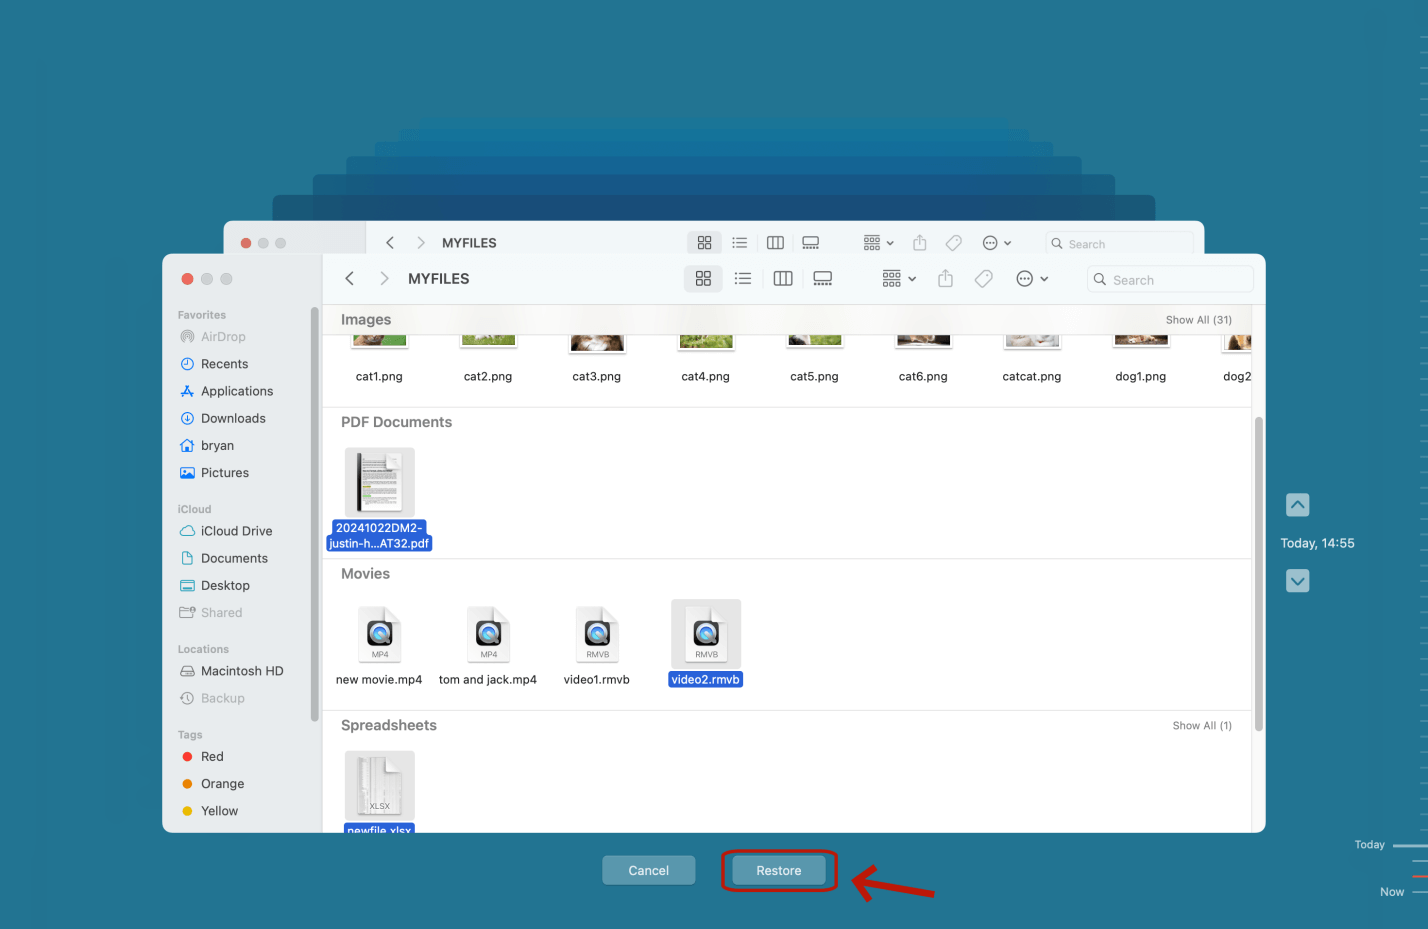
If you do not have Time Machine set up, you can explore other recovery options.
If your files were stored in iCloud Drive, you might be able to recover previous versions. Apple's cloud storage system keeps track of file changes and sometimes allows users to revert to earlier versions.
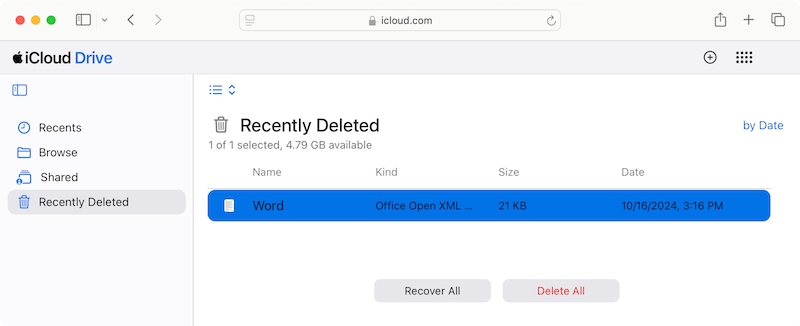
This method works best if you regularly store files in iCloud and have versioning enabled.
Many applications, especially Microsoft Office, Adobe, and Apple's productivity suite, save temporary or auto-saved versions of files.
Where to Look for Temporary or Auto-Saved Files:
For Microsoft Office (Word, Excel, PowerPoint):
~/Library/Containers/com.microsoft.Word/Data/Library/Preferences/AutoRecovery/
For Adobe Photoshop, Illustrator, and Premiere Pro:
~/Library/Application Support/Adobe/Adobe Photoshop/AutoRecover/
If your file was overwritten in an application, this method could help recover an earlier version.
If you use external drives or cloud backup services, check them for previous versions of your replaced file.
How to Restore from External Backups:
Restoring from Dropbox:
This method is useful if you have automatic cloud sync enabled.
Recovering a replaced file on a Mac can be challenging, but it's not impossible. Your best chances of success depend on how soon you act and whether you have backups.
Key Takeaways:
To prevent future data loss, always enable Time Machine, store important files in iCloud Drive, and consider using third-party backup solutions. With the right approach, you can minimize the risk of permanent file loss and keep your data safe.
Donemax Data Recovery for Mac
Donemax Data Recovery for Mac is one of the best Mac data recovery software. It is easy-to-use and can help in recovering deleted, formatted, inaccessible or lost data from Mac HDD/SSD, external disk, USB drive, SD card, camera or other storage devices.
Christina
Christina is the senior editor of Donemax software who has worked in the company for 4+ years. She mainly writes the guides and solutions about data erasure, data transferring, data recovery and disk cloning to help users get the most out of their Windows and Mac. She likes to travel, enjoy country music and play games in her spare time.
Gerhard Chou
In order to effectively solve the problems for our customers, every article and troubleshooting solution published on our website has been strictly tested and practiced. Our editors love researching and using computers and testing software, and are willing to help computer users with their problems